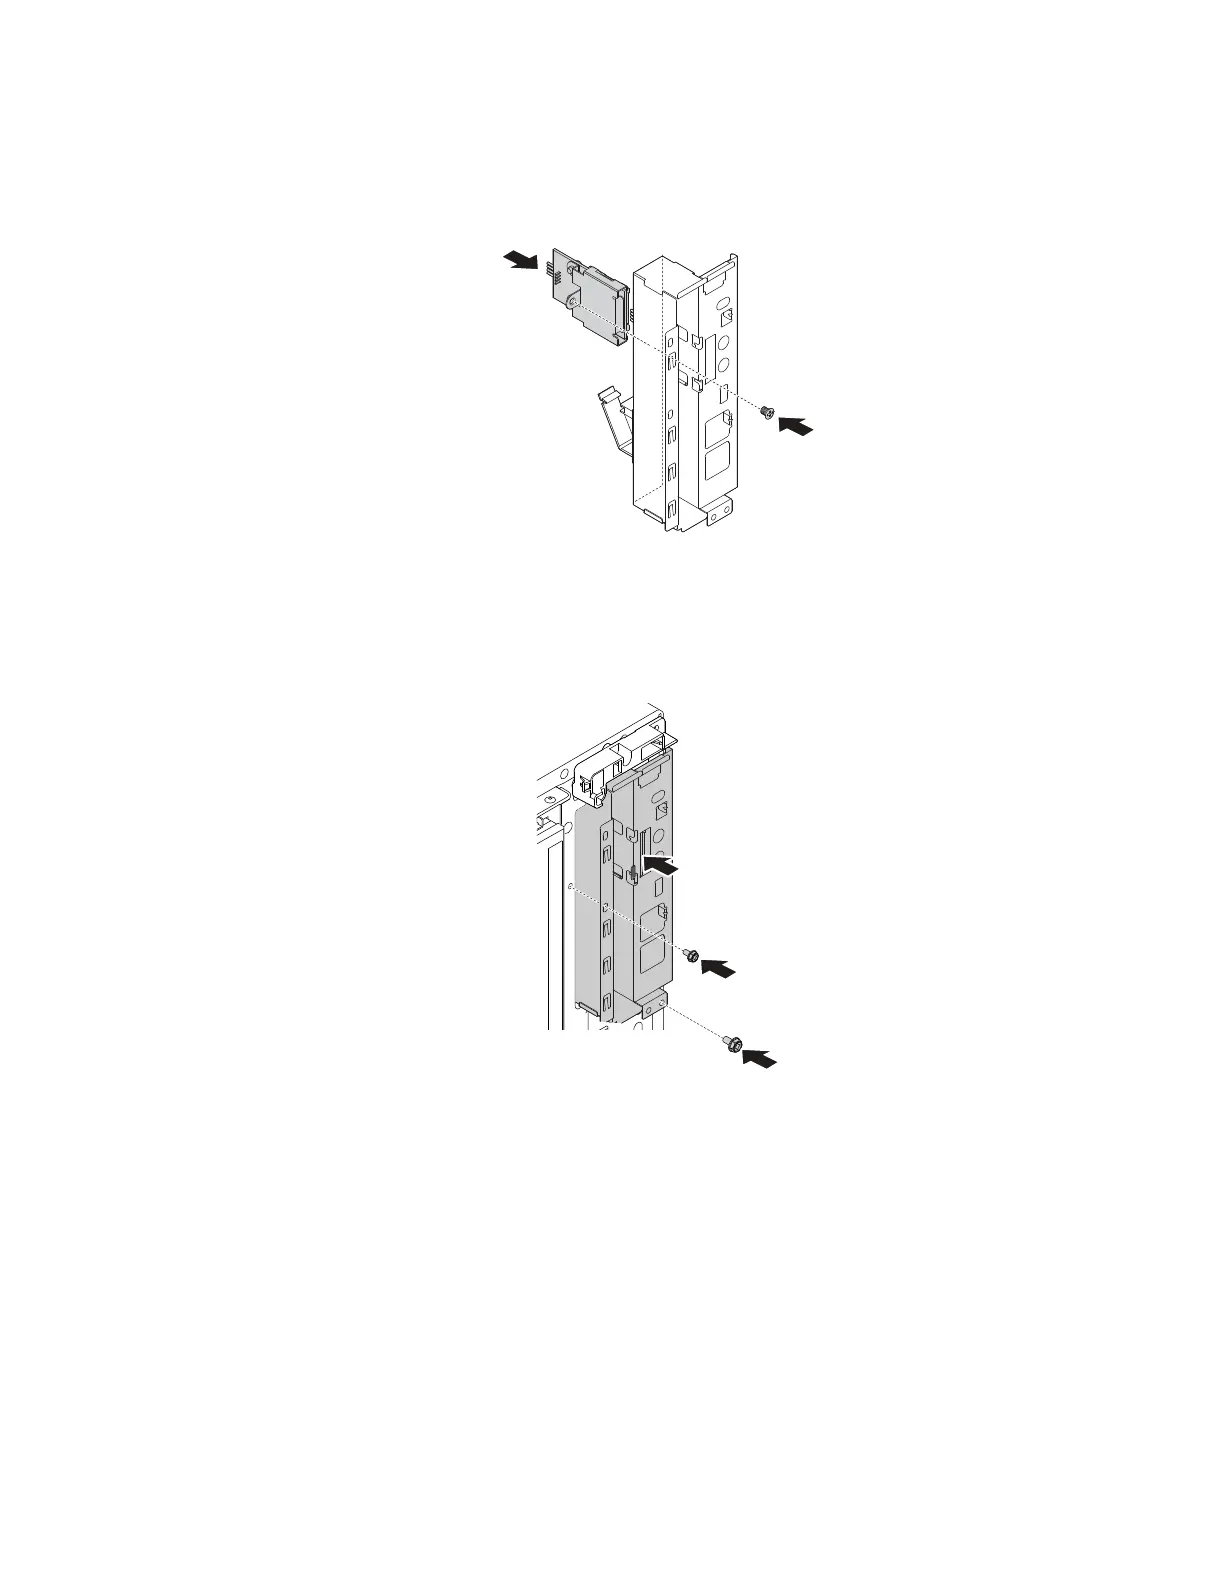
a. Install the card reader into the card reader slot from the rear of the front audio and USB assembly.
Then, install the screw to secure the card reader.
Note: Carefully handle the card reader by its edges.
Figure 120. Installing the card reader
b. Route the cable of the card reader through the corresponding square hole in the front of the chassis.
Then, position the front audio and USB assembly into the chassis and slide it inward as shown.
Install the screws to secure the front audio and USB assembly in place.
Figure 121. Installing the front audio and USB assembly
c. Connect the cable of the card reader to one of the front USB 2.0 connectors on the system board.
See “Parts on the system board” on page 38.
d. Route the cables that you have released with the cable clip at the rear of the front audio and USB
assembly.
What to do next:
• To work with another piece of hardware, go to the appropriate section.
• To complete the installation or replacement, go to “Completing the parts replacement” on page 187.
Chapter 9. Hardware removal and installation 155