Configuring Your GNS-2000
Now that everything is connected and powered on, you are ready to configure your GNS-
2000 so that it is accessible to the users on your network.
This procedure only needs to be done ONCE, by the NAS Server's Administrator.
Other LAN users should follow the Client PC Setup procedure described in the follow-
ing chapter.
Quick Setup with the GNS-2000 Wizard
1. Insert the NAS CD into your CD-ROM drive of your computer.
If the installation program does not start automatically, run the program
NAS_Setup.exe in the root (top) folder of your CD-ROM.
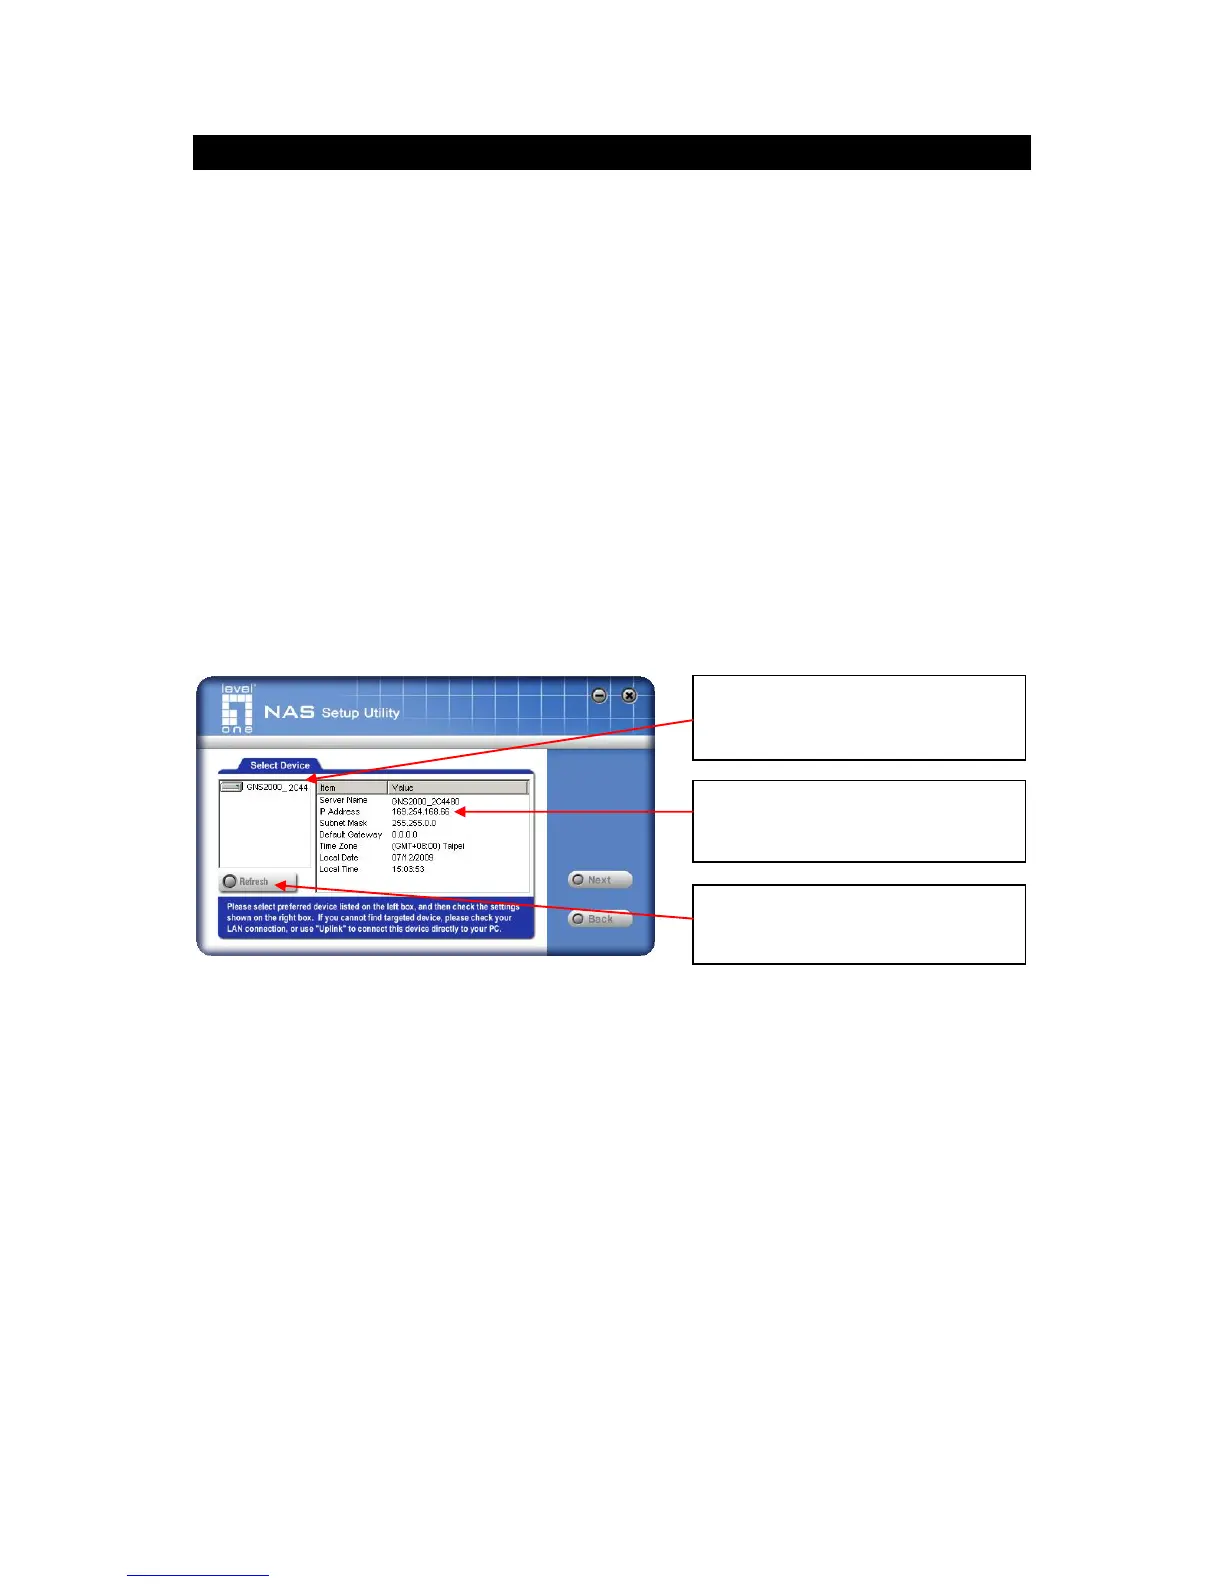
2. Click "Setup" to start the Setup Utility. The Utility will begin scanning your network for
installed GNS-2000 Servers, and a screen like the following will be displayed.
A list of all GNS-2000 Servers on your network will show on the left side. The right side
displays details of the currently selected NAS.
If the desired GNS-2000 is not listed, check the following:
GNS-2000 has finished the start up and boot process.
Your PC and GNS-2000 are on the same LAN segment (there is no Router be-
tween your PC and GNS-2000).
Otherwise, select the desired GNS-2000, and click the "Next" button.