Actions Yes No
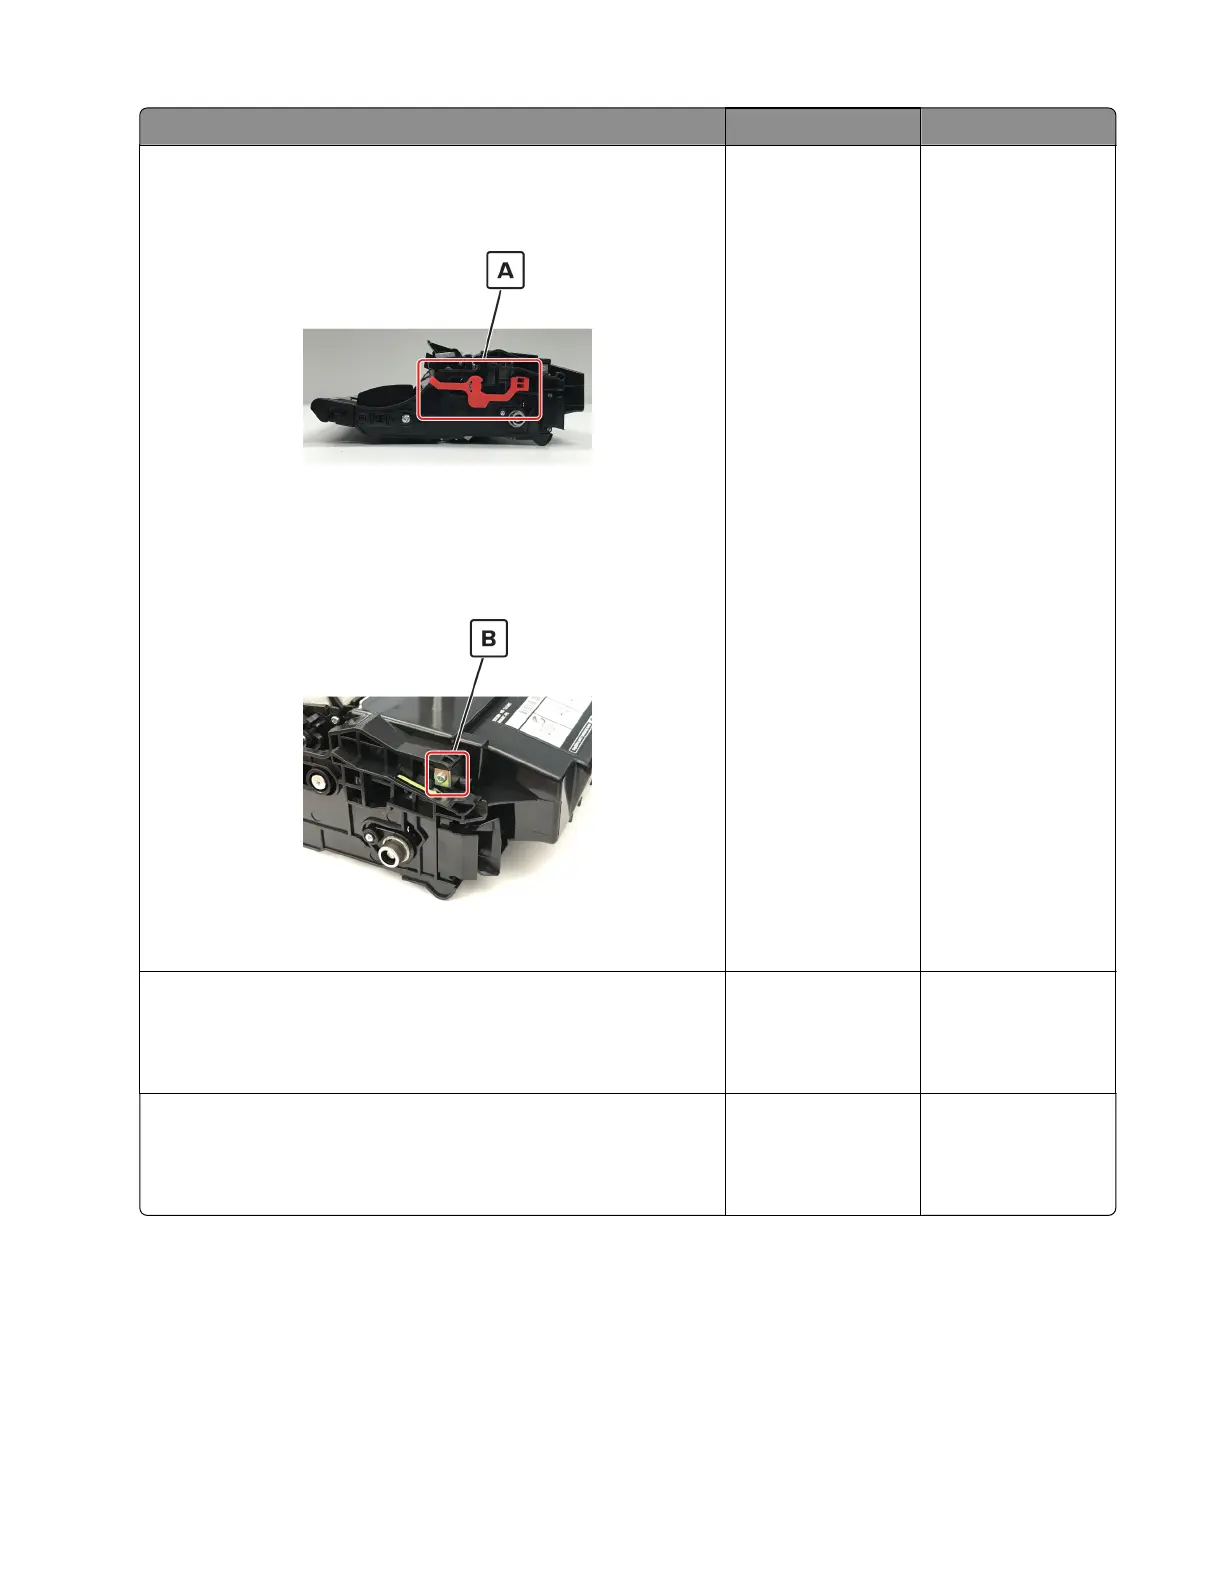
Step 3
a Remove any packing material left on the imaging unit, including
the red separator plastic (A).
Note: You may need a pair of pliers to remove a piece of
broken plastic inside the imaging unit.
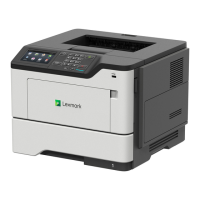
b Check the charge roller contact (B) on the right side of the
imaging unit for damage and proper installation.
Is the charge roller contact damaged and contaminated?
Go to step 4. Go to step 5.
Step 4
Repair or replace the charge roller contact on the imaging unit.
Does the problem remain?
Go to step 5. The problem is
solved.
Step 5
Replace the imaging unit.
Does the problem remain?
Go to step 6. The problem is
solved.
4600-830, -835, -895
Diagnostics and troubleshooting
54