120
4 Pull the screws straight out, and then discard them.
5 Grasp the right handle through its ring and pull it to the front. It slides up and locks into the
open position.
6 Grasp the left handle through its ring and rotate it out toward you. It does not lock into position.
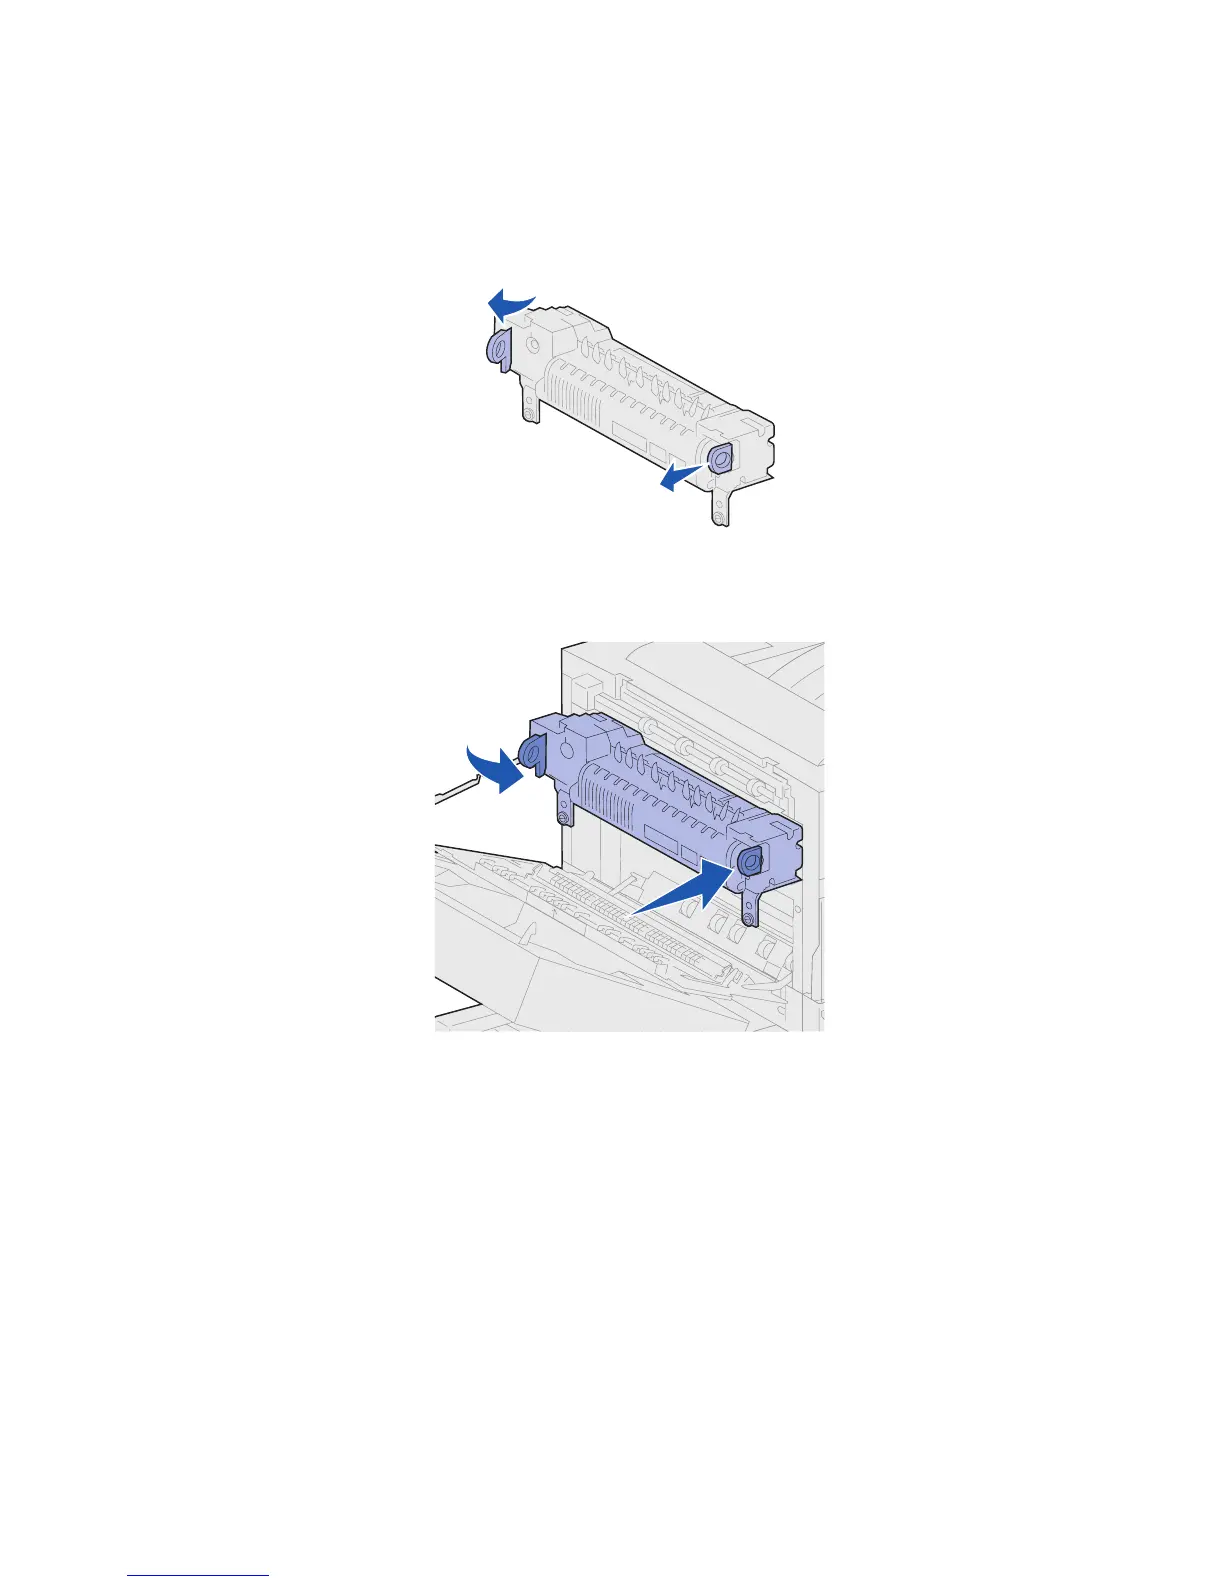
7 Align the fuser with the opening in the printer, and then slide it into place.
Note: Push firmly on each side of the fuser near the handles until it is in place.
8 Push both handles back to their original positions.