iPECS-MG Hardware Description and Installation Manual Issue 1.1
DECT INSTALLATION August, 2010
37
LED Indication, BRIB4
NO FUNCTION STATUS
LD1
LD5
Line 1 status Red: ON = Error
Blue: ON = In-use, OFF = Idle
LD2
LD6
Line 2 status Red: ON = Error
Blue: ON = In-use, OFF = Idle
LD3
LD7
Line 3 status Red: ON = Error
Blue: ON = In-use, OFF = Idle
LD4
LD8
Line 4 status Red: Error
Blue: ON = In-use, OFF = Idle
5.3.2.2 BRIB Installation
Before installation of the BRIB, set the Mode, Terminating Resistor, and Power Feed Switches for
each BRIB Line. Note that the BRIB cannot simultaneously support both the T and S mode, all ports
on the BRIB must be set in the same mode, T or S..
The BRIB board can be installed in any universal slot of any KSU; the 1
st
slot of the BKSU is for the
MPB only.
Assure Power is OFF
Slide the BRIB in the guide rails of the desired slot.
Tighten thumbscrews to hold the board firmly in place.
5.3.2.3 BRIB Wiring
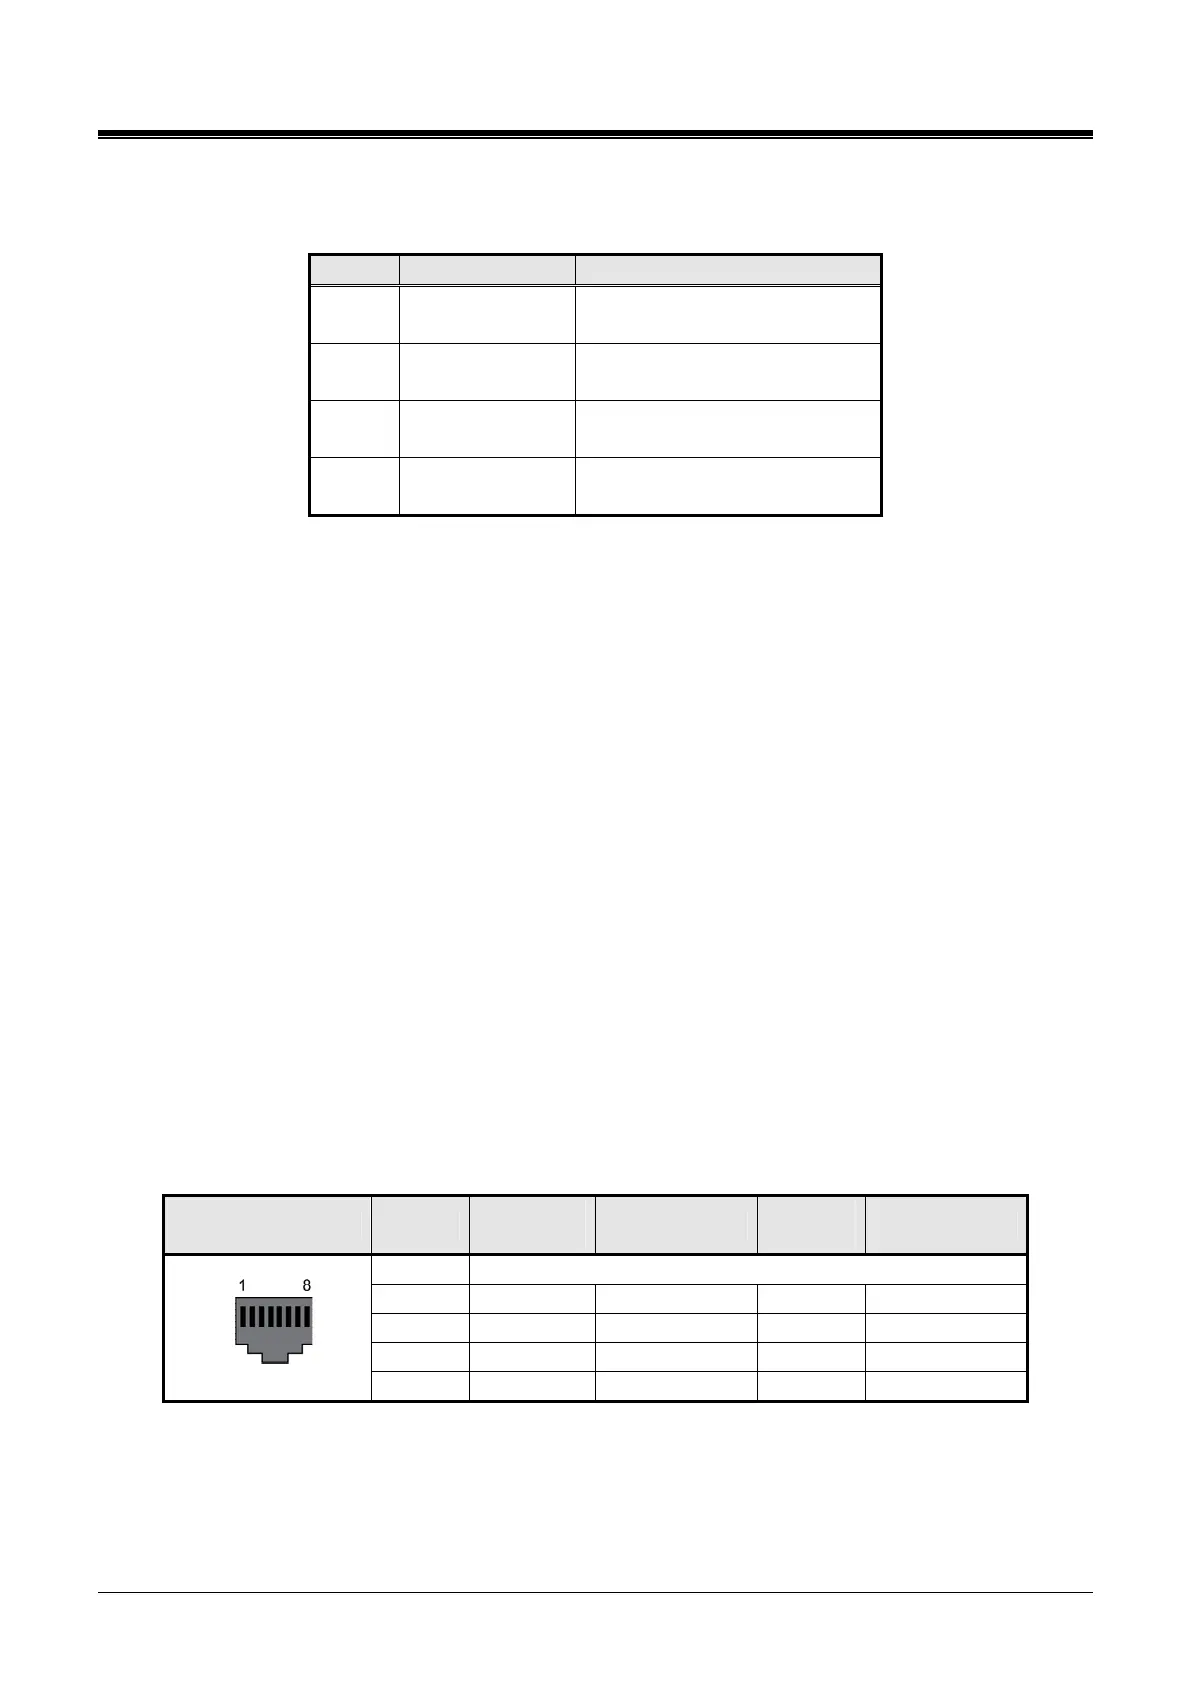
A separate RJ45 connector is provided for each BRI line supported by the BRIB. Referring to the pin-
out chart and Figure 5.3.2.3-1 below,
wire the TX and RX pins of each RJ-45 connector to the BRI digital line termination point using UTP
cable.
tag or number wiring for maintenance.
RJ45
CONECTOR PIN
NAME
(T-mode)
FUNCTION
NAME
(S-mode)
FUNCTION
1,2,7,8 Reserved
3 TX+ Transmit Data RX+ Receive Data
4 RX+ Receive Data TX+ Transmit Data
5 RX- Receive Data TX- Transmit Data
RJ45
6 TX- Transmit Data RX- Receive Data