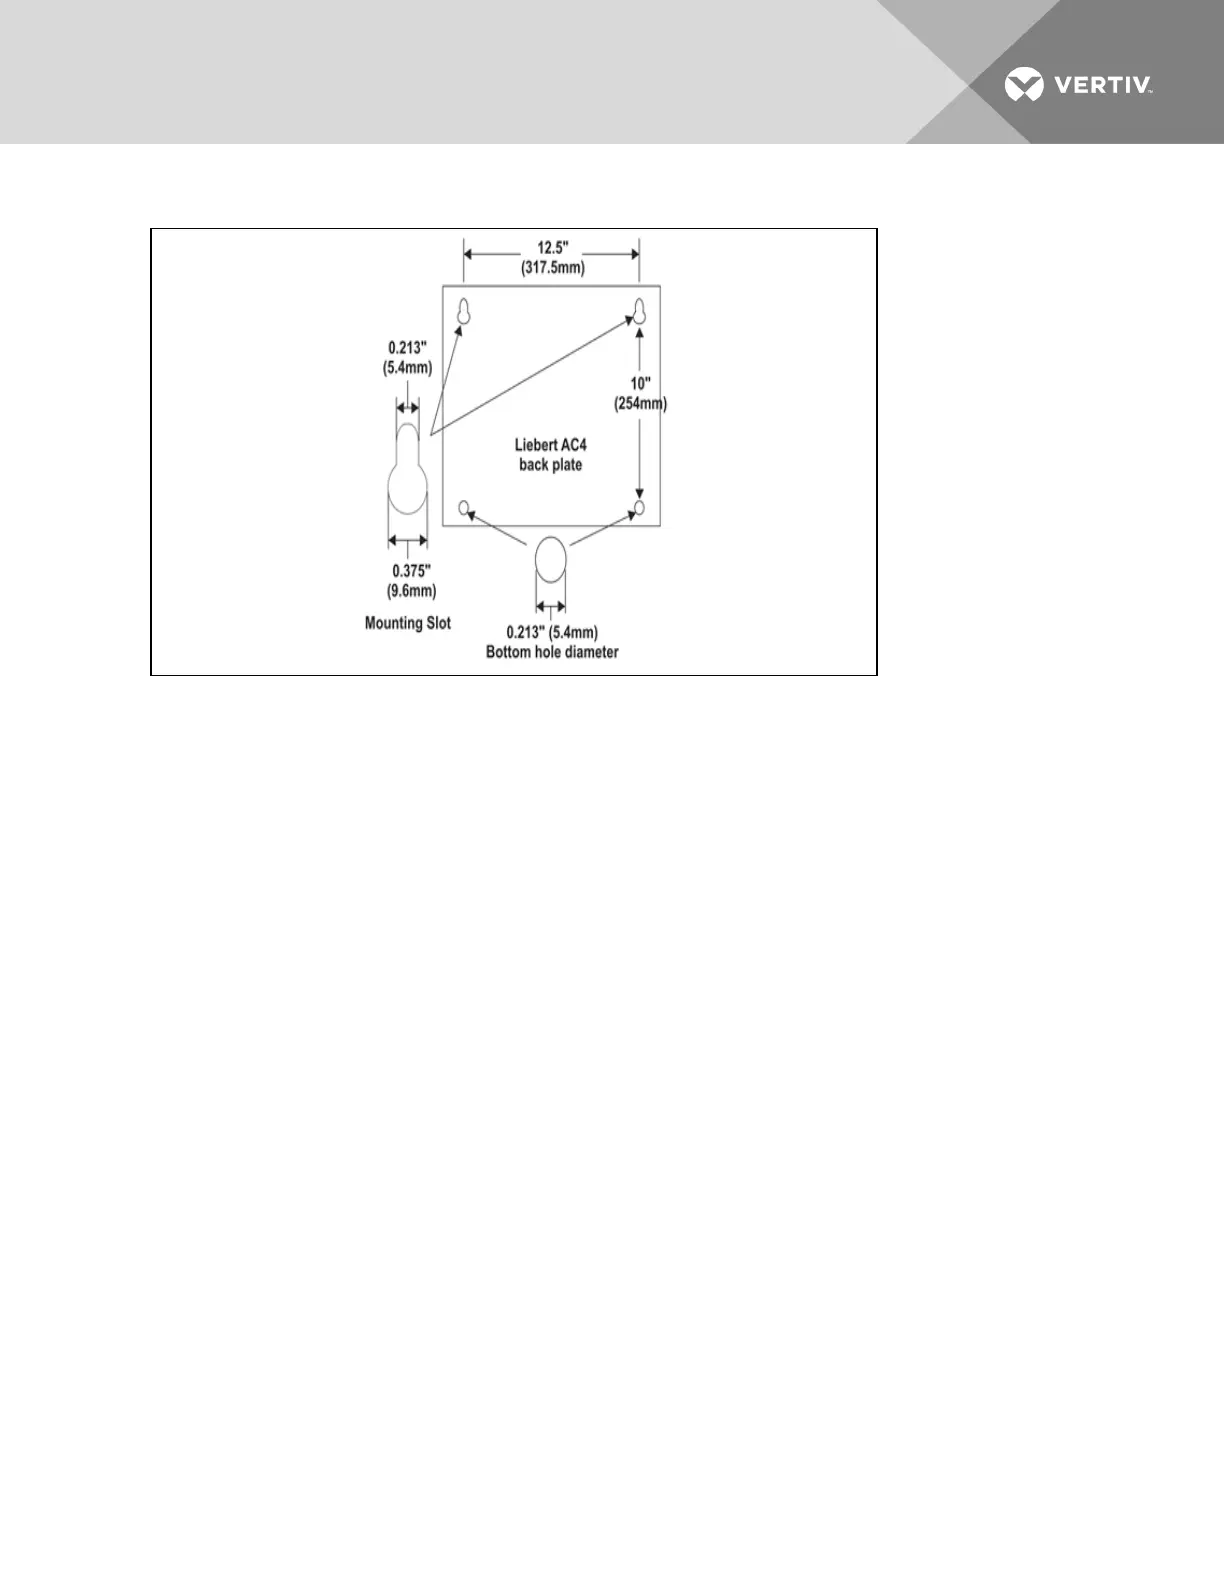
Figure 2.1 Mounting dimensions
2.3 Flush-Mounting the Liebert AC4
NOTE: Removing the conduit knockouts before mounting the Liebert AC4 on the wall will ease
installation and prevent strain on the mounting hardware and wall. It is imperative to remove the
knockouts if the unit is to be flush-mounted.
NOTE: The rectangular access doors on the top and bottom of the Liebert AC4 must be reversed so
they slide the opposite direction. Leaving the doors as shipped from the factory prevents them from
being opened when the panel is flush mounted in a wall.
The Liebert AC4 may be flush mounted according to company practices—either with screws through the
sides of the panel into wall supports or with hanging hardware that attaches to the back of the panel.
After determining how and where to place the unit, check to ensure that you have all the hardware
required to install the panel in the wall. Obtain the needed tools.
Required tools
• Saw
• Electric drill
• Screwdriver
• Marker to denote layout of the hole to accommodate the Liebert AC4
• Trim ring and associated hardware
• Mounting hardware
Vertiv | Liebert® AC4 User Manual | 17