Page 36 / 60 Section 5. Software control – Using Lightware Matrix Controller
Step 1. Right click on the EDID to be saved.
Step 2. Click on the “Save to file” in the pop-up window.
Step 3. The Matrix Controller Software downloads the desired EDID and a save dialog
appears. It may take a few seconds to download the EDID. If the save dialog is
shown, type in the file name, select the file type, and press Save button. After the
process is completed, an “EDID saved!” message confirms the command.
Load EDID from file to memory
The HDMI-TP-TX200R/RX200R/RX100RA is able to load EDID from a file located on the
computer and store it. EDIDs are stored in *.dat files.
Step 1. Select the User Memory list in one of the list windows.
Step 2. Right click on the desired memory location. Then select “Load from file” from the
pop-up menu.
Step 3. Browse your hard drive to find the desired EDID file. The software checks
whether the selected file is a valid EDID file.
Step 4. Click Open in the browser window. After the process finished, an “EDID Upload
completed” message appears.
5.5.2. Advanced EDID Editor
This powerful tool is essential for AV professionals. The Lightware Advanced EDID Editor
is integrated into the Lightware Matrix Controller software, and makes it possible to
manage every setting in the EDID on an intuitive user interface. The editor can read and
write all descriptors, which are defined in the standards, including the additional CEA
extensions.
Any EDID from the device’s memory or a saved EDID file can be loaded in the editor. The
software translates the raw EDID, and displays it as readable information to the user. All
descriptors can be edited, and saved in an EDID file, or uploaded to the device’s
memory.
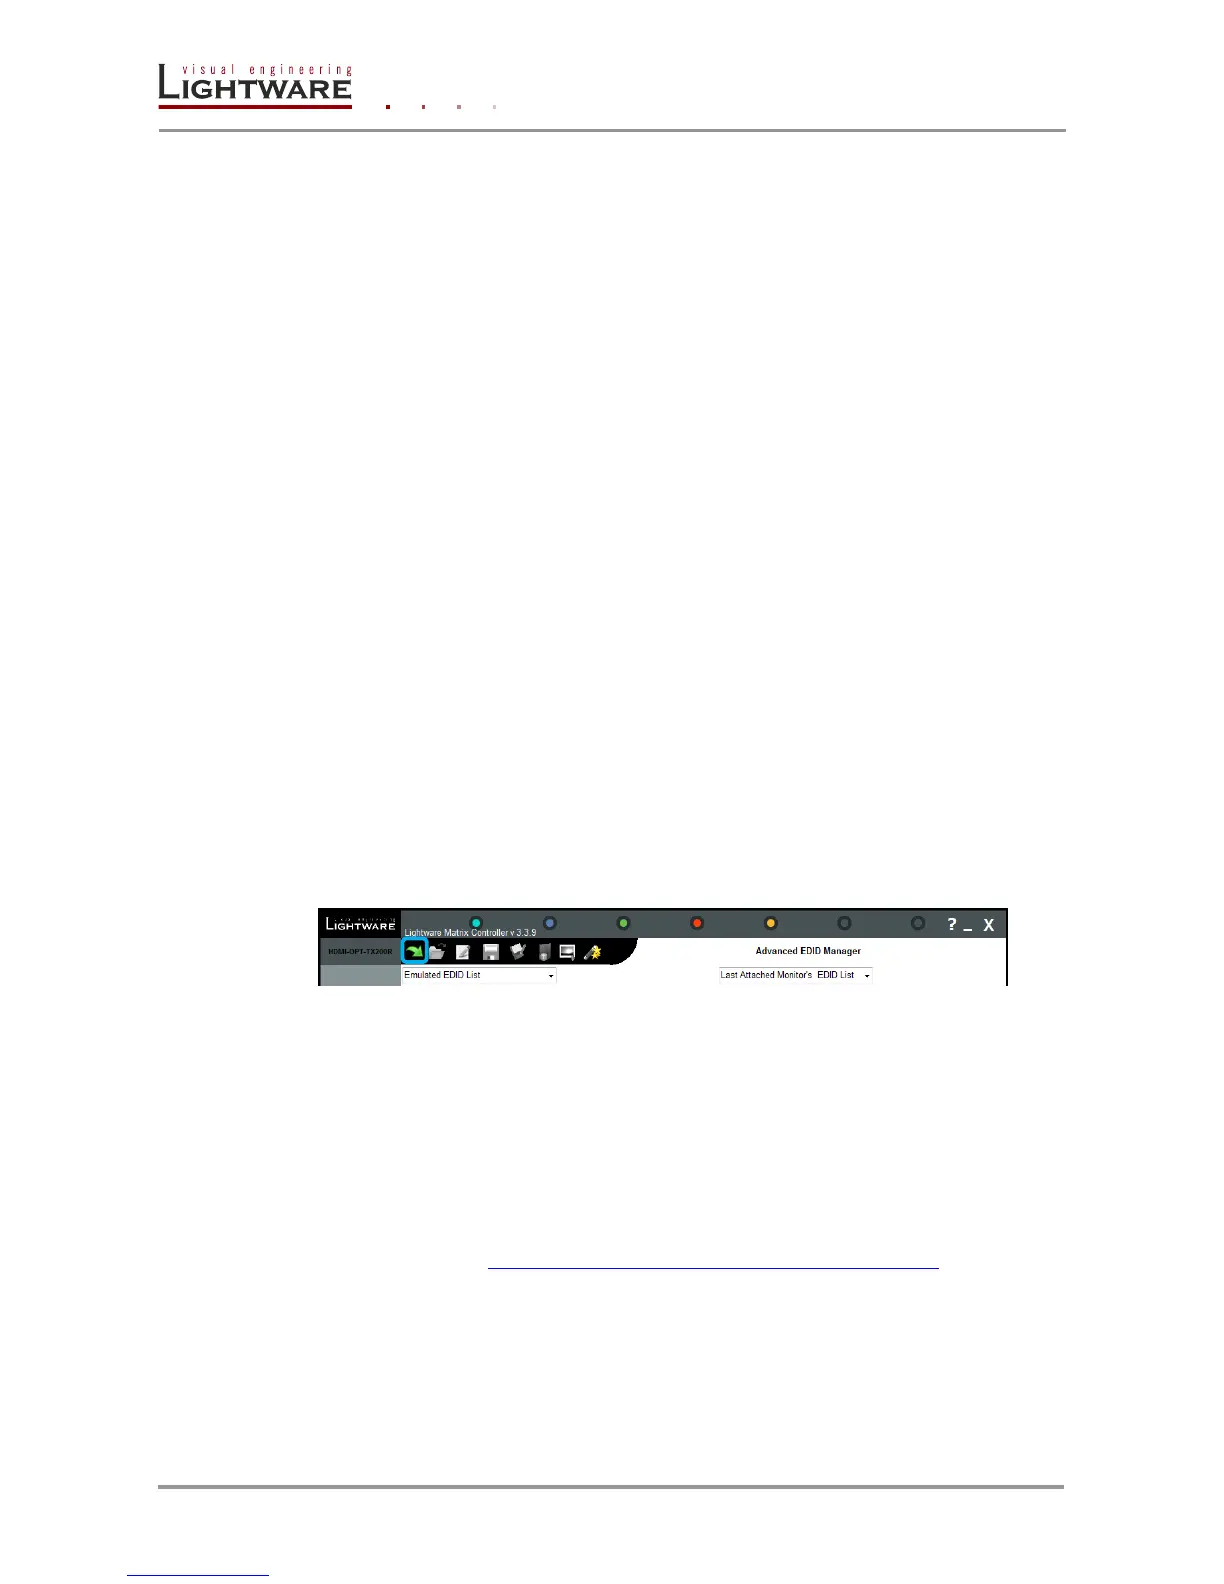
By clicking on the green arrow, the editor area rolls down.
Figure 5-2. Open Advanced EDID Editor
When the user enters the menu for the first time, an empty EDID is loaded into the
editor’s memory.
All EDID in the unit’s memory can be edited in the following way:
Step 1. Right click on the desired EDID to be loaded to the EDID Editor.
Step 2. In the pop-up menu, click on Edit EDID. The editor area automatically rolls down,
and the EDID is loaded into the editor area.
For further information, see the user’s manual of Advanced EDID Editor.
Info: Software & manual: http://www.lightware.eu/index.php/support-/downloads
5.5.3. Make an EDID without YUV colorspace supporting
Step 1. Open Advanced EDID Editor.
Step 2. Open an EDID which has CEA extension.
Step 3. Left click General line in the CEA category
Step 4. Choose NO for YUV444 support and YUV422 support