Charging and servicing of the battery must be
carried out in conformity with the instructions
supplied with the battery and the charger (if
using an external charger).
The electrolyte contains sulphuric acid, which is a
dangerous substance. During any work on the battery,
wear gloves and goggles. In the event of any splashes on
the skin or into the eyes, rinse immediately in pure water
and consult a doctor if necessary. During charging, batte-
ries emit hydrogen gas, which can create an explosive
mixture. Do not create sparks, smoke, or place any flame
near a battery on charge or one which has been recently
charged. To avoid any accumulation of hydrogen, leave the
battery cover open during charging, which should be
carried out in a well-ventilated area. Do not place any
metallic object on the battery, as this may create a short-
Daily checks and tasks prior to operation
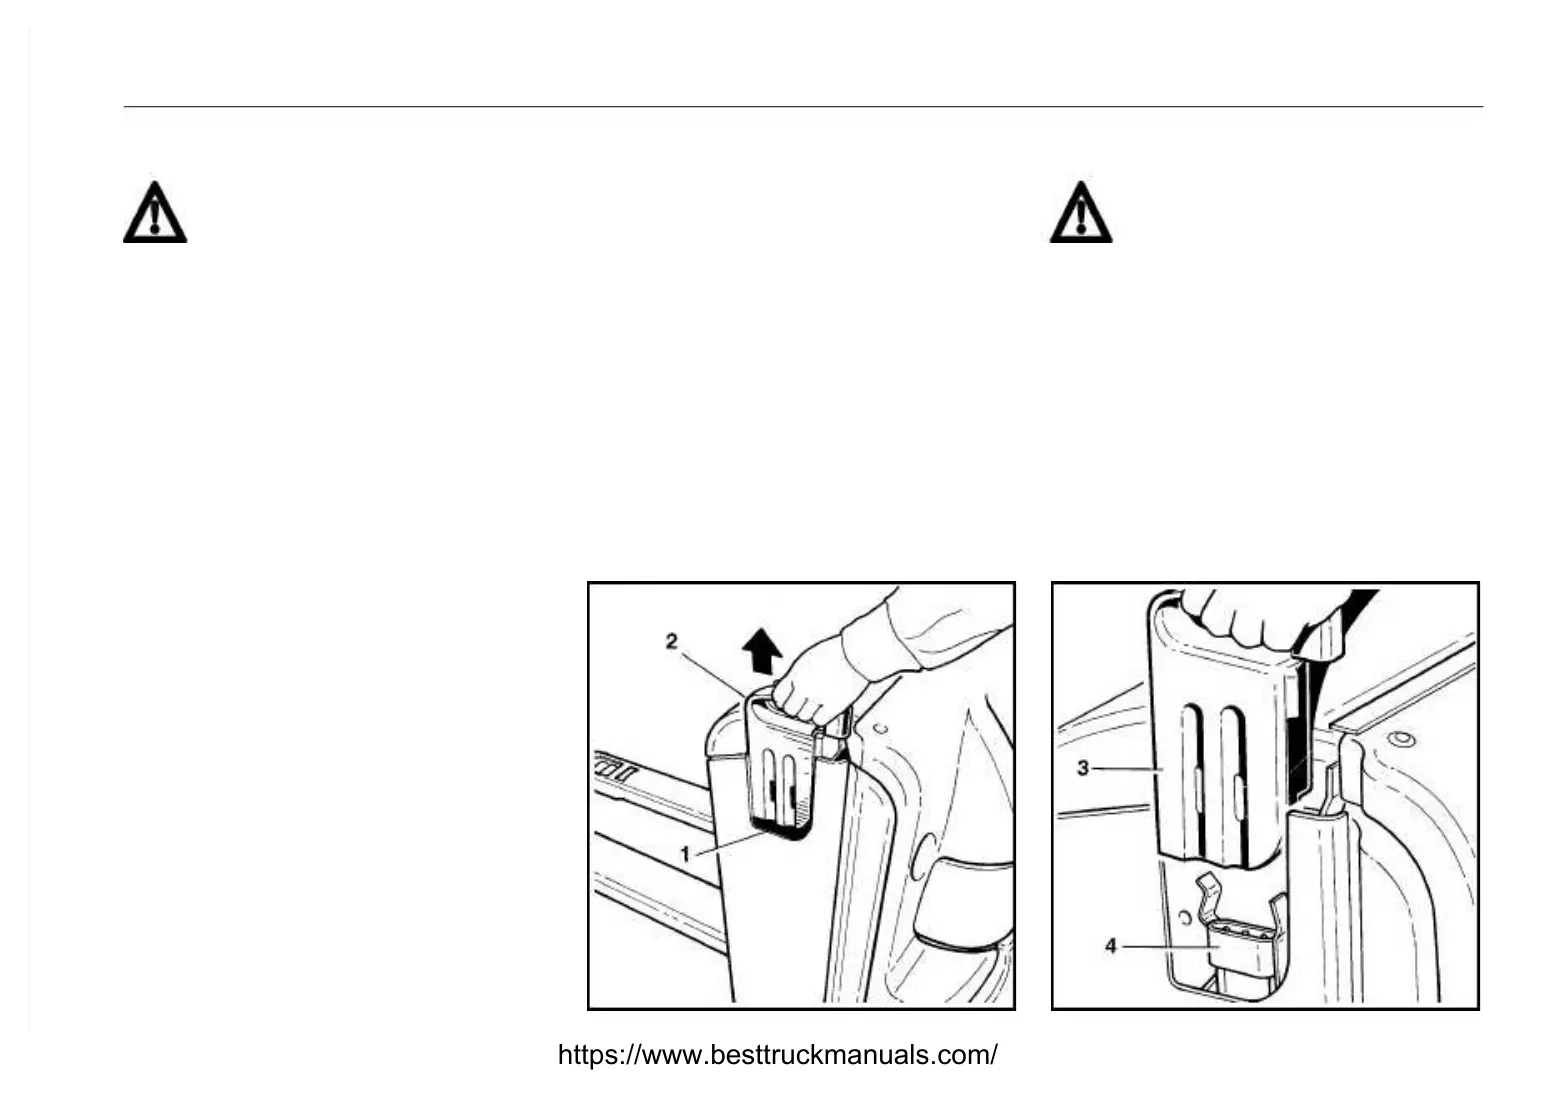
Never connect or disconnect the connector while
current is flowing through the circuit - this may
cause violent sparking and damage the con-
Regularly check the condition of the connector contacts,
and replace them if they show any traces of arcing or of
Take care to observe the + and - polarities. Always connect
+ to + and - to -. Do not reverse the connections.
Each half of the connector is fitted with a locating pin to
avoid any risk of connection reversal. Make sure these are
present and in good condition.
Connect / disconnect the battery plug
https://www.besttruckmanuals.com/