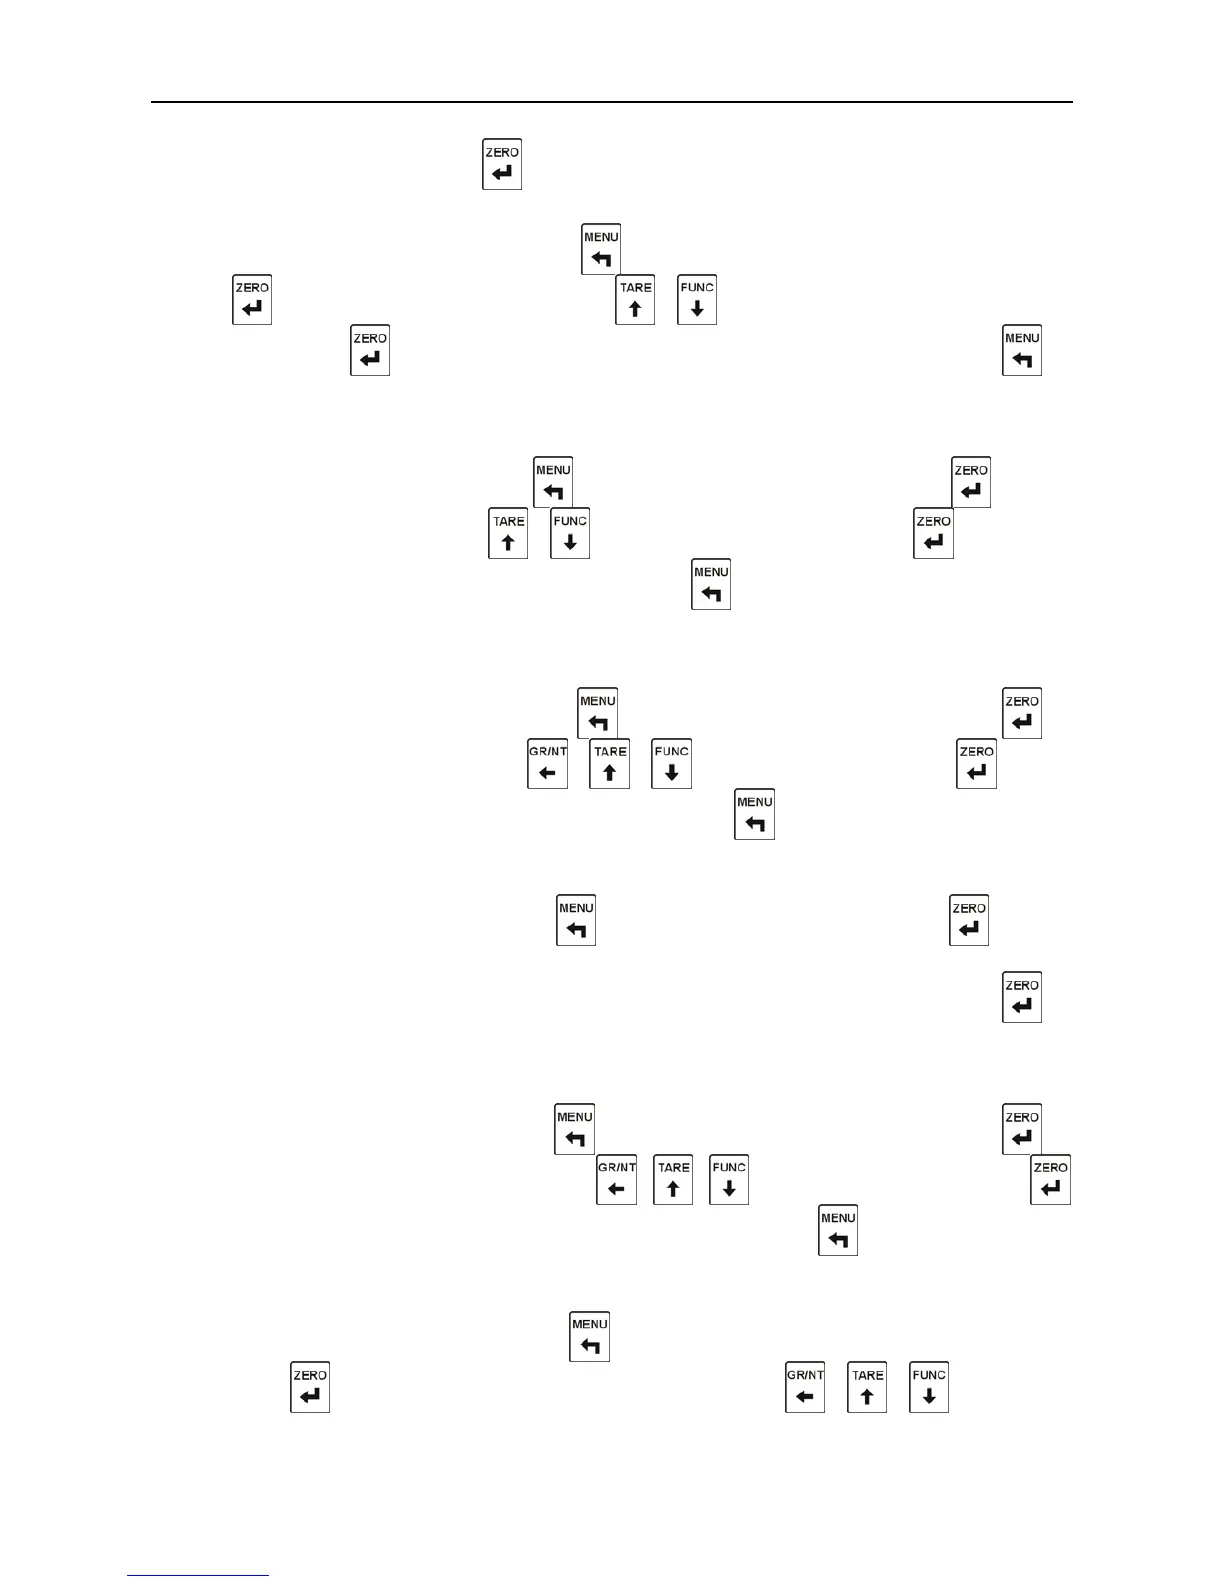
“CAL2” is displayed
,
and press to enter the first step.
Step1
:
Decimal Point Setting
“C2.dECi” is displayed
,
and press to jump over the decimal point setting
;
press
to enter the decimal setting; press
、
to select the position of the decimal
point; press to save the position selected and enter the second step, or press to
enter the next step directly without saving the position selected.
Step 2
:
Division Setting
“C2.d” is displayed
,
and press to jump over the division setting
;
press to enter
the division setting; press
、
to select the division; press the to save the
division selected and enter the third step, or press to enter the next step without saving
the division selected..
Step 3: Capacity Setting
“C2.MAX” is displayed
,
and press to jump over the capacity setting
;
press to
enter the capacity setting; press
、 、
to input the capacity; press to save
the capacity input and enter the next step, or press to enter the next step directly
without saving the capacity input..
Step 4:Zero Calibration
“C1.Zero” is displayed, and press to jump over the zero setting; press to enter
the zero calibration, and “000000”is displayed and all are flickering. If the dynamic
detection is on, after the scale is stable and the dynamic indicator is off, press to
perform zero calibration and enter the fifth step, or enter the fifth step without zero
calibration.
Step 5:Sensitivity Input(unit:mV)
“C2.SEn” is displayed
,
and press to jump over the sensitivity setting; press to
enter the sensitivity input setting; press
、 、
to input the sensitivity; press
to save the sensitivity input and enter the next step, or press to enter the next step
directly without saving the sensitivity input.
Step 6: Capacity Calibration
“C2.SPAn” is displayed
,
and press key to jump over the capacity calibration setting;
press to enter the capacity calibration setting; press
、 、
to input the