Pump Installation 6160 Pump Installation
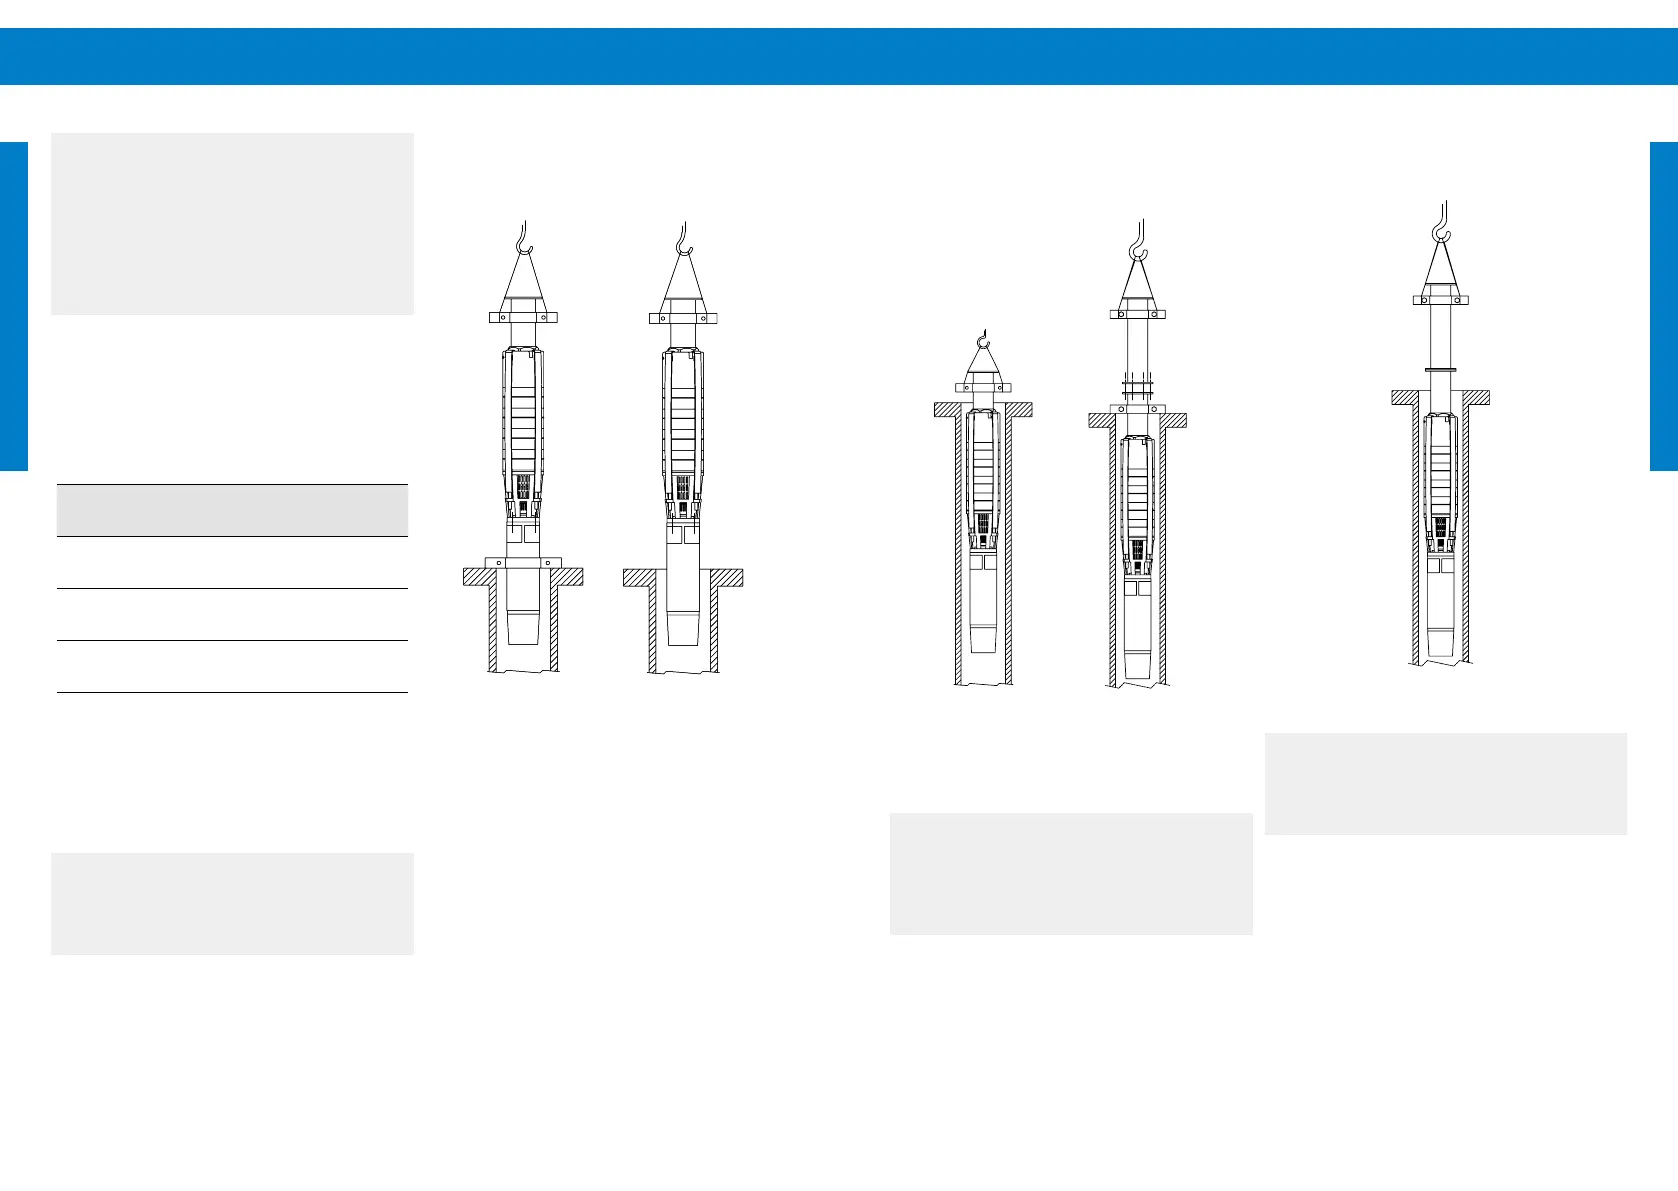
EN ENFigure 29: Connecting the next piece of pipe
After connecting the two pipes, lift the whole pump
system again to dismantle the lower clamp above
the pump end. This procedure has to be followed for
every piece of pipe until the pump has reached the
desired installation depth.
l
WARNING – If the pump is not lifted
before the clamp is being dismantled the
pump will sag. This could cause serious
injuries to the installer and damage to
the pump system.
a
NOTE - Pay attention to "8.2.4
Preparing the installation" on page
55“and "8.2.5 Installation Depth" on
page 57.
8.2.8 Pipes with thread
If you use pipes with a thread instead of a ange the
installation is basically the same.
The threads have to be sealed with hemp- or teon
tape.
Make sure that the threads cannot work loose over
time.
Figure 30: Dismantling the lower clamp
a
CAUTION – Impact between the pump
end and motor can damage the pump
system.
CAUTION – The NEMA coupling of the
motor and the pump end must be CLEAN
when the pump end is mounted onto the
motor.
For correct connection pay attention to the following
table with tightening torques. The screws must be
tightened diagonally.
Table 12: Tightening torques for pump/motor
connection
Pump / Motor Torque [Nm]
Torque
[lb × ft]
M8 18 13
M12 70 52
M16 150 110
When pump end and motor are assembled, lift the
pump unit a little and remove the lower clamp on the
motor. Now lower the pump carefully downwards
into the bore hole until the upper pipe clamp is
resting properly on the support structure. Be careful
not to allow the pump to hit the side of the well or
this may cause damage.
l
WARNING – Always take suitable
security precautions (like a strong safety
rope) to safeguard the pump against
slipping into the well during installation!
Now the next piece of clamped pipe can be mounted
onto the ange/connector of the previous one. Only
use suitable bolts and sealing material. ("Figure 29:
Connecting the next piece of pipe" on page 61)
Figure 28: Dismantling the lower clamp