For additional information, see the complete installation and operation guide at www.lutron.com/qs
GRAFIK Eye QS with DALI® Control Unit Quick Installation and Operation Guide
19
Daylight Sensor Setup (continued)
Zone Mode
This step allows you to assign sensors to zones on the GRAFIK Eye QS control
unit. Each zone can be assigned to only one sensor, but sensors can be assigned
to more than one zone.
Selecting Sensors
1. If not already done, associate daylight sensors and set to
“Zone Mode”.
2. Use the Master buttons to highlight “Setup” and press
the OK button to accept. Available sensors will be
displayed.
3. Use the Master buttons to scroll through the sensors until
the one you wish to assign or unassign is highlighted,
and press the OK button to select it.
4. Use the zone raise and lower buttons for the desired
zones to assign or unassign the sensor to those zones.
The zone raise button assigns the displayed sensor, and the zone
lower button unassigns it. Press the Timeclock (back) button
to return to the list of available sensors. Repeat for additional
sensors.
Calibrating the Sensors
1. Put any wireless Radio Powr Savr daylight sensors associated
with the desired zones into Calibrate Mode: Press and hold the
“Cal” button for 6 seconds until the sensor flashes.
Note: After 5 minutes, Calibrate Mode will timeout, and the
sensor will return to normal mode.
2. Press the Timeclock (back) button to return to the Daylight
Sensor screen. Use the Master buttons to highlight “Calibrate”
and press the OK button to accept.
3. Use the Master buttons to select the desired zone and press the OK button to accept.
4. Use the Master buttons to select the desired light level for the zone, and press the OK button to accept. Repeat
for all zone levels you wish to calibrate.
5. Exit programming mode.
Note: If wireless sensors are not found, verify that they are associated correctly.
Daylight Sensor
Setup
Calibrate
Searching
Sensor x/y
××××-××××
RF
Scene 1
Set Zones
Daylight Sensor
Setup
Calibrate
Sensor Name
Zone 1
Adjust Light
More Light
Less Light
Saved
OK
16
9-16
1-8
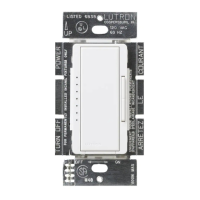
Master buttons
OK button
Timeclock (back)
button
12
3
4
5
 Loading...