For additional information, see the complete installation and operation guide at www.lutron.com/qs
GRAFIK Eye QS with DALI® Control Unit Quick Installation and Operation Guide
20
Pico Wireless Control Setup
Associating the Pico wireless control with a GRAFIK Eye QS Wireless
control unit (for wireless enabled GRAFIK Eye QS control units only)
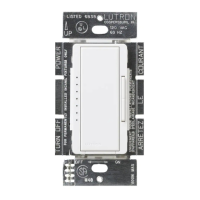
1. Make sure the wireless mode of the GRAFIK Eye QS
control unit is “Enabled”.
2. On the Pico wireless control, press and hold the top (on)
and bottom (off) buttons for 3 seconds. The info screen
on the GRAFIK Eye QS control unit will display the Pico
options. Press the OK button on the GRAFIK Eye QS
control unit to select the desired operation type for the
Pico.
3. Assign Pico wireless control.
a. To assign the Pico wireless control as a zone controller,
use the Master buttons to select “Zone” and press
the OK button to accept. Use the zone raise/lower
buttons for a zone to select a desired preset level,
and then press the zone raise and lower buttons
simultaneously for 1 second (until the zone LEDs flash
at the programmed preset level). Repeat for all zones
you wish to control with the Pico wireless control.
OR
b. To assign the Pico wireless control as a scene
controller, use the Master buttons to select “Scene”
and press the OK button to accept. Press and hold the
top scene button on the GRAFIK Eye QS control unit
for 3 seconds (until the scene LEDs flash).
4. On the Pico wireless control, press and hold the top and bottom buttons
for 3 seconds until the LEDs on the GRAFIK Eye QS control unit stop
flashing.
Note: The wireless signal has a range of 9 m through standard
construction or 18 m line-of-sight.
Saved
Change Type?
Zone
Change Type?
Scene
Pico
Change Type?
Press OK
OR
OK
16
9-16
1-8
Master buttons
OK button
Press and hold the
top scene button for
3 seconds to assign
Pico as a scene
controller
12
3
4
5
 Loading...