LeadCare
®
II User's Guide 4-7
Step 3: Analyze the Sample
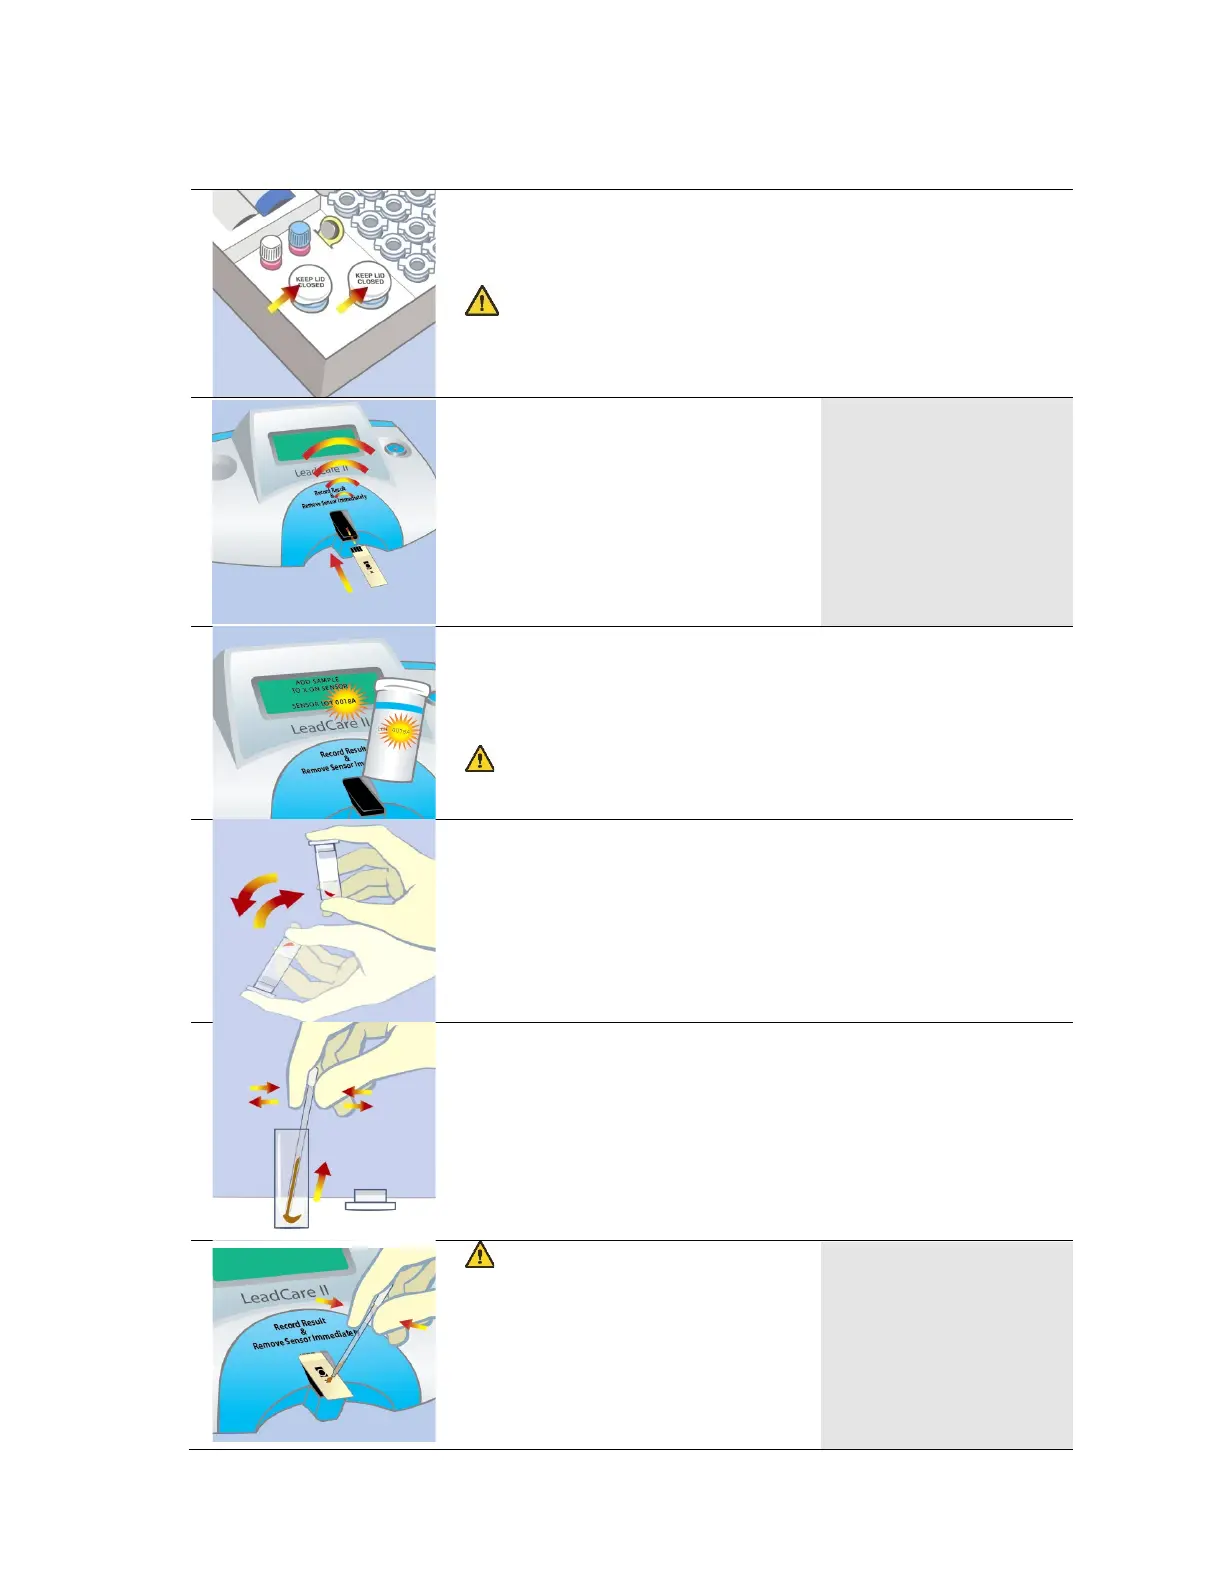
1. Remove one sensor from the sensor container. Close the
container immediately. Grasp the sensor at the end
without the black bars.
CAUTION: Keep the sensors in their container until
you are ready to use them. Minimize handling to prevent
contamination which could cause an inaccurate test
2. Insert a sensor (with the black
bars facing up) completely into
the analyzer. Make sure the
sensor is inserted under the
sensor guides and sits flush on
the analyzer deck. When the
sensor is inserted properly the
analyzer beeps and displays the
ADD SAMPLE
TO X ON SENSOR
SENSOR LOT 0018A
3. Make sure the sensor lot number matches the lot number
on the display. If the number does not match, recalibrate
the analyzer and test controls (refer to Chapter 3).
CAUTION: The control lot number must match the
sensor lot number and the calibration button code.
4. Make sure that the sample mixture is at room temperature
and uniformly mixed before testing.
5. Remove the cap from the treatment reagent. Remove a
transfer dropper from its container. Squeeze the walls of
the dropper and insert the tip into the sample. Release the
pressure to draw the sample into the dropper. There
should be approximately ½” of sample in the dropper.
CAUTION: Make sure the
message to the right is
displayed on the screen before
adding the sample.
6. Touch the dropper tip to the X
on the sensor and squeeze the
walls to dispense the sample.
ADD SAMPLE
TO X ON SENSOR
SENSOR LOT 0018A