A
Access to the Accessory 1-1
Malvern personnel 1-1
Operator 1-1
Supervisor 1-1
Accessory name 7-1
Assumed information 1-2
B
Background Sweeps 7-2
Bubbles 8-1
C
Chemical compatibility B-1
Cleaning the Accessory 9-2
Connecting up your Accessory 3-4
Mastersizer Micro & Microplus 3-6
Mastersizer S and X 3-4
Controller unit 4-2
Rear panel 4-3
D
Date & Time 7-5
Digital I/O connector 4-4
Disassembly 9-3
Dispersant Name 7-3
Dispersant Quantity 7-3
Dispersion Unit connector 4-3
Dispertion unit 4-2
Disposing of the Accessory 2-6
Drain 4-2
Drain control 4-2
E
Editing and deleting a SOP 7-5
Electrical safety warnings 2-3
EMC performance E-1
F
Fault diagnosis and correction C-1
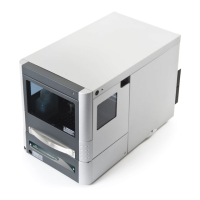
Features of the Accessory 4-1
Controler unit 4-2
Dispertion unit 4-2
Drain control 4-2
Pump speed display 4-2
Qspec logo 4-3
Sample out 4-2
Sample return 4-2
Speed control 4-2
Flushing the Accessory 6-1
Fuse 4-4
Replacing the fuse 9-2
I
Installation 3-1
Checking the contents 3-3
Installation check 3-9
Unpacking the Accessory 3-2
L
Laser safety 2-2
General laser safety 2-2
Laser Warnings 2-2
Lens 7-2
M
Mains input connector 4-4
Mains on/off switch 4-3
Mains power cable 4-3
Mains voltage selector 4-4
Maintenance 9-1
‘O’ ring seals 9-4
Cleaning 9-4
Cleaning the Accessory 9-2
Cleaning the cell windows 9-5
Disassembly 9-3
Reassembly 9-4
Replacing the fuse 9-2
Replacing the sample tubing 9-1
Making measurements 6-1
Malvern personnel 1-1
Malvern software 4-4
Maximum obscuration 7-5
Measurement Quantity 7-3
Measurement Sweeps 7-2
Menu Commands 1-2
Min Obscuration 7-4
Moving the Accessory 2-5
INDEX
QS SMALL VOLUME SAMPLE DISPERSION UNIT
Page 1