BOOM, JIB, TOWER, AND MAST
Folio 1316-8
Replacing Lacings
The packing slip shipped with new lacings identifies the
lacing and chord material. This information is also recorded
with the original parts order from your Manitowoc Distributor.
1. During inclement weather conditions, move the boom
section to be repaired into a covered area or build a
shelter over the section.
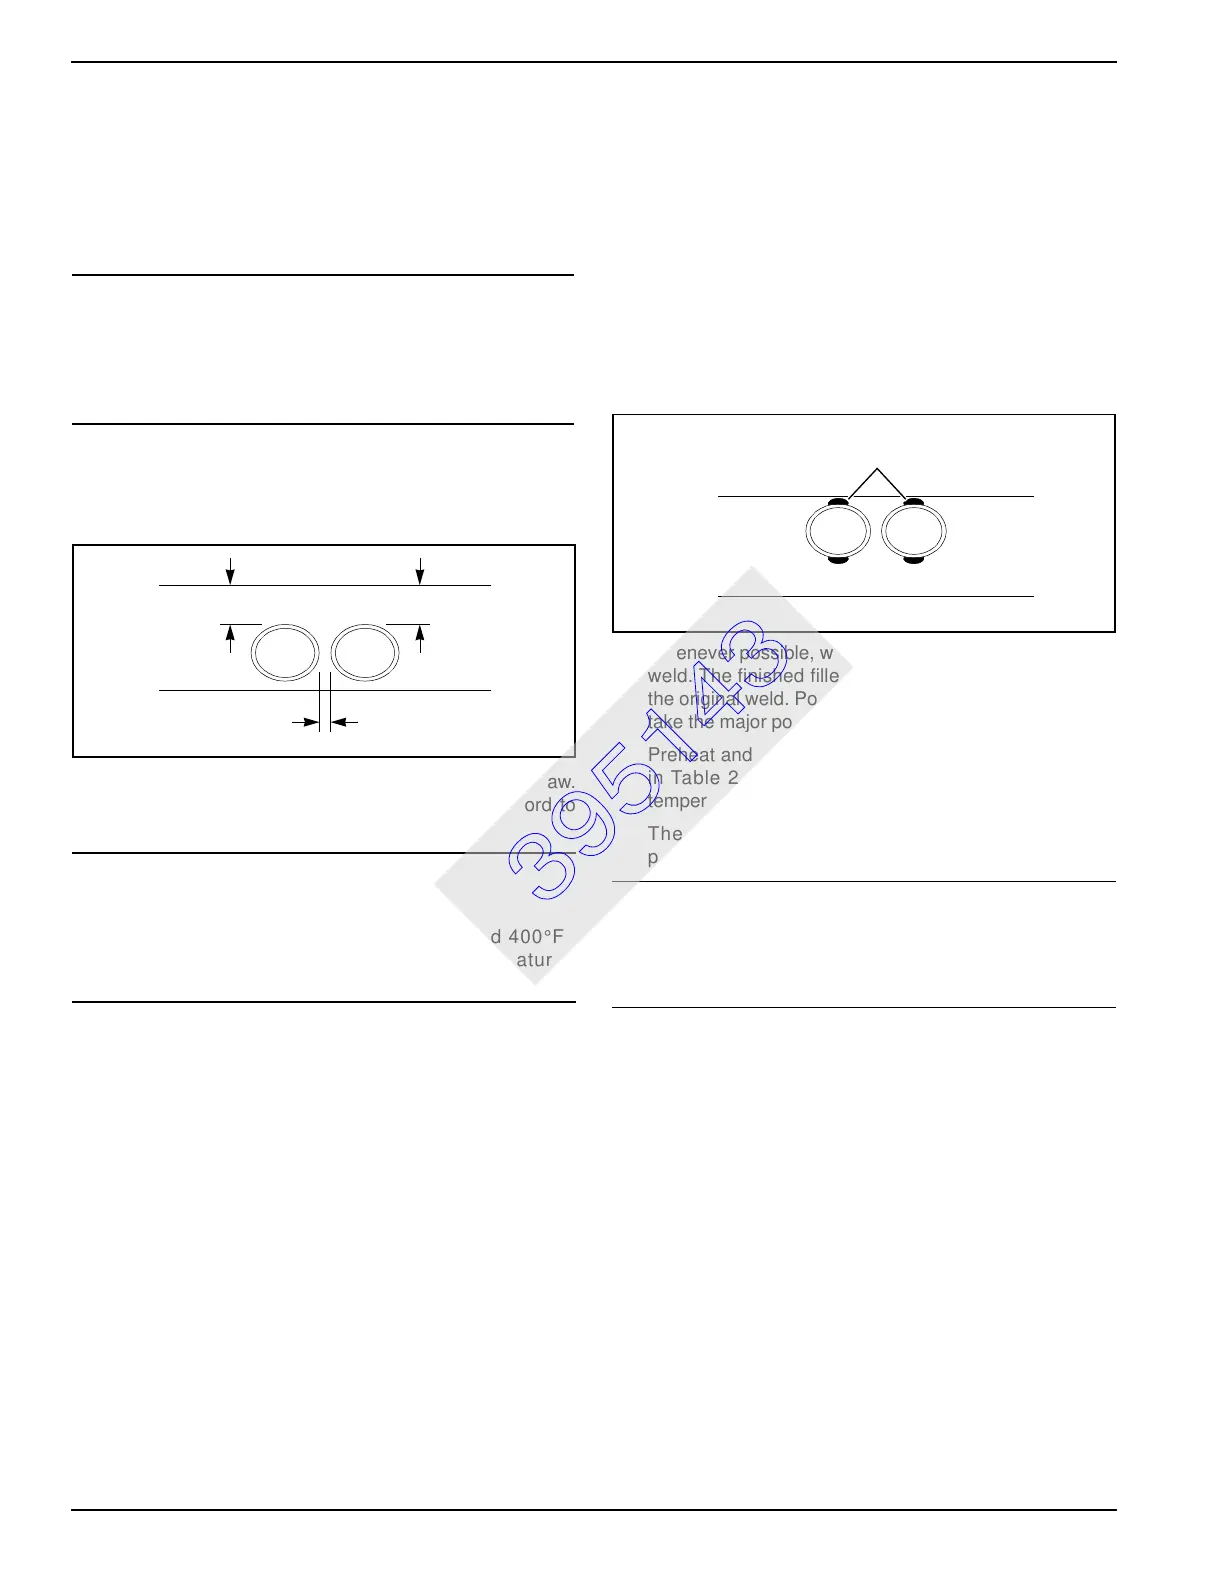
2. Measure the exact position of the damaged lacing with
relation to the chords as shown in Figure 7.
Record
measurements
, as any marks on the chord will be
removed during grinding.
3. Cut out the damaged lacing with a burning torch or saw.
Cut 3/8 – 1/2 in. (9.5 – 12.7 mm) above the chord to
prevent overheating the chord.
4. Carefully grind the remaining lacing and weld from the
chord to provide a smooth gouge-free surface. Take
care not to overheat the chord.
a. If the chord is straight, damaged lacings should be
removed one at a time. If the chord is bent or bowed
slightly, cut loose damaged lacings first, and then
check the chord straightness (see procedure).
b. Always replace the center lacing first in a series of
damaged lacings. This will assist in maintaining the
cross sectional dimensions of the section. Then
replace the remaining lacings, first on one side of
center and then on the other side of center.
c. Always replace diagonal lacings first. Diagonal
lacings run from one corner to another (for example,
from upper left chord to lower right chord).
5. Inspect the ground areas with dye penetrant or a
magnetic particle test to determine if any cracks exist in
the chord.
Section must be replaced if cracks exist
.
6. Make sure all welding surfaces on the chords and
lacings are free of dirt, moisture, oil, paint, and rust
before welding. If necessary use emery cloth to polish
the surfaces.
7. Fit the new lacings into position using the
measurements recorded in step 2. The gap between the
chord and lacing must not exceed 1/16 in. (1.6 mm) at
either end.
8. Tack weld the new lacing into position at both ends with
a 3/32 in. (2.4 mm) electrode. The tack welds should be
approximately 1 in. (25.4 mm) long on both sides of the
lacing as shown in Figure 8.
9. Weld the lacing into place.
Whenever possible, weld lacings using a horizontal fillet
weld. The finished fillet weld must be the same size as
the original weld. Position the electrode so the chord will
take the major portion of the heat.
Preheat and maintain the interpass temperatures given
in Table 2; use a temperature crayon to check the
temperature.
The weld passes should be in as straight a line as
possible;
do not weave electrode from side to side.
10. Remove all slag from the weld.
11. Slowly cool weld by wrapping with an insulated blanket.
12. Once the welds have cooled to the ambient
temperature, visually inspect each weld to ensure that
all craters are full (no porosity) and that there are no
undercuts around the weld.
a. Determine if there are any cracks in the welds by
performing a non-destructive test on each weld
not
less than 48 hours after welding
(per American
Welding Society Code).
b.
Defective welds shall be ground out and rewelded
.
c. Do not use the boom section during the 48 hour
period.
13. Prime and paint all welds and replacement lacings.
CAUTION
Structural Failure!
No welding shall be done in snow, rain, or high winds that
will chill welds extremely fast. Ambient temperature in
welding area must not be less than 40°F (4°C).
CAUTION
Structural Failure!
Do not allow temperature of chord to exceed 400°F
(204°C) during cutting or grinding (use temperature
crayon to check).
FIGURE 7
B231
LACING LOCATION
MEASUREMENTS
CAUTION
Structural Failure!
Crater which forms at end of weld pass must be filled in;
otherwise a crack may develop at crater.
FIGURE 8
B231
TACK WELD
LOCATIONS
1" (25.4 mm) Long Tack
Weld (both sides)
395143