SERVICE 800D
5-38
Published 5-27-2018 Control # 039-06
Alternative No. 1
Special Tools:
•Electrical tape
•Short Cord or Wire
1. Retract the boom completely.
2. At the hoist mount end of the boom, remove the 5/16-
18NC grade 5 capscrew through the slot on the lop plate
of the first boom section.
3. Pull the end of the cable out of the back of the boom and
connect a short piece of wire or cord through the loop.
Anchor the cord in order to keep control of the end of tho
cable.
4. At the sheave case end of tho boom. Remove the two
capscrews and spacer bar from the top front end of the
first boom section. As the spacer bar is removed, pull the
steel cable along with the bar. The cord on the opposite
end of the steel cable will allow some length of cable to
be pulled from the boom. Do not pull hard enough lo
break the hoist end of the cable loose.
5. Remove the cable stop from the end of the old
proportioning cable and fasten the eyelet end of the new
wire to the old cable with electrical tape
6. While maintaining some amount of tension on the new
wire pull the old wire out of the boom at the hoist end of
the boom assembly. When the eyelet of the new wire
becomes visible at the hoist end of the boom, stop
pulling on the wire
7. Detach the old and new wires. Insert the eyelet of the
new wire into the space between the top plates of the
first and second sections. Reattach the wire to the top
plate of the second section with the 5/16-18NC grade 5
capscrew that was removed earlier.
8. At the sheave case end of the boom, install the spacer
and capscrews in the top front of the first section. Make
sure that the new anti-two-block wire is routed through
the slot in the spacer bar.
9. Visually inspect the routing of the proportioning cable to
make sure that it is properly seated in the sheave
grooves.
10. Cut off the excess wire from the new wire that is sticking
out of the first section leaving a length to about 24 in (61
cm). This will allow a short amount of wire to use to apply
tension and for the installation of the cable stop and
shrink tube without dealing with a lot of extra wire
11. Slide the cable stop onto the end of the wire sticking out
of the end of the first section and run it up against the
spacer bar. While pulling on the steel cable with a
tension of about 15-25 lb (7-11 kg), tighten the screw in
the cable stop.
12. Slide a new piece of shrink tube onto the end to the wire,
run it up against the cable stop, and apply heat to shrink
the tube. This will prevent the end of the wire from
fraying.
13. Cut off the excess wire leaving about 1 in (25 mm) of
wire with shrink tube sticking out of the cable stop.
14. Slowly operate the boom to make sure the sheaves turn
and the cable runs correctly.
Alternative No. 2
This is the method to be used in the event the proportioning
cable has been cut during use. In this method a long
installation tool is used to run the new wire from one end of
the boom to the other.
Special tools:
•Electrical tape
•Installation tool
1. Retract the boom completely.
2. At the hoist end of the boom, remove the 5/16- 18NC
capscrew from the top plate of the second section. This
capscrew is accessible through a slot in the top plate of
the first section.
3. Remove the old wire from the boom.
4. Extend the boom until the reinforcing plate on the
second section is extended about 24 in (61 cm) out of
the first section.
5. At the sheave case end of the boom, remove the two
capscrews and the spacer plate from the front top of the
first section. As the spacer plate is pulled from the boom,
bring the old wire out of the boom.
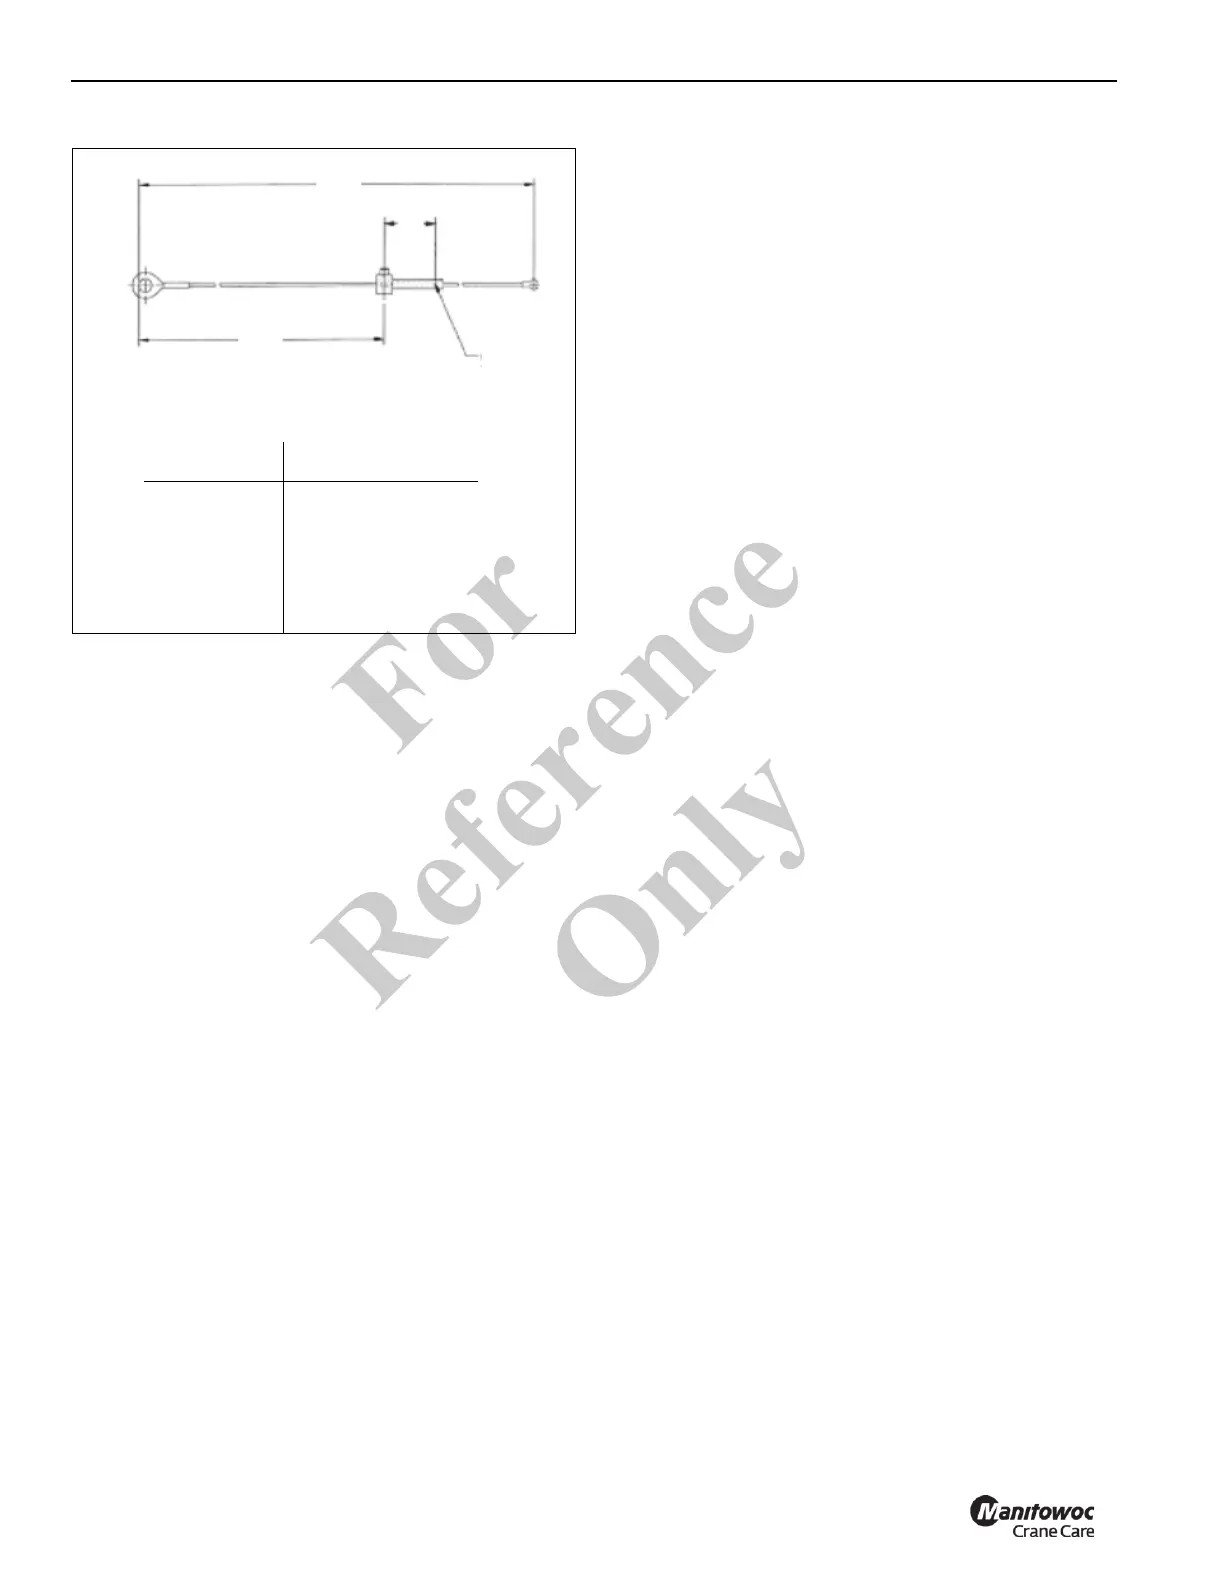
055.00
1.00
X ± 1.00
CUT CABLE
HERE AFTER
TIGHTENING
(115007)
MODEL LENGTH (X)
8100D
890D
880D
685D
680D
649D
USE CABLE AS IS
605.00
545.00
555.50
525.00
339.50
9392
Fo
r
Reference
Only

 Loading...


