SERVICE 800D
5-6
Published 5-27-2018 Control # 039-06
Fatigue of Welded Structures
Experience has shown that highly stressed welded
structures when repeatedly subjected to varying stresses
caused by twisting, shock, bending, and intentional and/or
unintentional overloads, often become subject to weld
cracking which may be attributed to fatigue of the welded
joint. This condition is not uncommon in construction
equipment.
Equipment should be periodically inspected for evidence of
weld fatigue. The frequency of these inspections should
increase with the age of the equipment and the severity of
the application. The following are known high stress areas
applicable to National Cranes, and a visual inspection of
these areas should be made part of an owner’s planned
preventive maintenance program:
• Telescopic Boom: wear pad retaining structures,
hydraulic cylinder attaching points, boom pivot shaft
retaining structures.
• Outrigger pads, beams, boxes and attachment
structures.
• Main frame: generally in the area of doubler plates and
crossmembers, and at the junction of front and rear
frame members on truck cranes.
• Turntable bearing connection—where bearing is welded
to the crane superstructure or chassis.
• Counterweight support structures.
• Chassis axle and suspension mounting structures.
• Hydraulic cylinder end connections.
The above is provided only as a guide, and your inspection
plan should not be limited to the areas listed. A thorough
visual inspection of all weldments is good practice.
Anyone requiring more detailed inspection instructions
and/or repair procedures may request same by contacting
your local National Crane distributor.
Loctite®
Always follow the directions on the Loctite® container, as not
all Loctite® types are suitable for all applications. Various
types of Loctite® are specified throughout the Service
Manual. The following types of Loctite® brand adhesives are
available from the Parts Department of the local National
Crane distributor.
Application of Medium Strength Loctite®
NOTE: The fastener may be re-used; the adhesive may be
re-applied over cured adhesive residue.
The following procedure covers the proper application and
curing method for medium strength Loctite®
adhesive/sealant (Loctite® No. 243).
1. Ensure the threaded surface, both male and female, is
clean of contaminants and free of dirt and oil.
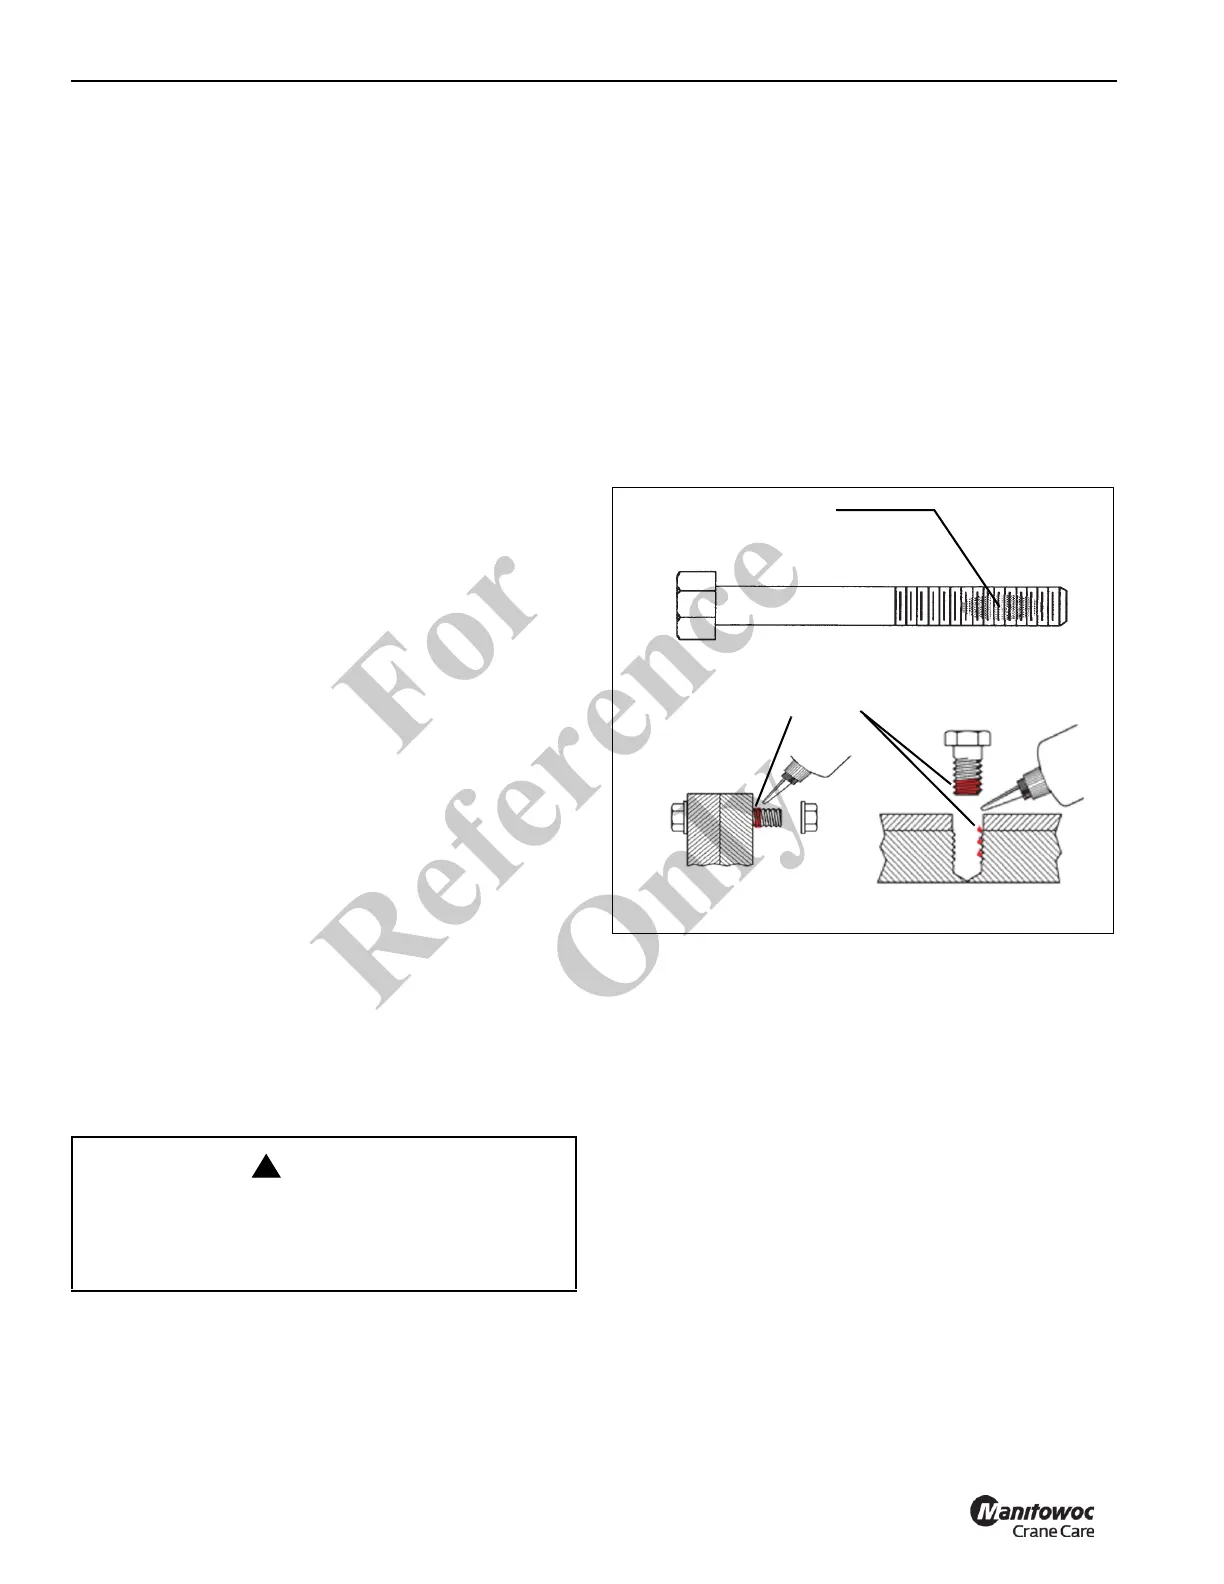
Adhesive/Sealant Application
1. Apply a bead perpendicular to the thread, several
threads wide, in the approximate area of threaded
engagement (see Figure 5-1).
2. In a blind hole application, a bead of several drops of
adhesive should be applied into the bottom of the hole to
be hydraulically forced up during engagement.
3. After application and engagement of mated threads,
fixturing will occur within five (5) minutes. Time required
to achieve full strength is 24 hours.
FASTENERS AND TORQUE VALUES
Use bolts of the correct length. A bolt which is too long may
bottom before the head is tight against the part it is to hold. If
a bolt is too short, there may not be enough threads engaged
to hold the part securely. Threads can be damaged. Inspect
them and replace fasteners, as necessary.
Torque values should correspond to the type bolts, studs,
and nuts being used.
CAUTION
Skin and/or Eye Hazard!
Loctite® type adhesives contain chemicals that may be
harmful if misused. Read and follow the instructions on
the container.
4203
FIGURE 5-1
Bead Application
Bead Application
8213-1
8213-2
Fo
r
Reference
Only
 Loading...