6C-2190-13645--2 495 POWER-TRIM
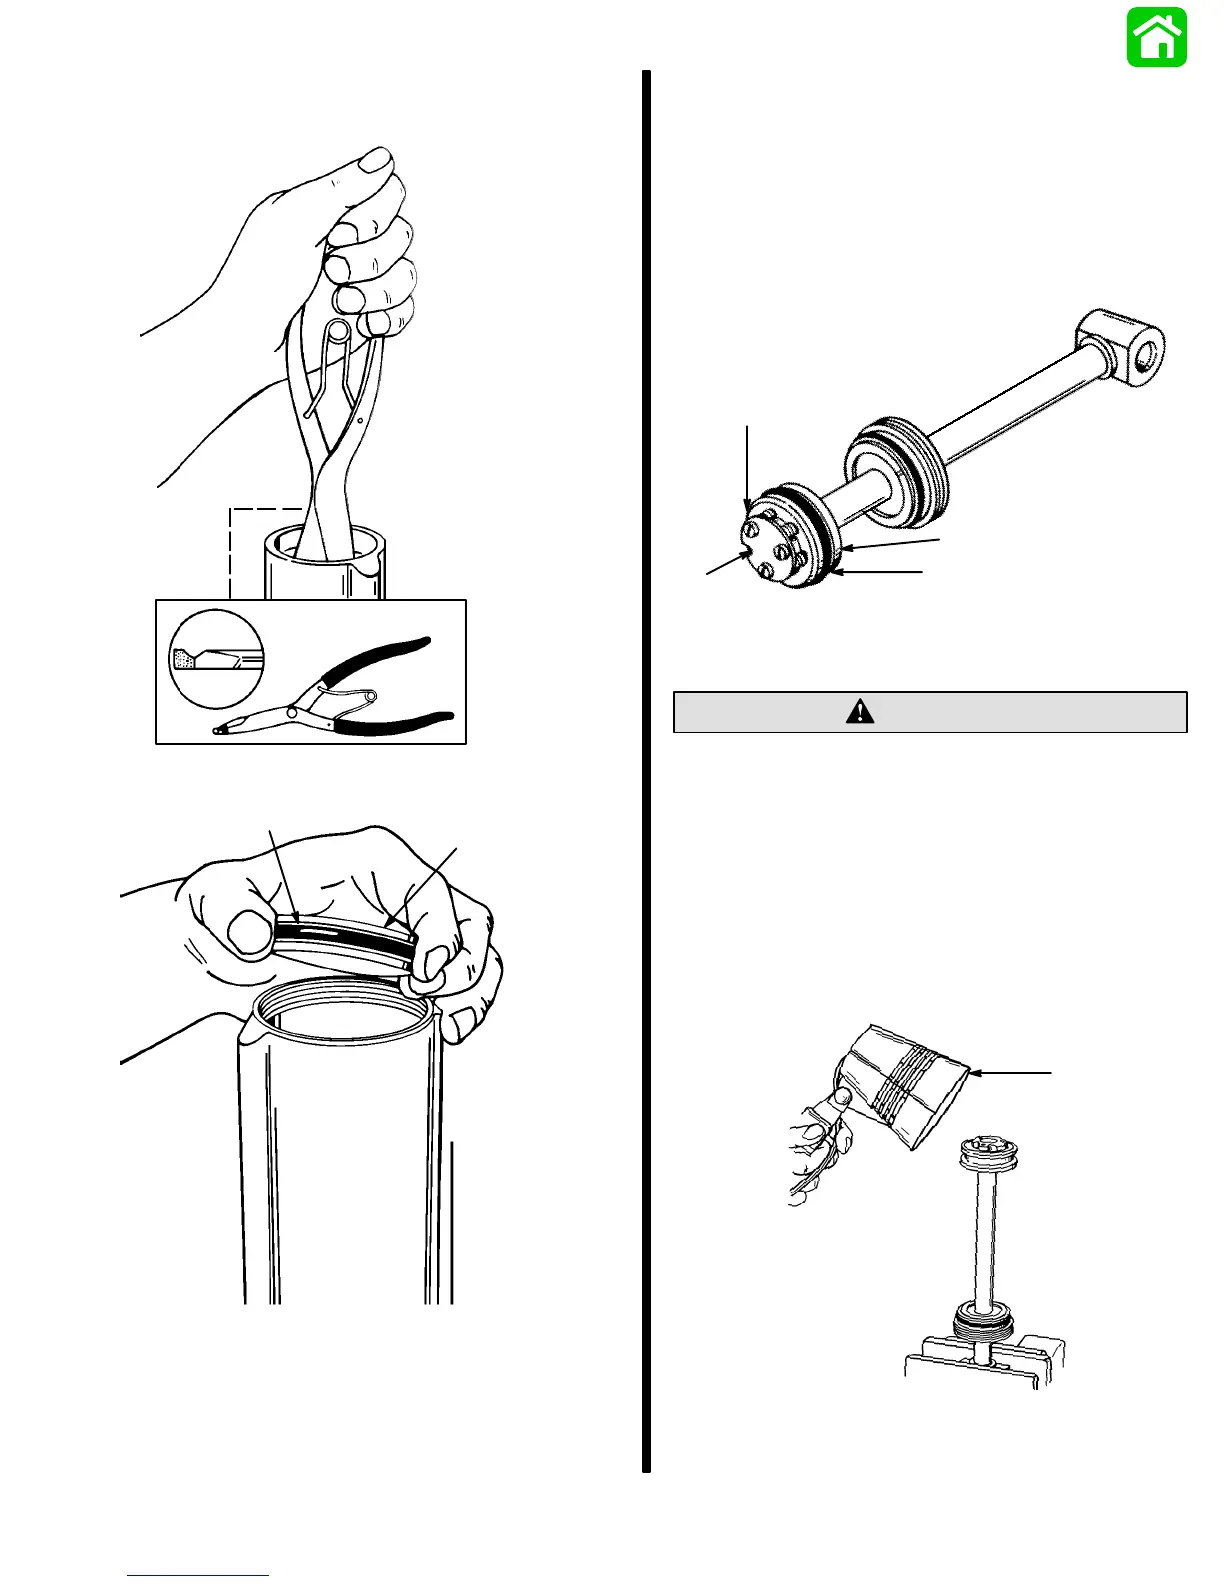
5. Remove memory piston from cylinder using lock-
ring pliers (Craftsman P/N 4735) or suitable tool.
51193
LOCK-RING PLIERS
6. Remove O-ring from memory piston.
51196
a
b
a - O-ring
b - Memory Piston
1. Place trim rod assembly on clean work surface.
2. Remove trim system from vise and empty fluid
into appropriate container.
Trim Rod Disassembly
1. Place trim rod assembly on clean work surface.
2. Remove screws securing plate to trim rod piston
and O-ring.
3. Remove check ball components from trim rod
piston.
51143
a
b
c
d
a - Screw (3)
b - Plate
c - O-ring
d - Piston
When removing Trim Rod piston, spanner wrench
must have 1/4 in. x 5/16 in. long pegs to avoid
damage to trim piston.
CAUTION
4. Place trim rod into soft jawed vise and apply heat
to shock piston using torch lamp (91-63209).
5. Loosen trim rod piston using spanner wrench
(1/4 in. x 5/16 in. long pegs).
6. Allow trim rod piston to cool. Remove from trim
rod.
51146
a
a - Torch Lamp