18
4. Operating mode
4.3.3. OFFSEt LO mode - setting and example
Limit warning! The OFFSEt LO mode can only be used locally on the same isobar!
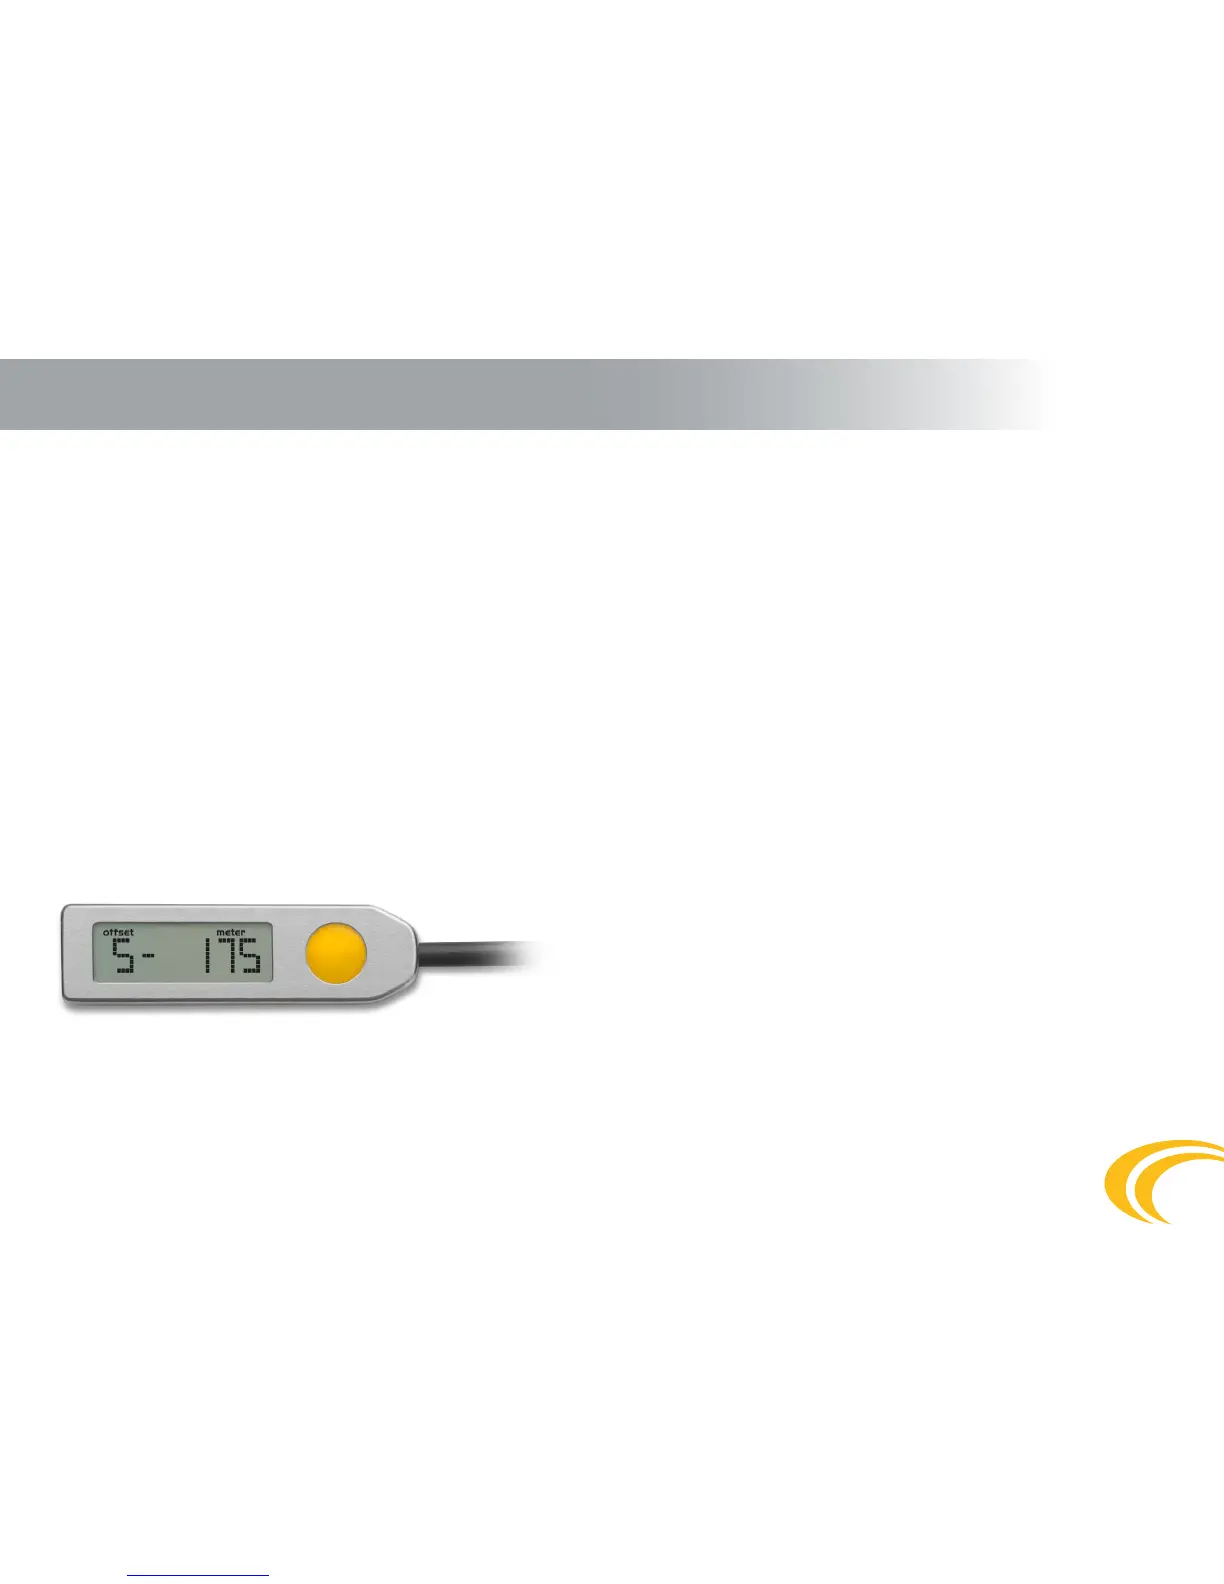
Example: The landing location is about 175 m below the point at which the device was turned on (take-o point).
Briey press the yellow button on the control unit, GO-ON sign appears (for 2 seconds). Do not hold the button, depress it only briey!!!
During the time the GO-ON sign is displayed, preferably immediately after it comes on, depress the yellow button briey once again. The GO-ON
sign appears again. After the yellow button is depressed again (GO-ON sign displayed), the last preset PROFILE can be seen on the display (Stu,
Int, Pro, Cpi, Tan). DO NOT CONFIRM the selected PROFILE and wait for OFFSEt function to show; conrm this function by pressing the button.
The display shows -LO (decreased landing elevation). Conrm -LO by pressing the yellow button at the moment the required function is indicated
on the display. (Note: If the device had already been set for OFFSET in the given mode +/-, the display shows the last selected setting for two
seconds.) If the original setting is not conrmed by depressing the button, the display will show the initial letter of the set PROFILE (Stu, Int,
Pro, Cpi, Tan), then the minus sign (-) and in two one-second intervals it displays the numbers to allow exact setting of the required altitude.
The rst number is hundreds of meters, followed by tens and single meters. After entering the required oset, the device calibrates. The initial
letter of the PROFILE remains on the display and above it is the sign oset followed by a minus sign (-) and the set meters. For a better control
of the selected PROFILE, it is possible to press the button once, the whole set PROFILE is shown and above it is the oset sign, after four seconds
the GO-OFF sign appears in case you intend to switch o the device completely, and the INFO menu also comes on that allows access to the
information menu.
Switched on in the OFFSEt LO -175m mode with STUDENT (Stu) prole