MLI Ultra 12/2750, 12/5500, 24/5500 – User and Installation Manual
How to activate MasterBus powering
This is done in two parts:
• First, set the DIP switches.
• Secondly, open MasterAdjust on a notebook/laptop or PC, connected to the MasterBus network
via a USB Interface.
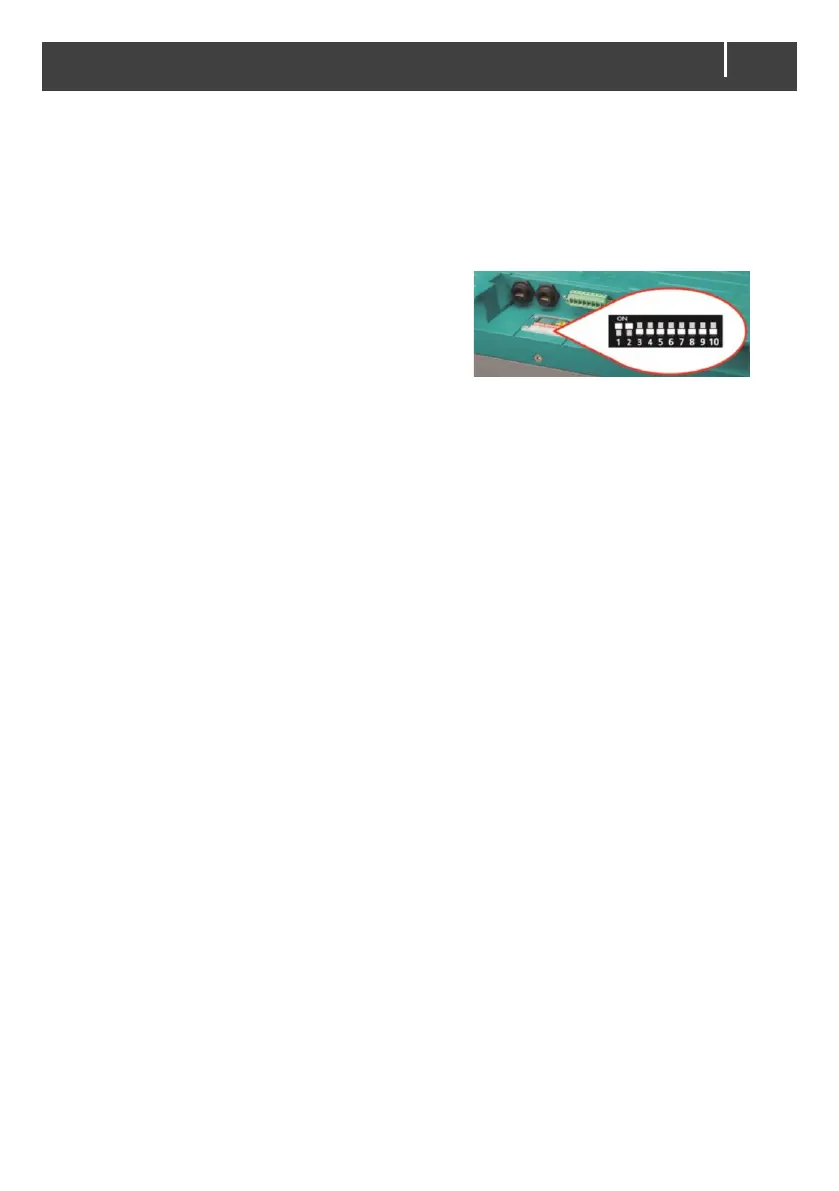
DIP switches
1. Remove the DIP switch cover by loosening the four
screws.
2. Use a small screwdriver to carefully set the DIP
switches:
• Set DIP switch 1 to the ON position () to select
MasterBus.
• Set DIP switch 2 to the ON position () to activate MasterBus powering.
3. Replace the DIP switch cover and fasten with the screws. Make sure that the rubber band is
placed correctly, to make it watertight.
MasterAdjust
4. When the MLI Ultra is connected to MasterBus, open MasterAdjust.
5. Right-click the MLI Ultra and select Login.
6. Select Installer and enter the installer code.
7. Go to the Configuration tab.
8. From the MB power drop-down list, select Automatic or Always on.
Automatic: MasterBus power will be switched off when the main current is in between 1.0A and -
1.0A for more than 24 hours and the battery voltage has dropped below the float voltage.
Always on: the MLI Ultra will always power the MasterBus network. Note that this will slowly
drain the battery.
9. Close MasterAdjust.
 Loading...