PIPETTOR REASSEMBLY
8 /
Autoclaving
O-ring Replacement
O-rings do not require replacement after autoclaving; however, the
o-rings may require replacement if liquids have been overfilled into
the cylinder of the pipettor. In this case, the o-rings should be
removed prior to autoclaving. Spare o-ring packs are available
through Matrix Technologies for all pipettor volumes.
1. Remove old o-rings
• 1250 ul, 850 ul, 250 ul Pipettors: O-rings can be removed
from the pistons by squeezing one side of the o-ring and
lifting it out of the o-ring groove on the piston. Once
removed, the o-rings should be discarded as biohazardous
waste.
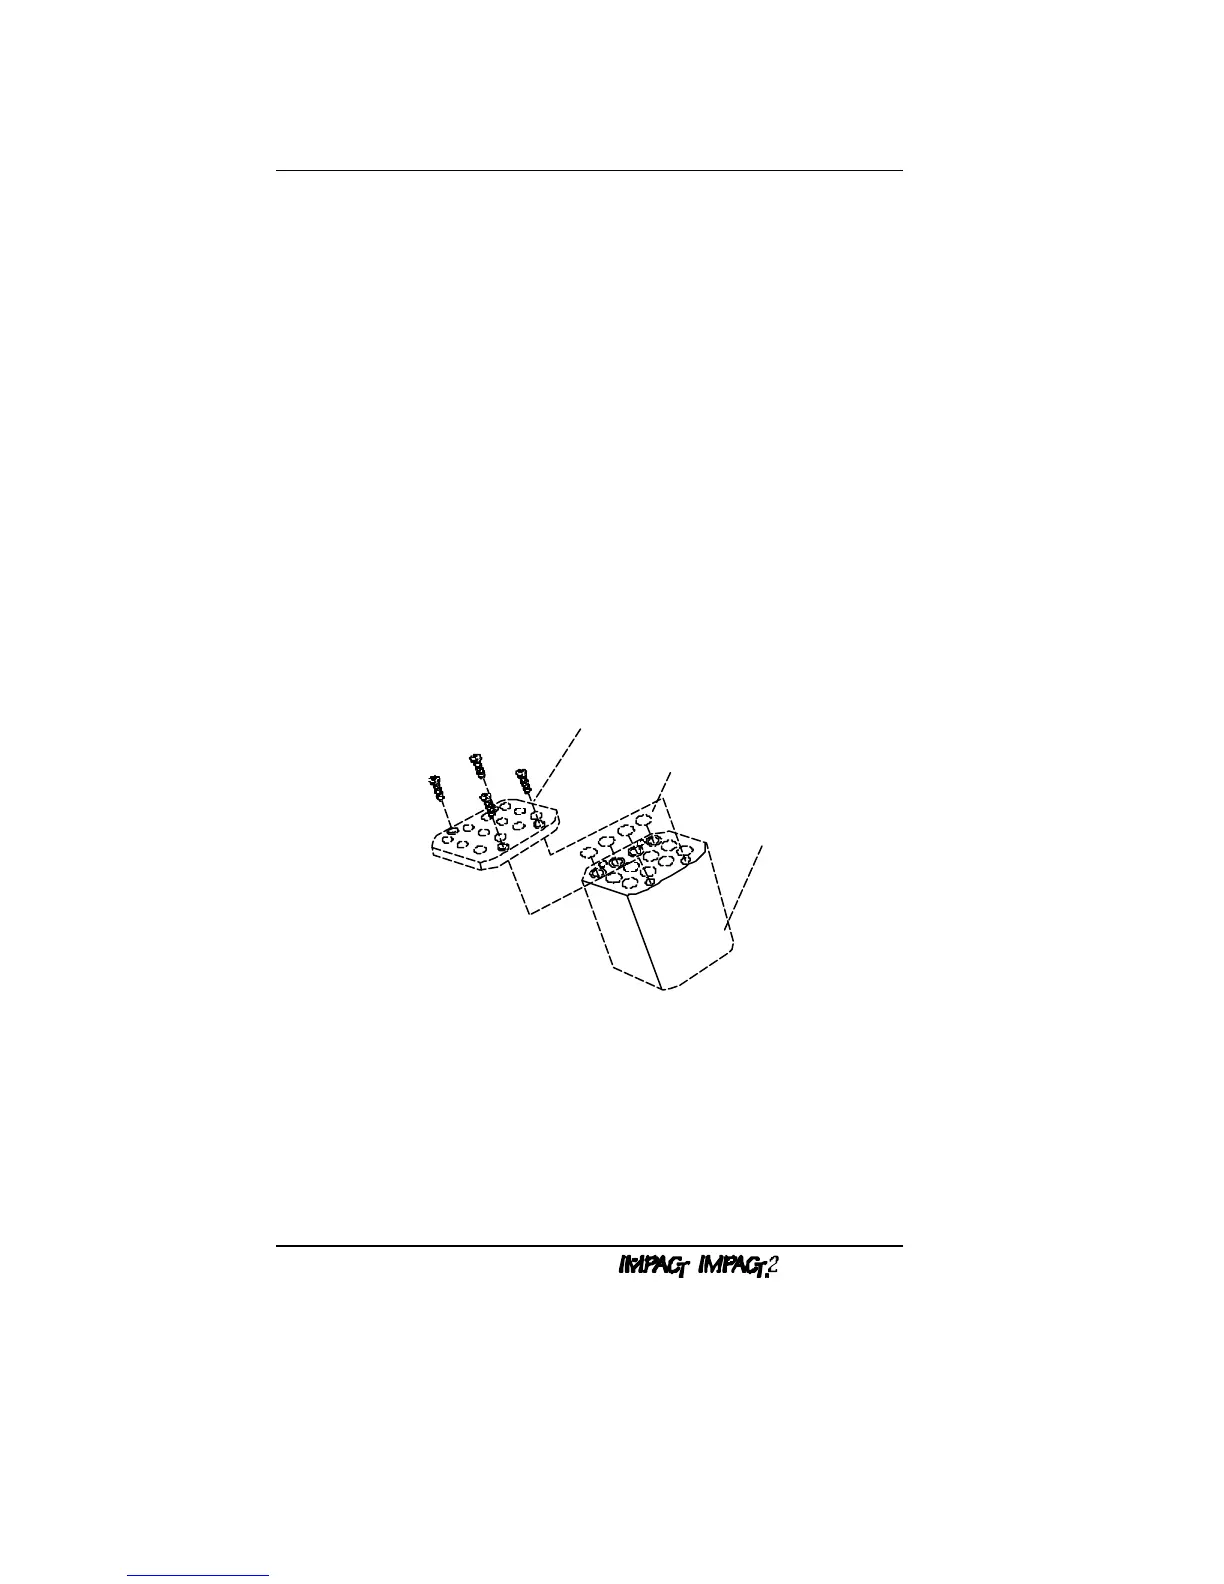
• 125 ul, 12.5 ul Pipettors: O-rings from these pipettors are
located in the cylinder. To remove the o-rings, unscrew the
four screws that hold the cylinder cap to the cylinder (see
Figure 6). Once removed, the o-rings should be discarded
as biohazardous waste.
Cylinder Cap
O-rings
Cylinder
Figure 6: Removing O-rings
2. Install new o-rings
After the old o-rings have been removed and all components
have been autoclaved, the new o-rings may be installed.
Before installing the o-rings, apply a thin coat of lubricant to
each o-ring, using the o-ring lubricant supplied in the Autoclave
Kit.