PIPETTOR REASSEMBLY
/
Autoclaving
13
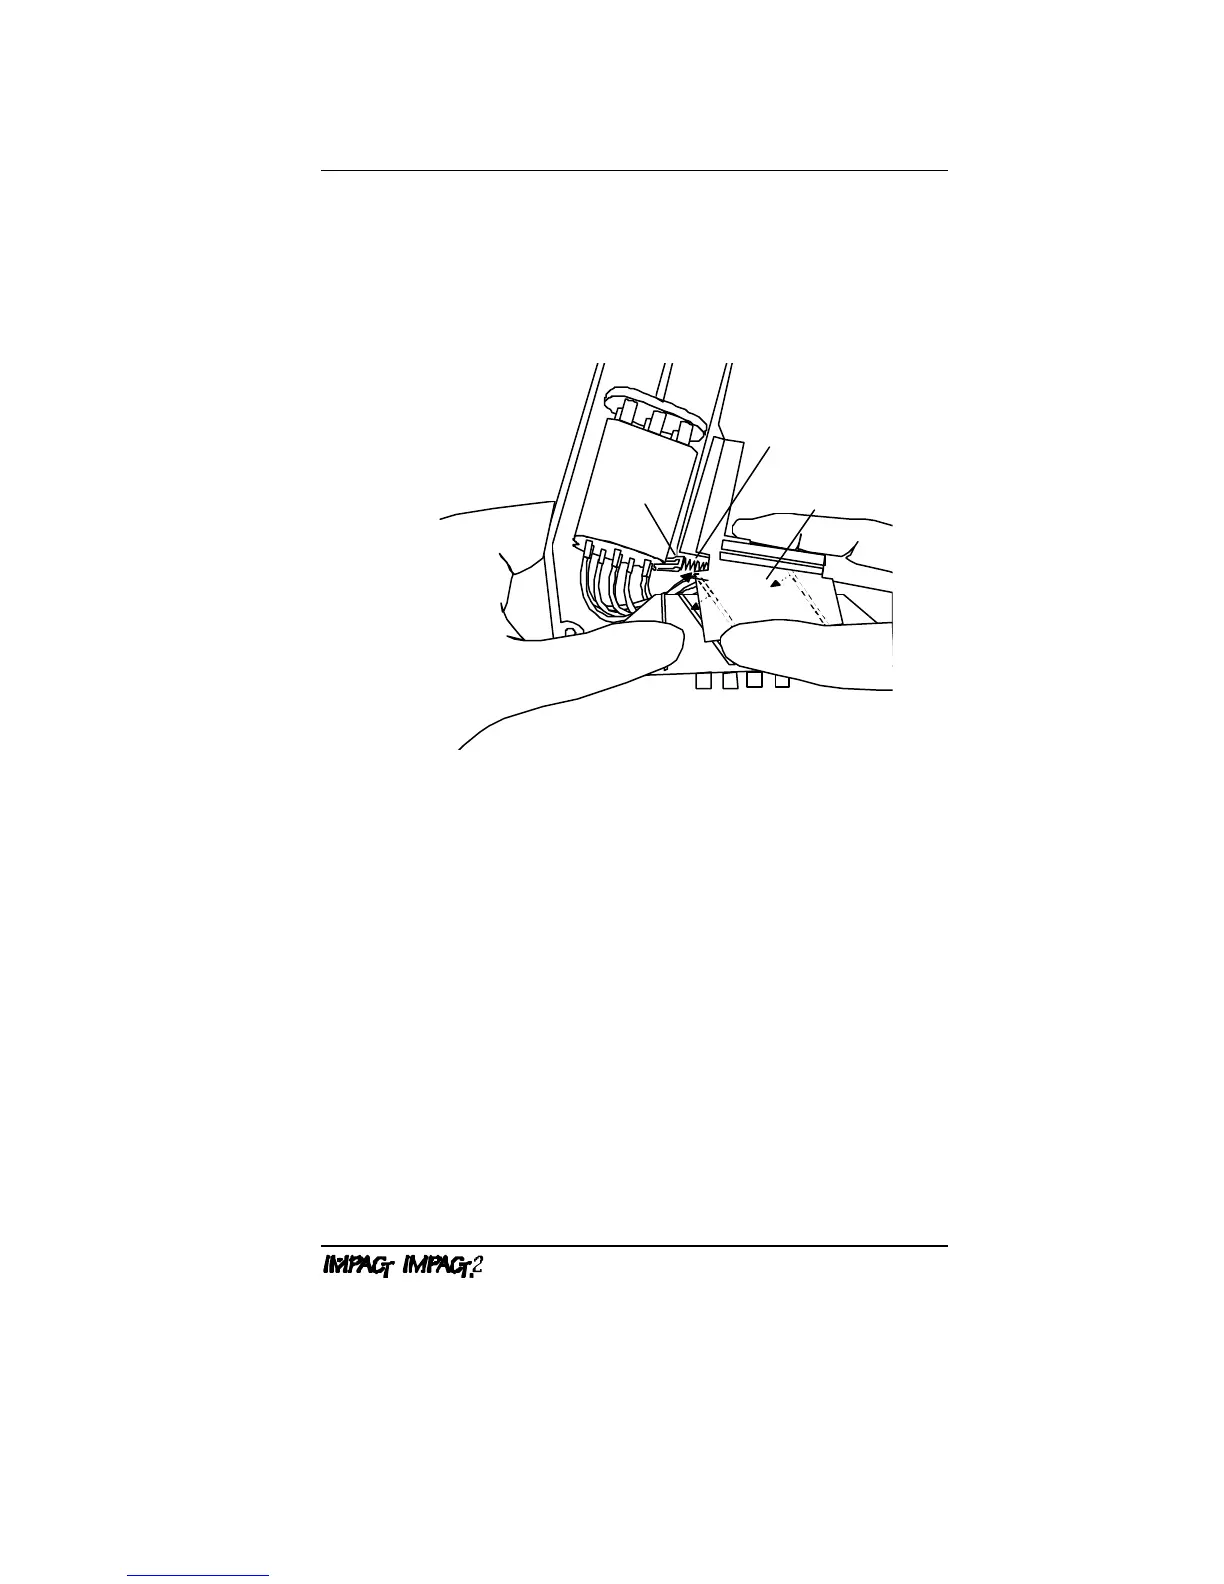
5. Hold the ejector comb in place while inserting the ejector
trigger (see Figure 13). Place the end of the ejector spring
against the plastic stop and compress the spring while
positioning the ejector trigger over the aluminum ejector
comb (the ribs on the ejector trigger should mate with the
slots on the aluminum ejector comb).
Ejector Spring
Plastic Stop
Ejector Trigger
Figure 13: Inserting Ejector Trigger
NOTE: Be careful not to pinch the crosstubes when
inserting the ejector trigger.
Test the ejector trigger to ensure that the ejector comb
moves down when the trigger is pressed (hold the ejector
comb firmly in place while testing the trigger).
6. Place the cover housing onto the main housing and fasten
the three screws.
7. Re-attach the color ring.
The pipettor is now ready for use.