Maintenance – Ink-Bottle Replacement
T50/T100 PTM – User Guide – Version 2 Issue 1
28
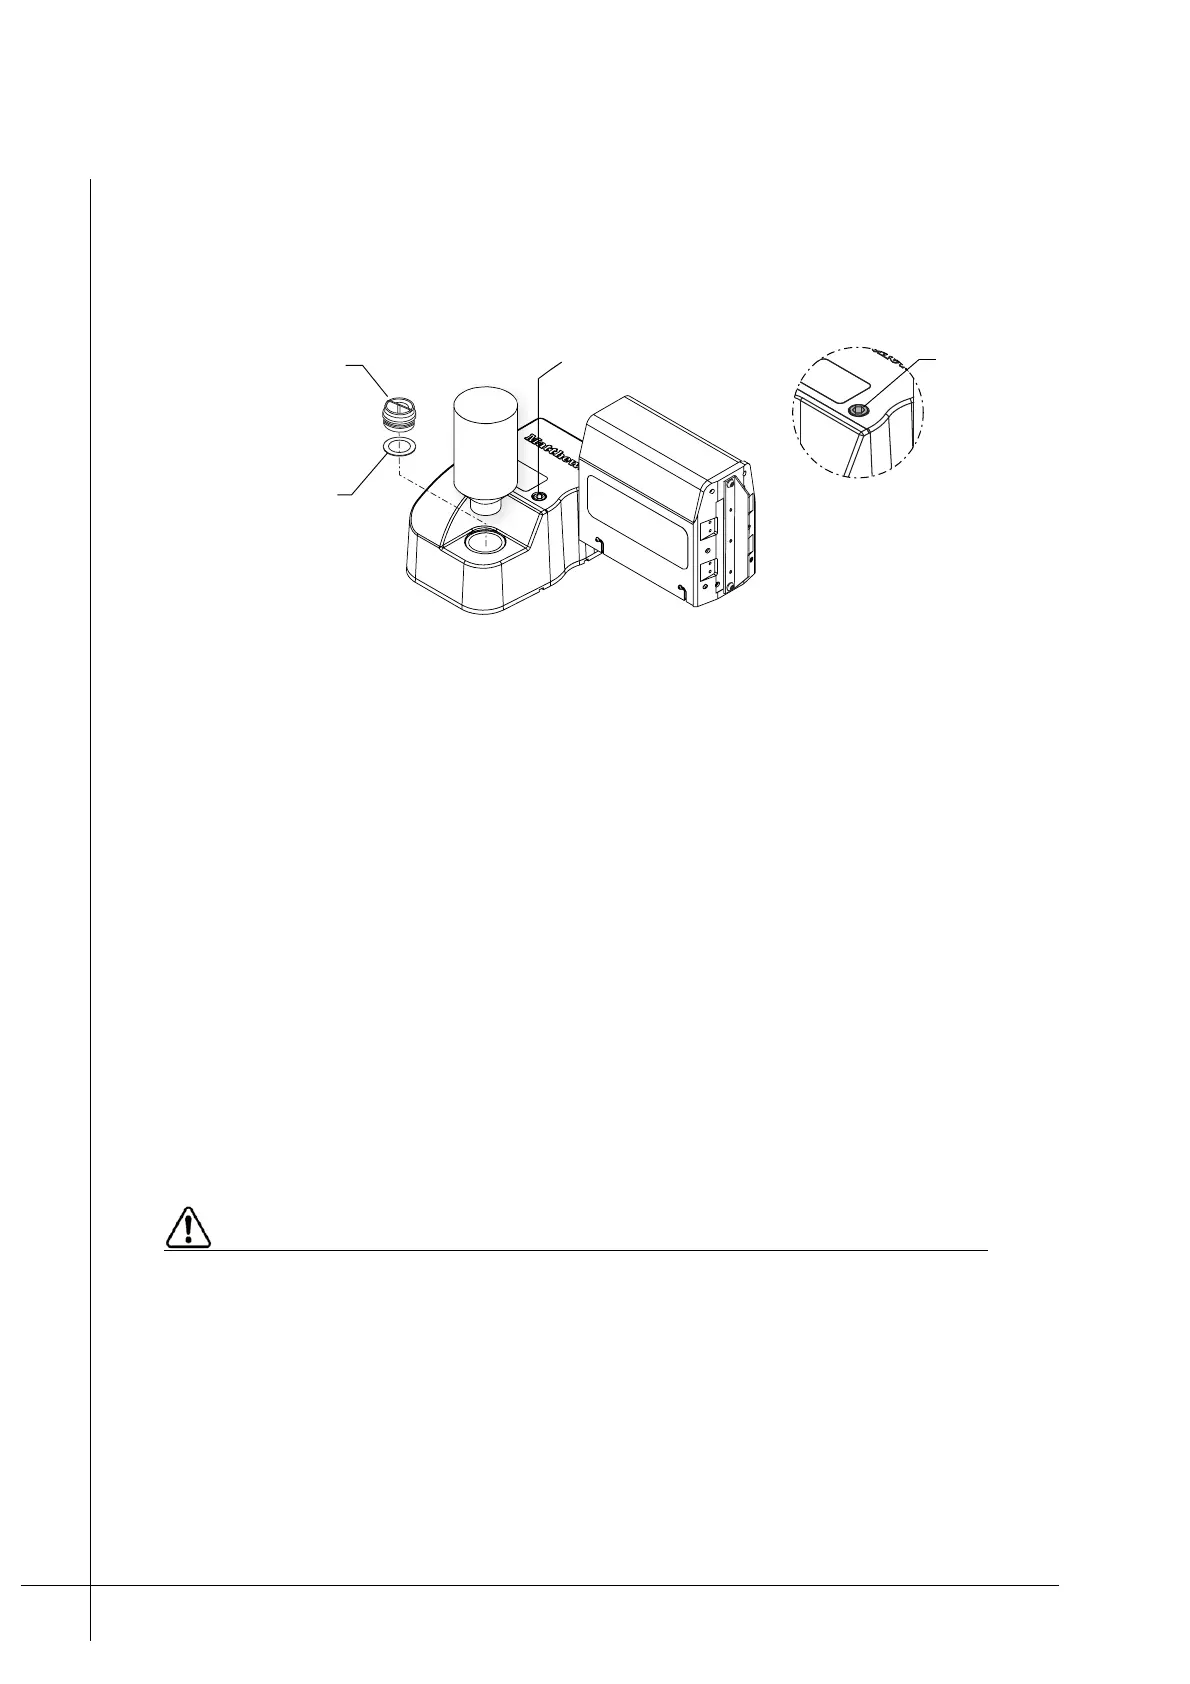
Caution: Failure to mount the Nozzle-Protector-Plate can lead to damage of the
PTM.
4. Turn the Ink-Vent-Screw fully clockwise. Do not overtighten it, use forefinger and thumb
force only.
Figure 23 - Preparing for moving, shipping, or storage
5. Unscrew and remove the Ink-Bottle from the Ink-Inlet.
6. Make sure that the Ink-Inlet-Seal, inside the Ink-Inlet, is correctly seated and then screw
Ink-Reservoir-Cap in to the Ink-Inlet. Make sure that it is hand tight.
If storing or shipping the PTM continue from Step 7, otherwise the PTM is ready and no
further action is required.
7. Carefully put one plastic bag around the Head and one around the Ink-Reservoir. Use
elastic bands to seal and secure the plastic bags on to the PTM.
Note: The plastic bags will catch any ink spillage that may occur during transport.
8. Place the PTM inside its original packaging and seal it, so that it is securely protected
from being impacted or otherwise damaged.
The PTM is now ready for storage or shipping.
Ink-Bottle Replacement
Use only Matthews approved inks. If any other ink type is used it may cause damage to
the PTM and void the warranty.
The Ink-Bottle should be replaced whenever the INK LED is lit Orange, indicating that the
ink level is low. To replace the bottle simply unscrew it, anti-clock-wise, and then replace it
with a new one.
The Ink-Bottle’s opening is fitted with a push valve which is pushed in whenever the bottle is
screwed in to the Ink-Inlet.
Ink-Vent-Screw
closed when
level with the
cover
Ink-Vent-Screw
Ink-Reservoir-Cap
Ink-Inlet-Seal