21
T50/T100 PTM – User Guide – Version 2 Issue 1
Installation – Commissioning a T50/T100 PTM
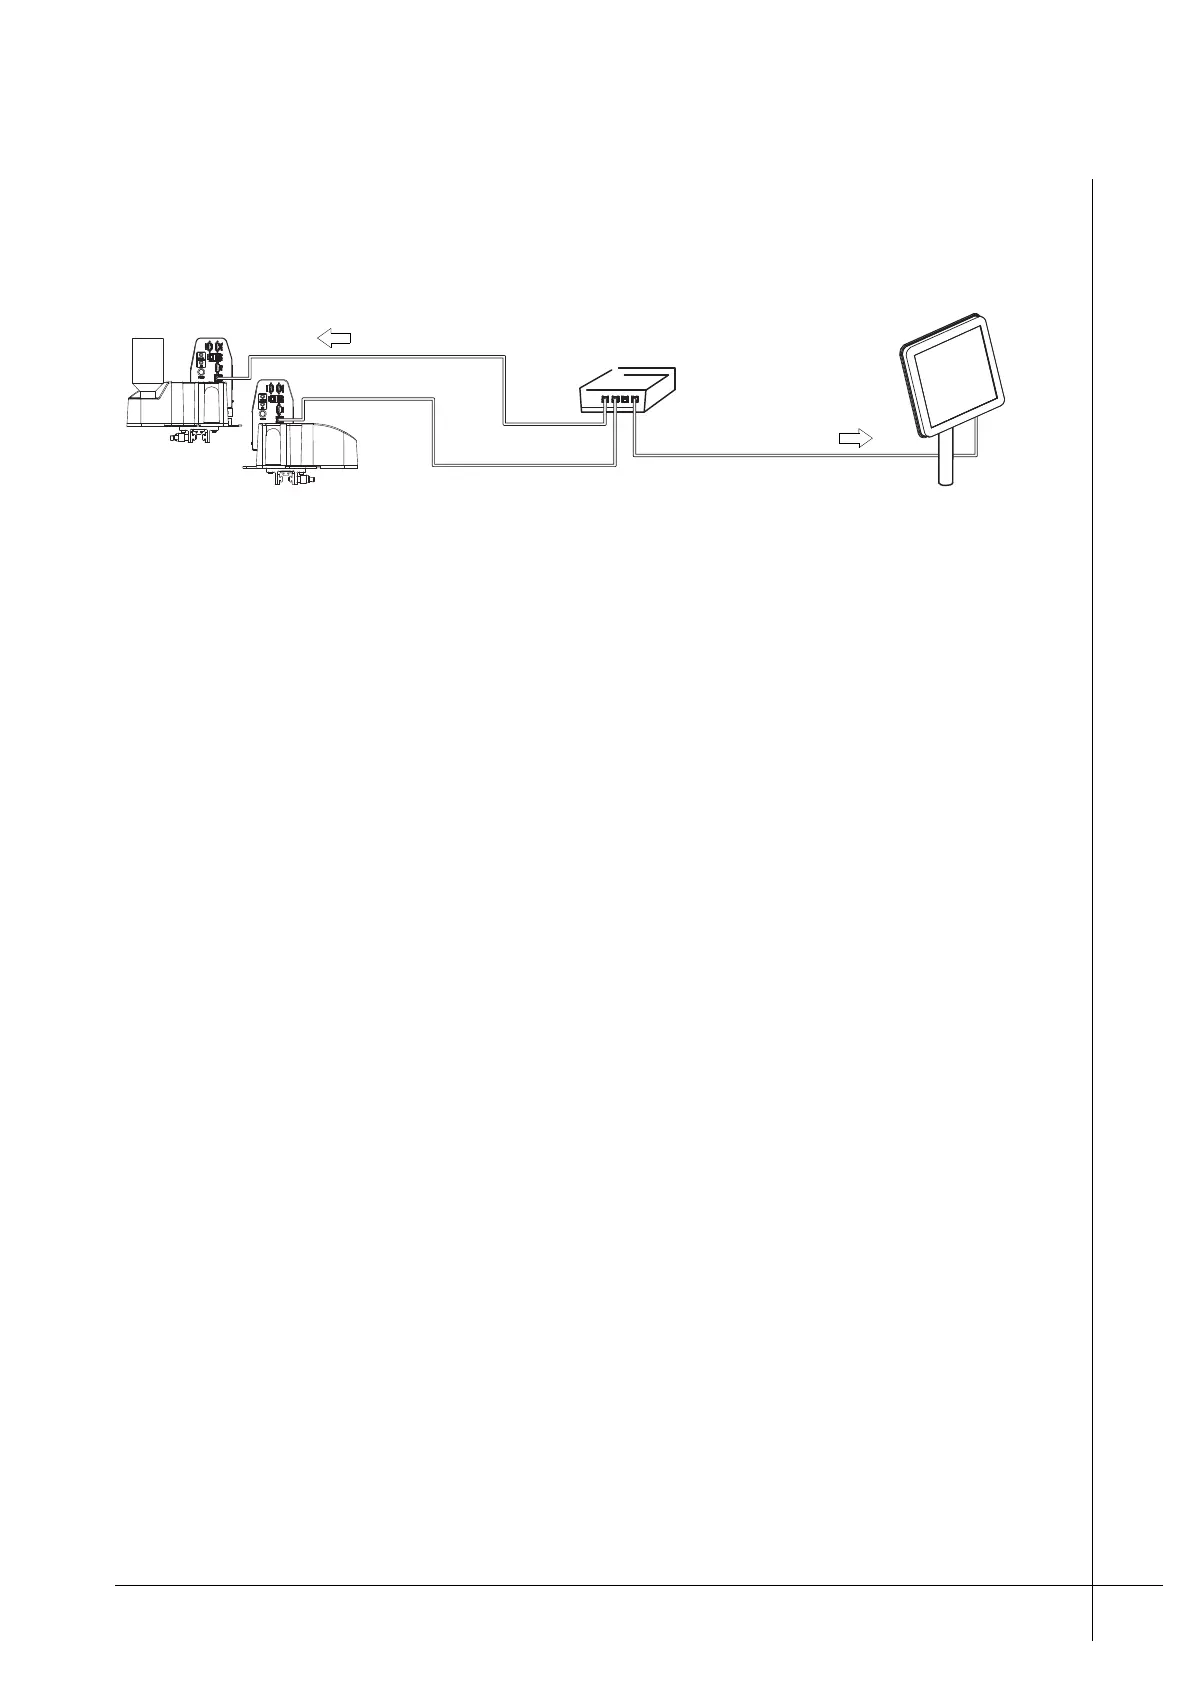
If more than one print head is used they must first be connected to a Matthews Ethernet
switch and then to a PCM, as shown below.
Figure 19 - Connecting two or more heads to a PCM
The maximum distance between the print heads and the switch is 100 m. The maximum
distance between the switch and the PCM is also 100 m.
Print heads are connected to the RJ-45 connection that is labelled "Printer Network" on the
PCM’s interface panel. This connection must be used only for Viacode devices. It is a
proprietary network. Do not connect Viacode devices to any other connection.
The Ethernet cable is connected to the RJ-45 connections labelled "Ethernet" on the print
heads.
Once print heads are connected they will be available for selection when configuring an
installation in the PCM. Further information regarding the operation and configuration of an
installation can be found in the PCM's Technical Manual.
Commissioning a T50/T100 PTM
The following procedure lists the required steps when installing a T50/T100 PTM for the first
time.
Procedure – Commissioning a T50/T100 Print Head
1. Make sure that the print head is correctly mounted as described under “Mounting the
Print Head” on page 16.
2. Turn the Ink-Vent-Screw, located on top of the Ink-Reservoir, fully anti-clock wise. The
Ink-Vent-Screw will protrude above the Ink-Reservoir when it is open, as shown in "Detail
A" below.
P
C
M
Ethernet switch
"Printer Network"
"Ethernet"
• Two or more T50/T100s