Repair Comet Executive Gas
7-30
Perform only when the unit is OFF
with power disconnected and COOL.
Remove Burner
1. Turn power OFF at the main disconnect
switch.
2. Turn OFF the gas supply to the unit.
3. Lockout and tagout both the electrical
and gas supplies following local work
rules and in compliance with government
standards.
4. Remove the protective backplate at the
rear of the unit. This piece should be
handled by two maintenance personnel.
5. Open both endframe doors.
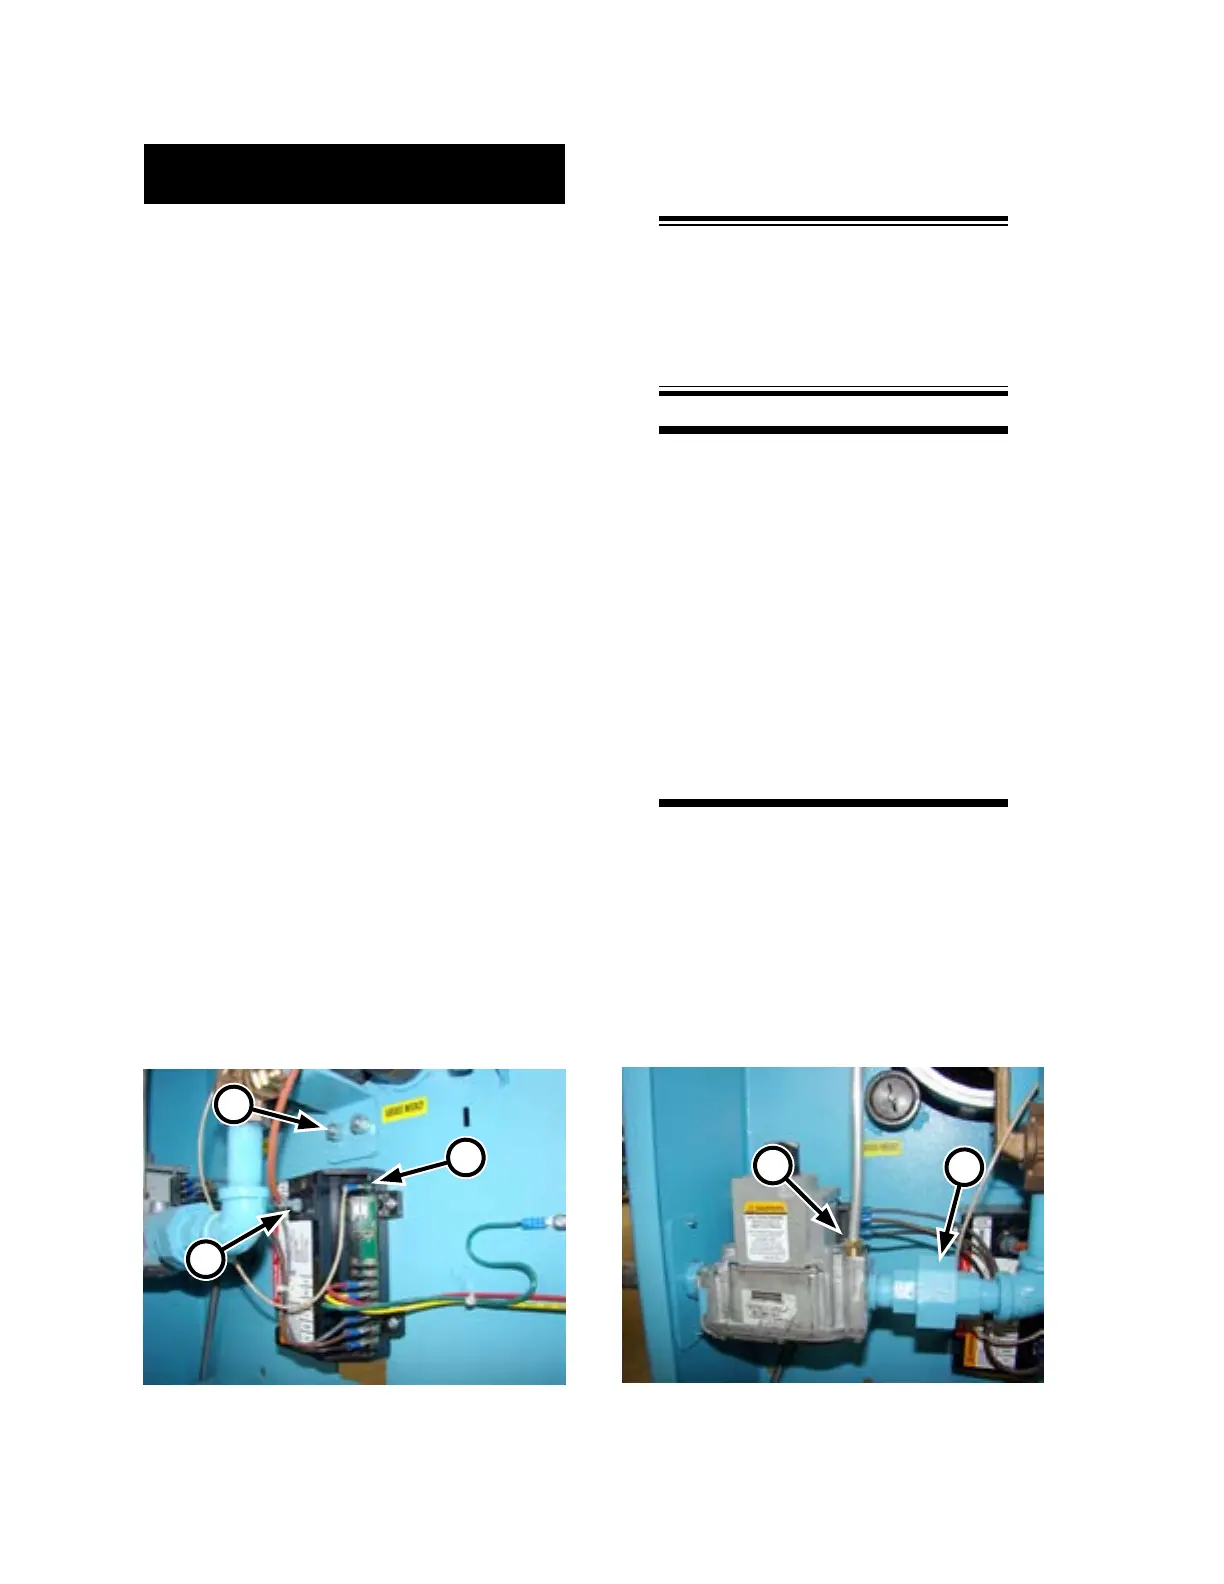
6. In the left endframe, note the specific
connection point for the ame sensor wire
(Figure 7-26, A) and the ignition electrode
wire (B) to the ignition control.
7. Disconnect each wire.
8. Disconnect the pilot gas line from the gas
valve (Figure 7-27, A).
9. Securely place a large C-clamp on the
burner assembly and use it as a hand-hold
to help balance and support the assembly.
10. Then, loosen the union (Figure 7-27, B)
between the gas valve and the burner.
NOTE: Three maintenance
people are required to remove
the burner assembly. Station one
person at the right end of the unit
and the other two at the left end.
WARNING
The burner assembly is
heavy and will rotate when it
is removed.
Make sure it is adequately
supported at both ends
during removal and
replacement and that there
are sucient personnel/
equipment to handle it to
prevent injury or damage.
11. Make sure a worker has a good hold on
the C-clamp and the burner assembly is
supported.
12. Finish disconnecting the gas union (Figure
7-27, B).
Figure 7-26: Disconnect the ame sensor and
ignition electrode wires.
B
C
A
Figure 7-27: Disconnect the pilot gas line at the gas
valve.
A
B