uNPACKING AND VERIFYING COMPONENTS
Copyright © 2017 McCrometer, Inc. All printed material should not be changed or altered without permission of
McCrometer. Any published technical data and instructions are subject to change without notice. Contact your McCrometer
representative for current technical data and instructions.
www.mccrometer.com
3255 WEST STETSON AVENUE • HEMET, CALIFORNIA 92545 USA Printed In the U.S.A.
TEL: 951-652-6811 • 800-220-2279 • FAX: 951-652-3078 Lit. # 30120-48 Rev. 2.4 / 11-5-18
2
1.0 UNPACKING AND VERIFYING COMPONENTS
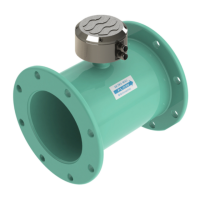
The FPI Mag® (Full Prole Insertion) ow meter provides accurate ow measurement for full-pipe clean water
applications. The electromagnetic sensor automatically senses and corrects for shifting velocity in the pipe by
constantly obtaining an area weighted mean velocity. Model 394L is a forward and reverse ow measurement
sensor, and the 395L is a forward only ow measurement sensor. The instrument has all of the features needed to
suit a wide variety of applications.
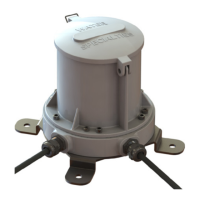
The ow meter is comprised of the innovative FPI Mag sensor (item #1 below) and a converter (item #4 below). For
converter installation instructions, see the manual provided for the converter purchased with your system.
The sensor is easily installed without service interruption, and requires no site calibration. Installation without
service interruption can be done only when adhering to safe hot-tapping procedures, or in locations already tted
with an appropriate full port ball valve, corporation stop or gate valve.
1.1 Unpack the Shipping Box and Verify Contents
Upon receiving the meter, unpack the contents of the shipping box and verify that the items in Figure 1 are
included.
NOTE: If any of the above-listed items are not present, contact the factory before continuing with installation.
Item # Qty. Description
1 2 Long threaded insertion rods
2 1 FPI Mag Sensor
3 2
Cables with Quick-Connects
(Compression cable glands are
available as an option)
4 1
FPI Mag Installation Operation and
Maintenance Manual
5 1
Converter Installation Operation and
maintenance Manual
6 2
9/16" or 3/4" reversible ratchet
wrench
7 1 Pipe thread sealant
8 8 Hex nut (3/8" or 1/2")
9 4 Locking cotter pin
10 1 Power cord (8', 115 VAC)
11 2 Protective cap for retaining rods
12 2 Short threaded retaining rods
13 1 Converter (M Series or L Series)
14 1 Stainless Steel ball valve & SS nipple
15 1 Calibration Certicate
Figure 1. Shipping Box Contents
3
14
1
2
12
15
11
13
4-10
Note: Do not discard the protective end caps (item 11). They will
be needed when the sensor is fully installed. See STEP 13.
i

 Loading...