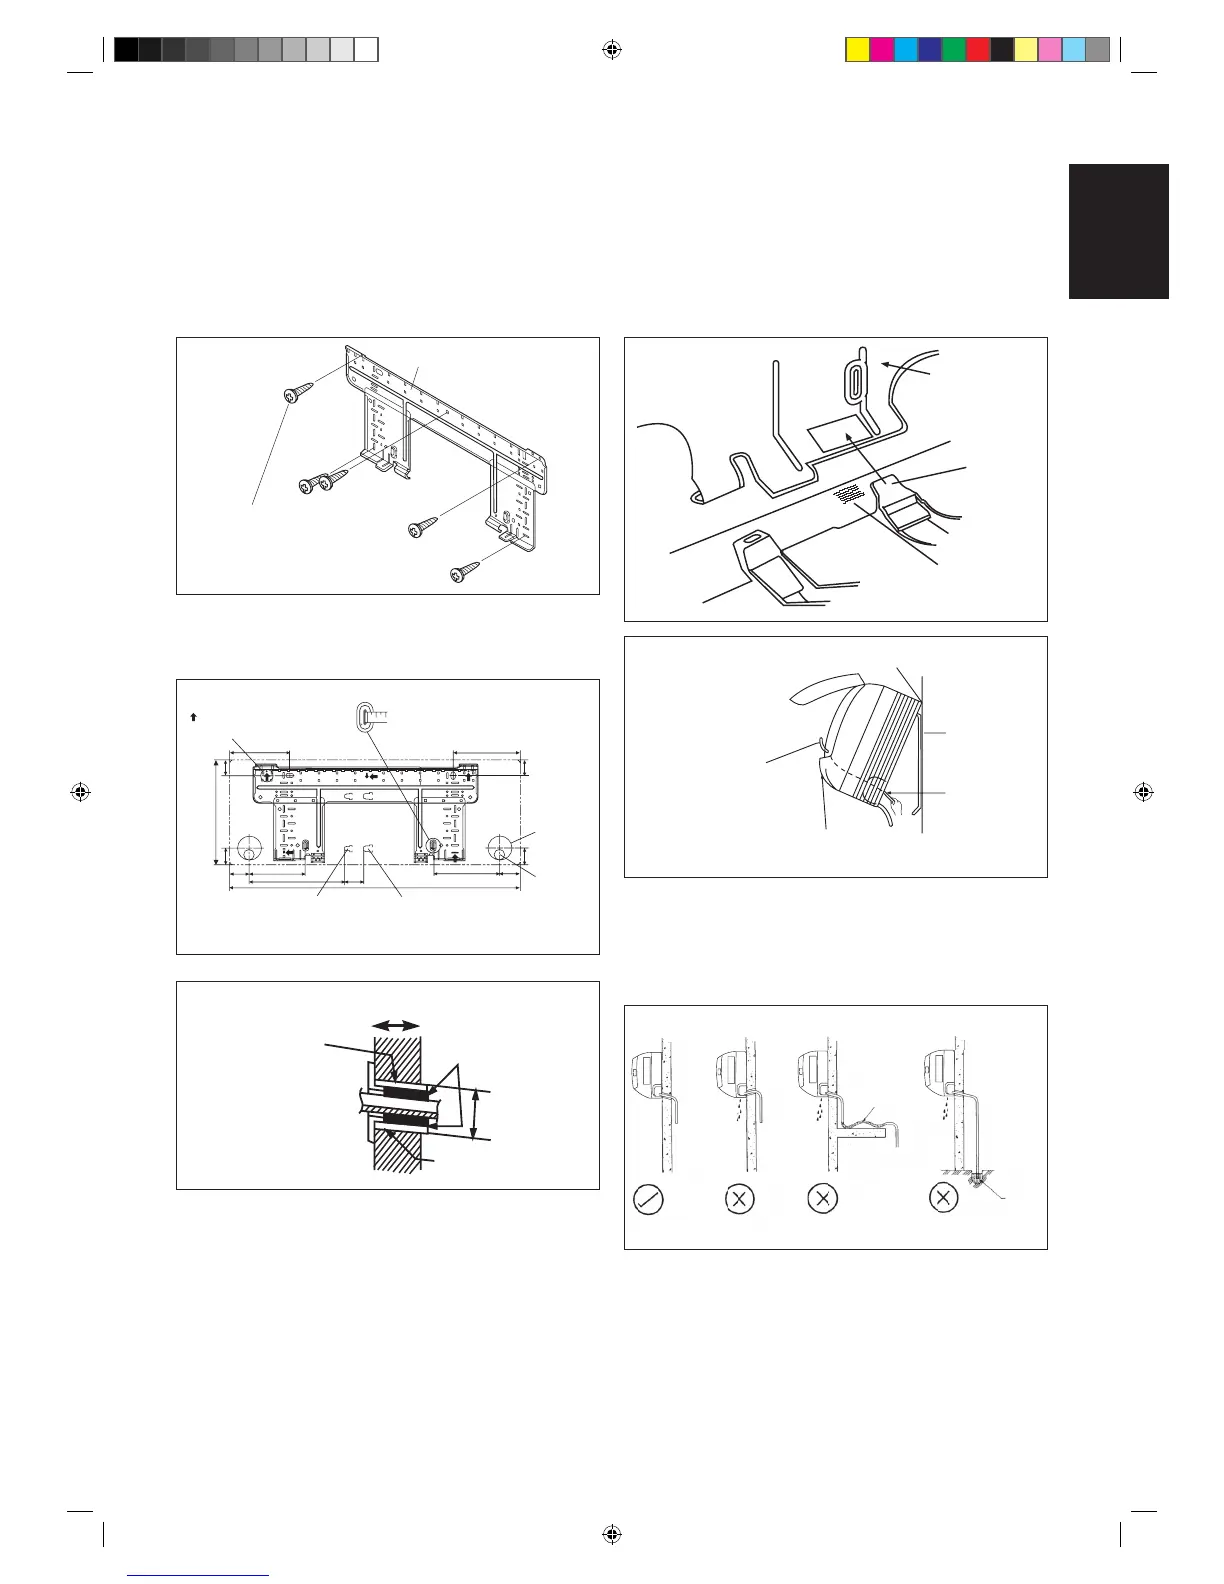
Mounting Installation Plate
Ensure that the wall is strong enough to withstand the
weight of the unit. Otherwise, it is necessary to reinforce
the wall with plates, beams or pillars.
Use the level gauge for horizontal mounting, and fix it
with 5 suitable screws.
In case the rear piping draws out, drill a hole 65mm in
diameter with a cone drill, slightly lower on the outside
wall (see figure).
166
184
181.7
55.554.5
153.8
263
51.9
800
9
.
5
4
2
.2
4
8
8
2
2
.
2
4
9
.
5
4
Recommended Mounting Plate Retention Spots And
Dimensions
Mount The Unit Onto The Installation Plate
Hook the indoor unit onto the upper portion of the
installation plate (Engage the two hooks at the rear top
of the indoor unit with the upper edge of the installation
plate). Ensure that the hooks are properly seated on the
installation plate by moving it to the left and right.
How To Attach The Indoor Unit
Hook the claws of the bottom frame to the mounting
plate.
How To Remove The Indoor Unit
Push up the marked area (at the lower part of the front
grille) to release the claws.
Water Drainage Piping
The indoor drain pipe must be in a downward gradient for
smooth drainage. Avoid situations that are likely to cause
water to leak.
Mounting plate
fixing screw
Mounting plate
Mounting plate
Clip
Mark (Rear side)
Bottom frame
Front grille
When stripping the ends
of interconnecting wires in
advance, bind right ends
of wires with insulating
tape.
Mounting plate
Hand indoor unit’s hook here.
Wire guide
Interconnecting
wires
Water Drainage
Correct Wrong Wrong Wrong
Water
Leaking
Water
Leaking
Water
Leaking
Water
Retention
End
dipped
into
water
Drain
Recommended mounting plate
retention spots (5 spots in all)
Use tape measure as shown.
Position the end of a tape
measure at
Through
the wall
hole
Ø 65mm
Drain
hose
position
Gas pipe endLiquid pipe end
All dimensions are in mm
Hole with cone drill
Wall embedded pipe
(Field supply)
Caulking
OutsideInside
Ø 65
Wall embedded pipe
(Field supply)
Wall hole cover
(Field supply)
Acson IM-WMJ-0109(0).indd 7 2009-4-8 9:10:12
 Loading...