Page 22 IM-738
Roof Curb Assembly and Installation
The roof curb and unit must be located on a portion of the roof
that can support the weight of the unit. The unit must be sup-
ported to prevent bending or twisting of the machine.
If building construction could allow the transmission of sound
and vibration into the occupied space, it is recommended that
the unit be located over a non critical area. It is the respon-
sibility of the system designer to make adequate provisions
for noise and vibration in the occupied space.
The curb and unit must be installed level to allow the conden-
sate drain to flow properly.
Integral supply and return air duct flanges are provided with
the RPS/RFS roof curb, allowing connection of ductwork to
the curb before the unit is set. The gasketed top surface of the
duct flanges seals against the unit when it is set on the curb.
These flanges must not support the total weight of the duct-
work. Refer to “Piping Recommendations” on page 35 for
details on duct connections. It is critical that the condensate
drain side of the unit be no higher than the opposite side.
Assembly of a typical RPS/RDT roof curb is shown in
Figure 22 on page 23. Parts A through K are common to all
units having bottom return openings. Depending on the unit
length, Parts L and M may be included with the roof curb kit to
create the correct overall curb length. Figure 21 shows the
assembly of the RCS roof curb.
RPS/RDT Assembly instructions
(Figure 22 on page 23)
1. Set curbing parts A through K per dimensions shown over
roof opening or on a level surface. Note location of return
and supply air openings.
2. If applicable, set other curbing parts (D, L, M, etc.) in
place making sure that the orientation complies with the
assembly instructions. Check alignment of all mating bolt
holes. See Detail "A".
3. Bolt curbing parts together using fasteners provided.
Tighten all bolts finger tight.
4. Square entire curbing assembly and securely tighten all bolts.
5. Position curb assembly over roof openings. Curb must be
level from side to side and over its length. Check that top
surface of the curb is flat with no bowing or sagging.
6. Weld curbing in place. Caulk all seams watertight.
Remove backing from 0.25" (6 mm) thick x 1.50" (38
mm) wide gasketing and apply to surfaces shown by
cross-hatching.
7. Flash curbing into roof as shown in Detail "B".
8. Parts E and F are not required on units with no return shaft
within the curb perimeter.
9. Parts G and H are not required on units with no supply
shaft within the curb perimeter.
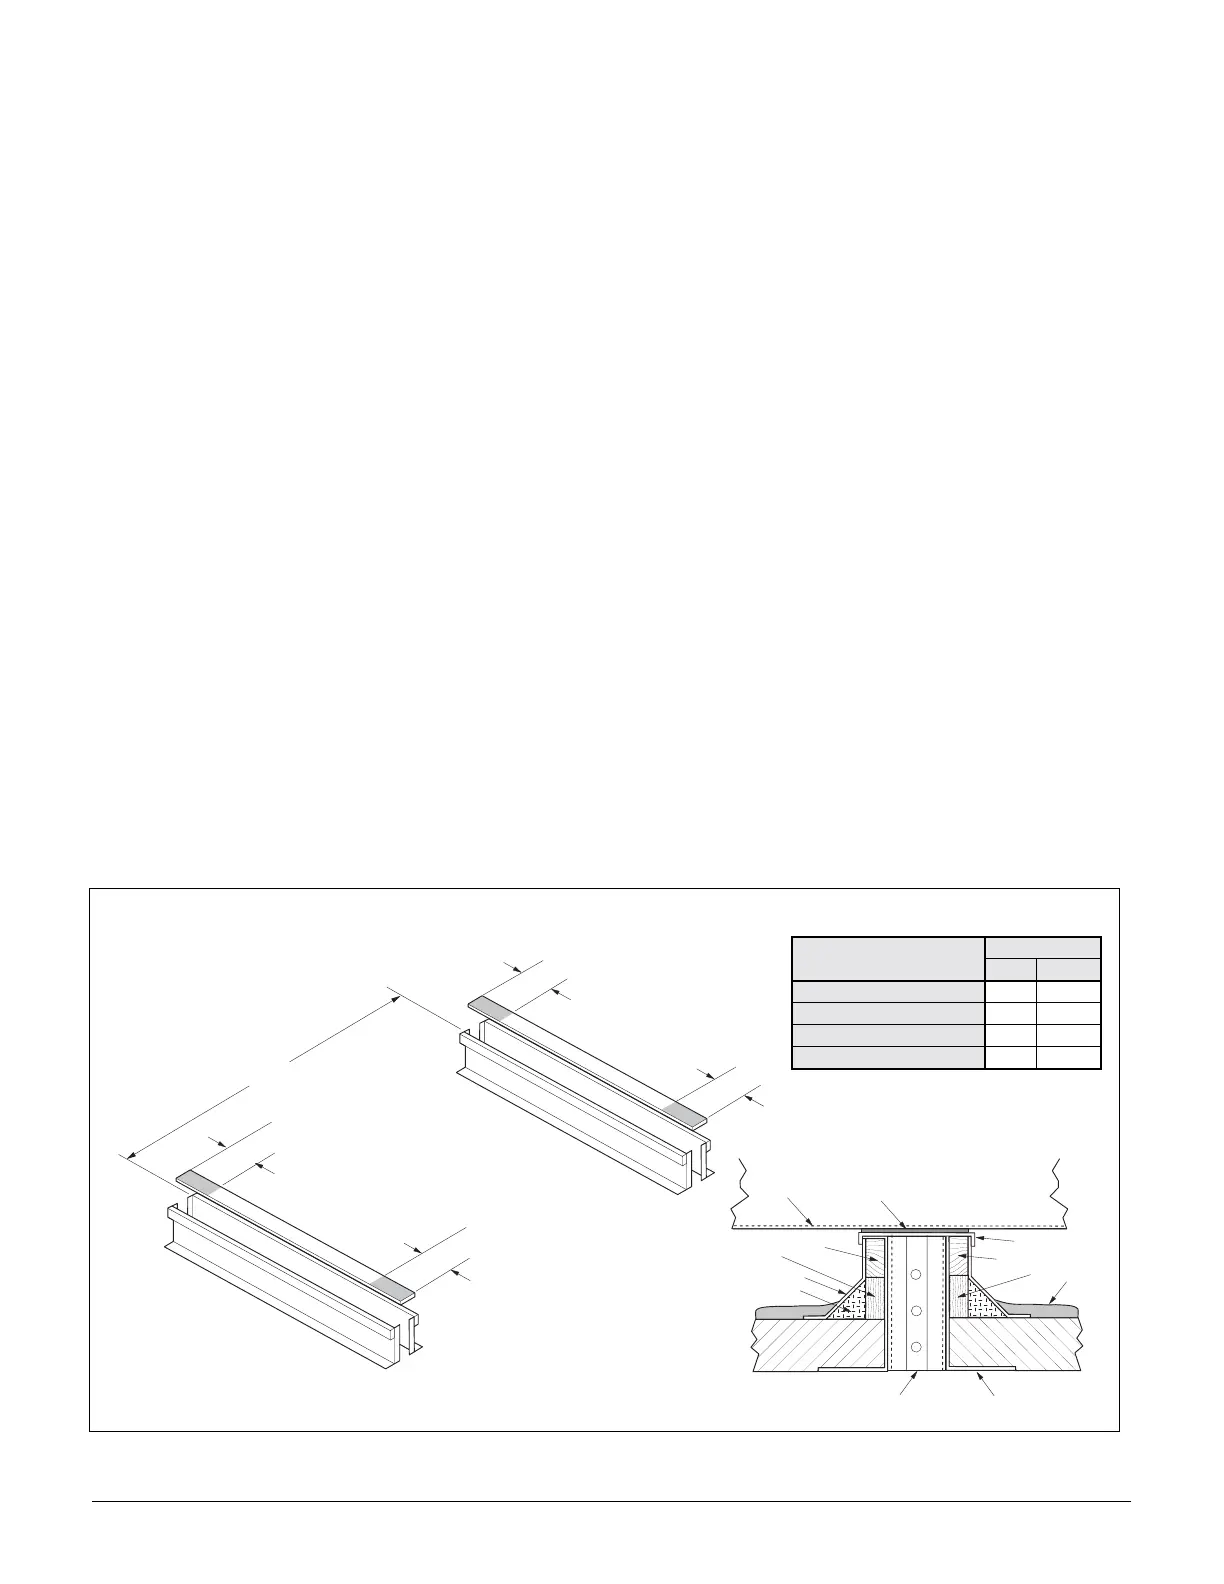
RCS Assembly instructions (Figure 21 )
1. Set curbing parts A in place making sure that the orienta-
tion complies with the assembly instructions. Check
alignment of all mating bolt holes.
2. Bolt curbing parts together using fasteners provided.
3. Curb must be level from side to side and over its length.
4. Weld curbing in place. Caulk all seams watertight and
insulate between channels.
5. Flash curbing into roof as shown in Detail C.
Figure 21. RCS Roof Curb Assembly
B
A
5
7
4
4
5
2
1 . U n i t B a s e
2 . G a l v a n i z e d C u r b
3 . G a l v a n i z e d C u i r b C o v e r
4 . 2 x 4 N a i l e r S t r i p
5 . R i g i d I n s u l a t i o n ( n o t f u r n i s h e d )
6 . C a n t S t r i p ( n o t f u r n i s h e d )
7 . F l a s h i n g ( n o t f u r n i s h e d )
8 . C u r b G a s k e t i n g
9 . I n s u l a t i o n b e t w e e n
G a l v a n i z e d C u r b ( n o t f u r n i s h e d )
1 0 . R o o f i n g M a t e r i a l ( n o t f u r n i s h e d )
1
3
8
1 0
9
6
D e t a i l C
6 "
A
A
6 "
" Z Z "
6 "
6 "
A
B
RCS UNIT SIZE
“ZZ”
IN. MM
015C—030C 31.0 787
036C & 040C 94.0 2057
045C—060C 62.0 1575
070C—075C 100.0 2540