EasyManua.ls Logo

McQuay RPS User Manual

McQuay RPS
100 pages
To Next Page IconTo Next Page
Page #1 background imageLoading...
Page #1 background image
IM-738 Page 1
Installation and Maintenance Manual IM-738
Group: Applied Systems
Part Number: IM-738
Date: April 2002
RoofPak
®
Singlezone Roof Mounted
Heating and Cooling Units with Scroll Compressors
RPS/RDT/RFS/RCS 015-075C
© 2002 McQuay International

Table of Contents

Question and Answer IconNeed help?

Do you have a question about the McQuay RPS and is the answer not in the manual?

McQuay RPS Specifications

General IconGeneral
BrandMcQuay
ModelRPS
CategoryAir Handlers
LanguageEnglish

Summary

Introduction

Unit Nameplate

Describes location and information on the unit's nameplate.

Compressor Nameplate

Details about compressor nameplates on units with single or tandem compressors.

Gas Burner Nameplate

Location and information on the gas burner nameplate for units with gas heat.

Hazard Identification Information

Provides warnings and cautions for potentially hazardous situations during installation and operation.

Nomenclature

Explains the coding system for unit model numbers and their components.

Unit Description

Typical Component Locations

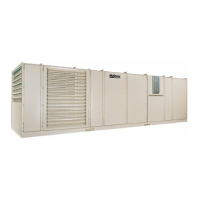
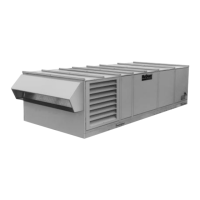
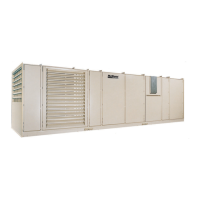
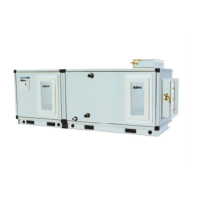
Illustrates locations of major components in RPS and RDT units.

Condenser Fan Arrangement

Refrigerant Circuit Schematic

Provides a schematic diagram of the unit's refrigerant circuit and lists component definitions.

Refrigeration Piping

Legend

Lists and describes components used in the condenser piping diagrams.

Control Locations

Figure 7. Control Locations - RPS Units

Diagram showing control component locations on RPS units.

Control Locations

Figure 8. Control Locations - RDT Units

Diagram showing control component locations on RDT units.

Control Panel Locations

Figure 9. Control Panel Locations

Illustrates the locations of main and condenser control panels on typical unit configurations.

Main Control Panel Diagrams

Figure 10. Main Control Panel - 015 - 040"

Schematic of the main control panel layout for units sizes 015 through 040.

Main Control Panel Diagrams

Figure 11. Main Control Panel - 045 - 075

Schematic of the main control panel layout for units sizes 045 through 075.

Condenser Control Panel Diagrams

Figure 12. Condenser Control Panel with MicroTech II (015C thru 030C)

Diagram of the condenser control panel with MicroTech II for sizes 015-030C.

Figure 13. Condenser Control Panel with MicroTech II (036C thru 060C)

Diagram of the condenser control panel with MicroTech II for sizes 036-060C.

Condenser Control Panel Diagrams

Figure 14. Condenser Control Panel with MicroTech II (045 thru 075)

Diagram of the condenser control panel with MicroTech II for sizes 045-075.

Figure 15. Condenser Control Panel with No Controls - RPS (036 thu 075)

Diagram of the condenser control panel without controls for RPS units 036-075.

Figure 16. Condenser Control Panel with No Controls - RPS (015 thu 030)

Diagram of the condenser control panel without controls for RPS units 015-030.

Electric Heat Control Panel Diagrams

Figure 17. Electric Heat Control Panel - sizes 15 - 40C

Diagram of the electric heat control panel for sizes 15-40C.

Figure 18. Electric Heat Control Panel - Sizes 45 - 75C

Diagram of the electric heat control panel for sizes 45-75C.

Controls, Settings and Functions

Table 3: Controls, settings and functions

Lists unit control devices, their symbols, descriptions, functions, and locations.

Controls, Settings and Functions

Table 4: Controls, settings and functions (continued)

Continues the list of unit control devices, their symbols, descriptions, functions, and locations.

Mechanical Installation

Receiving Inspection

Instructions for checking equipment upon receipt for damage and completeness.

Unit Clearances

Specifies required clearances for service access and walkways around the unit.

Ventilation Clearance

Unit(s) surrounded by a screen or a fence:

Specifies clearance requirements for units enclosed by screens or fences.

Unit(s) surrounded by solid walls:

Specifies clearance requirements for units enclosed by solid walls.

Overhead clearance

Roof Curb Assembly and Installation

RCS Assembly instructions

Step-by-step instructions for assembling RCS roof curbs.

RPS/RDT Assembly instructions

Step-by-step instructions for assembling RPS/RDT roof curbs.

RPS/RFS Roof Curb Assembly

Figure 22. RPS/RFS Roof Curb Assembly

Detailed illustration of the RPS/RFS roof curb assembly.

Post and Rail Mounting

Rigging and Handling

Provides instructions and warnings for lifting and handling the unit safely.

Figure 24. Rigging and Handling Instruction Label

Shows an example of the rigging instruction label shipped with the unit.

Lifting Points

Table 5: "X" Dimension (see Figure 25 & Figure 26)

Table providing "X" dimension values for various unit sizes and configurations.

Table 6: "Y" Dimension (see Figure 25 & Figure 26)

Table providing "Y" dimension values for various unit sizes.

RPS Factory Split at Condenser

Phase 1. Setting the Sections and Cabinet Reassembly

Steps for setting and reassembling the unit cabinet after a factory split.

Phase 2. Reconnecting Refrigerant Piping

Instructions for reconnecting refrigerant piping between split sections.

Phase 3. Reconnecting Power and Control Wiring

Steps for reconnecting power and control wiring after a factory split.

RPS/RDT Split at Condenser Reassembly

Step 2. Install condenser supports as shown in Figure 33.

Instructions for installing condenser supports during reassembly.

Step 3. Set the condensing unit in place as shown in Figure 34.

Instructions for positioning the condensing unit during reassembly.

Step 4. After condensing unit is set in place, install parts as shown in Figure 35.

Step 5. Make refrigerant piping and electrical connections.

Reconnecting Power and Control Wiring

Figure 36. Connecting Power and Control Wiring (015-040)

Diagram for connecting power and control wiring on units 015-040.

Figure 37. Connecting Power and Control Wiring (045-075)

Diagram for connecting power and control wiring on units 045-075.

Figure 38. Remove Vertical Raceway

Illustration showing how to remove the vertical raceway for wiring access.

RPS/RDT Factory Split at Fan

Phase 1. Setting the Sections and Cabinet Reassembly

Steps for setting and reassembling the cabinet after a fan split.

Phase 2. Reconnecting Power and Control Wiring

Instructions for reconnecting power and control wiring after a fan split.

Step 2. Set fan end of unit and discharge end of unit in place.

Step 3. Caulk and install parts as shown in Figure 40.

Step 4. Make electrical connections and reinstall Inner Raceway Cover as shown in Figure 41.

Piping Recommendations

Table 9: Minimum tonnage (R-22) to carry oil up suction riser at 40°F saturated suction

Table listing minimum tonnage required to carry oil up suction risers.

Leak Testing

Evacuation

Refrigeration Service Valves

Discharge Valve -

Describes the location of the discharge valve.

Liquid Valve -

Describes the location of the liquid valve.

Charging the System

Refrigerant Charge

Details on calculating and verifying the total refrigerant charge per circuit.

Subcooling

Condensate Drain Connection

Figure 42. Condensate drain connection

Diagram illustrating the condensate drain connection and recommended dimensions.

Unit Piping

Gas Piping

Refers to installation manual for gas furnace piping.

Fuel Oil Piping

Refers to installation manual for oil furnace piping.

Hot Water Coil Piping

Discusses hot water coil piping, valve options, and potential issues.

Steam Coil Piping

Steam Piping Recommendations

Steam Trap Recommendations

Steam Coil Freeze Conditions

Damper Assemblies

Economizer Dampers

Details on economizer damper operation, adjustment, and linkage.

Figure 46. Damper Adjustment

Illustration and notes on adjusting damper linkages for proper airflow control.

Intake Hood Damper (0 to 100% outside air)

Intake Hood Damper (0 to 30% outside air)

Figure 47. Intake Hood Damper Adjustment.

Illustration of intake hood damper adjustment.

Cabinet Weatherproofing

Installing Ductwork

Installing Duct Static Pressure Sensor Taps

Duct Static Pressure Sensor Tap Installation Recommendations

Recommendations for locating and installing duct static pressure sensor taps.

Electrical Installation

Field Power Wiring

Details on complying with codes, wiring, and protection for field power wiring.

Figure 52. RPS/RDT and RFS Power Wiring Connections

Diagram showing power wiring connections for RPS/RDT and RFS units.

Figure 53. Optional Side Power Wiring Entrance

Illustration of optional side power cable entrance location and dimensions.

Fan Trol

Table 14: FanTrol Setpoints in °F with MicroTech II Controls

Table of FanTrol setpoints for MicroTech II controlled units.

Table 15: FanTrol Setpoints - units with no Controls - Or pre-MicroTech II Controls

Table of FanTrol setpoints for units without MicroTech II or older controls.

Figure 54. RCS 015C-030C Power Wiring Connections

Figure 55. RCS 036C & 040C Power Wiring Connections

Figure 56. RCS 045 - 075 Power Wiring Connections

Table 16: Multiple Point Power Connection Options

Table listing options for multiple point power connections.

Table 17: Recommended 3-phase power wiring*

Table providing recommendations for 3-phase power wiring sizes.

Field Control Wiring

RPS,RDT and RFS Units

Describes field control wiring connections for RPS, RDT, and RFS units.

RFS/RCS Units

Details control wiring between RFS and RCS units.

Figure 57. RDT, RFS, RPS Field Control Wiring Connections

Diagram showing field control wiring connections for RDT, RFS, and RPS units.

Figure 58. RFS and RPS Interconnecting Control Wiring

Diagram showing interconnecting control wiring between RFS and RPS units.

Preparing Unit for Operation

Relief Damper Tie-Down

Instructions for removing tie-downs from relief dampers for proper operation.

Spring Isolated Fans

Procedures for releasing and adjusting spring mounts for fans.

Adjustment of Scroll Dampers

Figure 62. Scroll Damper Adjustment

Illustration showing how to adjust scroll dampers for air volume control.

Adjustment of Supply Fan Thrust Restraints

Figure 63. Thrust restraint adjustment

Diagram showing how to adjust thrust restraints for spring-mounted fans.

Adjustment of Seismic Restraints

Figure 64. Cross Section of Seismic Restraint

Illustration showing the cross-section and adjustment of seismic restraints.

Sequences of Operation

Power-up

Describes the initial power-up sequence and energizing of unit components.

Fan Operation

Explains the sequence of operation for supply and return fans.

Economizer Operation

Details the sequence of operation for the economizer based on enthalpy conditions.

Mechanical Cooling Operation

4-Compressor/4 Stage Unit

Explains the mechanical cooling operation for 4-compressor/4-stage units.

Cross Circuit Loading

Discusses how compressors are loaded across different circuits.

Heating

Gas Furnace, Modulating Burner (3 to 1 turn down)

Explains the sequence of operation for gas furnaces with modulating burners.

Safety Lockout

Describes conditions that cause safety lockout for the gas furnace.

Wiring Diagrams

Legend

Provides a legend for component designations used in wiring diagrams.

Typical Power Circuit Wiring (6 Compressor Arrangement with VFD Shown)

Typical Main Circuit Wiring (with Inlet Vane and Controls by Others)

Typical Main Circuit Wiring (with VFD and Controls by Others)

Typical Condensing Unit Control for RPS with MicroTech II Control (4 Compressor Unit Shown. RCS Has Minor Variations)

Typical Supply / Return Fan Control Circuit Wiring (No Controls)

Figure 60. Typical Supply / Return Fan Control Circuit Wiring (No Controls)

Diagram of supply/return fan control wiring without controls.

Typical Electric Heater Control Circuit Wiring

Figure 60. Electric Heater Control Circuit Wiring

Diagrams illustrating electric heater control circuit wiring.

Typical Gas Furnace Control Circuit (Modulating Burner, Mixed Air Intake)

SEQUENCE OF OPERATION

Detailed sequence of operation for gas furnaces with modulating burners.

Unit Options

Enthalpy Control

Discusses enthalpy control options including OAE and differential control.

Low Ambient Start

Explains the function of the low ambient start option for compressors.

Ground Fault Protection

Details the ground fault protection system designed to protect motors.

Figure 65. Enthalpy control settings

Psychrometric chart illustrating enthalpy control settings.

Phase Voltage Monitor

Describes the phase voltage monitor function and its protection against voltage issues.

Hot Gas Bypass

Figure 67. Hot Gas Bypass System

Diagram illustrating the hot gas bypass system with its components.

Figure 66. Hot Gas Bypass Adjustment Range Chart

Chart showing the adjustment range for the hot gas bypass valve.

SpeedTrol (NA Unit Sizes 015C - 030C)

Figure 68. SpeedTrol Schematic

Schematic diagram of the SpeedTrol system for fan speed control.

External Time Clock

Smoke Detectors

Freeze Protection

Fan On Operation

Explains freeze protection operation when the fan is running.

Fan Off Operation

Explains freeze protection operation when the fan is off.

Mixed Air Temperature Alarm

Duct High Pressure Limit

Variable Inlet Vanes

Supply Fan Vane Adjustment

Instructions for adjusting supply fan inlet vanes for proper airflow.

Return Fan Vane Adjustment

Instructions for adjusting return fan inlet vanes for proper airflow.

Actuator Rotation Adjustment

Procedure for adjusting actuator rotation for proper vane operation.

Table 19: Applicable Actuator Linkage Configurations

Table showing applicable actuator linkage configurations for fan vane assemblies.

Figure 69. Supply Fan or Return Vane Assembly (RPS 15-40)

Figure 70. Return Fan Vane Assembly

Figure 71. Supply Fan Vane Assembly (RPS 45-075)

Figure 72. Return Fan Vane Assembly (40" Wheels)

Figure 73. Return Fan Vane Assembly (RPS - 44" Wheels)

Figure 74. Supply Fan Assembly (40" Wheels - RDT 45 - 075)

Figure 75. Supply Fan Vane Assembly (44" Wheels - RDT 45 - 135)

Variable Frequency Drive Operation

Convenience Receptacle/Section Lights

DesignFlow™™ Outdoor Air Damper Option

DesignFlow Airflow Measurement Station Startup:

Procedure for starting up the DesignFlow airflow measurement station.

Leveling

Figure 77. Tape Fulcrum Alignment Plate to Vane

Illustration showing how to tape the fulcrum alignment plate to the vane.

Figure 78. Place Leveling Weight on Fulcrum

Illustration showing how to place the leveling weight on the fulcrum.

Leveling Procedure Steps

Detailed steps for leveling the DesignFlow airflow measurement station.

Propeller Exhaust Fan Option

Figure 80. 2 Fans with Back Return Shown

Illustration of fans with back return configuration.

Prestarting Checks

Fan and Motor Assemblies

Checks for fan and motor assemblies, including fasteners and rotation.

Belts

Bearings

Motor Bearings

Fan Shaft Bearings

Table 23: Recommended Fan Shaft Bearing Lubrication Intervals

Table showing fan shaft bearing lubrication intervals based on ambient temperature.

Vibration Levels

Table 24: Vibration Levels

Table listing vibration levels for fan speeds.

Vibration Causes

Setscrews

Table 25: Setscrew Minimum Torque Specifications

Table listing minimum torque specifications for setscrews.

Return Fan Bearing Setscrews

Supply Fan Wheel-to-Funnel Alignment

Figure 96. 20" Airfoil Wheel-to-Funnel (015C-030C)

Illustration of 20" airfoil wheel-to-funnel alignment.

Figure 97. 24" Backward Curved Wheel-to-Funnel (036C, 040C)

Table 28: 44" Airfoil Wheel-to-Funnel Tolerances (RDT 045 -075)

Refrigerant Charge

Replacing Failed Refrigerant Sensors or Switches

Winterizing Water Coils

Replacement Parts List

Table 29: Microtech II Components Parts List

List of MicroTech II components and their part numbers.

Service and Warranty Procedure

Replacement Parts

Information required when ordering replacement parts from McQuay.

Compressor

Details on compressor types, replacement limitations, and decisions.

In-Warranty Return Material Procedure

Procedure for returning materials for in-warranty claims.

Limited Product Warranty (North America)

Exceptions

Lists exceptions to the product warranty coverage.

Assistance

Information on obtaining warranty assistance or information.

Sole Remedy

States that the warranty is the owner's sole remedy and disclaims other warranties.

Related product manuals