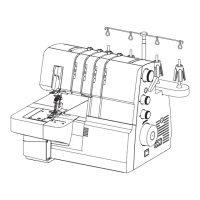
ON
OFF
2
1
2
4
3
6
1
5
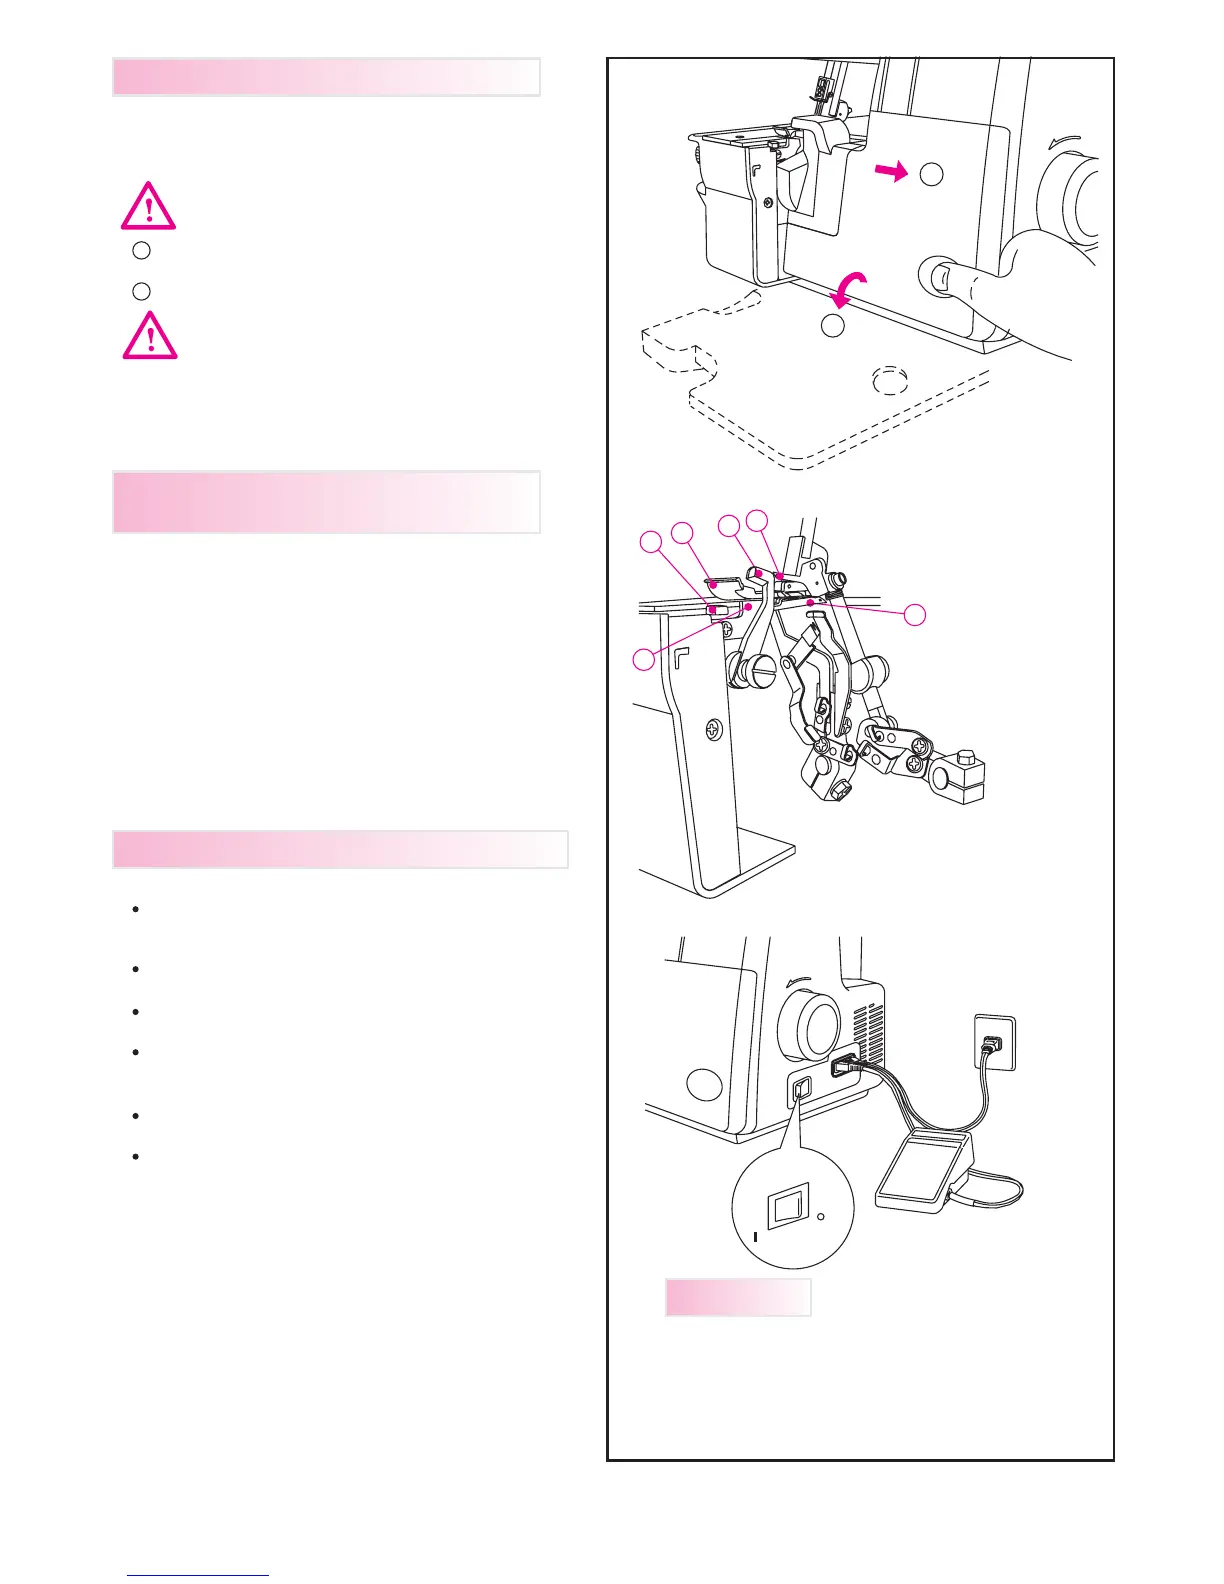
Caution:
Be sure to turn off power switch.
1 Push the cover to the right as far as it will go.
2 Pull cover down toward you.
8
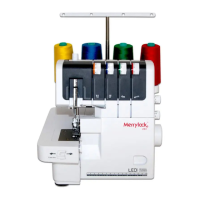
Caution:
Be sure looper cover is closed when
sewing.
1. Upper looper
2. Moveable Upper knife
3. Presser foot
4. Fixed position lower knife
5. Lower looper
6. Rolled Hem lever
Use only foot controller provided with this machine.
(Type 4C-316B for U.S.A. & CANADA only)
Be sure to make reference to "Warning" on following
Page.
Connect the controller/electric plug to the machine
receptacle.
Plug power line into electric outlet.
Power Switch: Push"l"mark side to turn "ON"
To run the machine and control the speed, press
the controller.
The harder you press, the faster the machine will sew.
To stop the machine from sewing, remove your foot
from the controller.
WARNING:
Push "O" mark side to turn "OFF"
5. PRINCIPAL PARTS BEHIND THE
4. HOW TO OPEN LOOPER COVER
LOOPER COVER
6. PREPARATION PRIOR TO SEWING