Page 30 of 64
4.4 The Nozzle Assembly
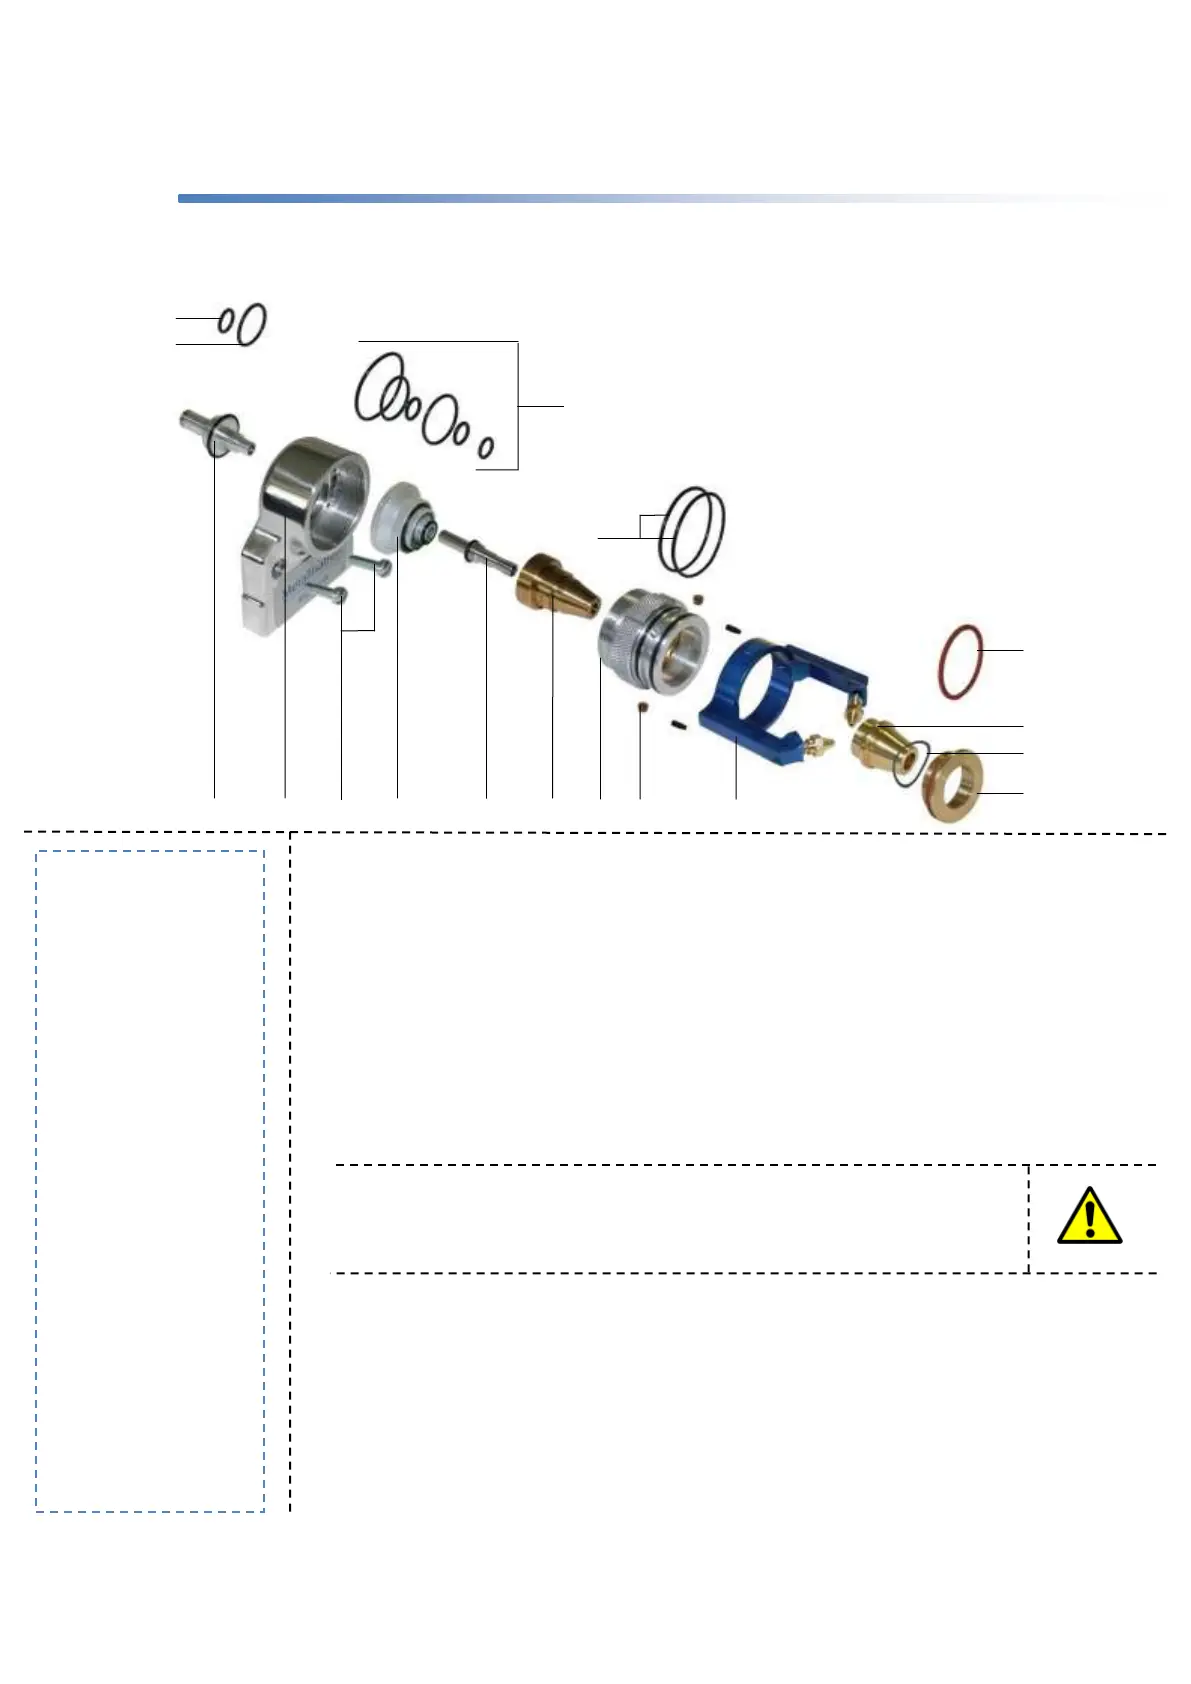
4.4.1 Removal & Dismantling
Referring to DIAG 1, use the following procedure to dismantle the
Nozzle Assembly, when necessary:
If fitted, pull off the Spreader Ring (A) and discard any damaged ‘O’
Rings (M) or cork seals (N).
Unscrew the Lock Ring (B) at the front of the nozzle to release the Air
Nipple (C) and Flexible Spacing Washer (D).
Unscrew the Spreader Air Cover (E) from the Gas Head (F) to release
the Nozzle Shell (G) and Mixing Block (H).
NB: If any difficulty is experienced in removing the Lock Ring (B) or the Air
Cover (E), DO NOT force the thread. Instead, apply penetrating oil and
ease the parts in and out until they can be removed easily.
Carefully pull the Nozzle Shell (G) from the Mixing Block (H), and
remove and replace ‘O’ Rings.
Remove the Screwed Insert (O) and replace ‘O’ ring as required.
Remove carefully, If using pliers, be careful not to distort.
WHEN & WHY?
The Nozzle Assembly
should only be dismantled
when it is absolutely
necessary.
For example:
If it is dirty/worn.
If it is damaged.
When needing to
change the Wire
Diameter.