PICkit
TM
2 User’s Guide
DS51553B-page 16 © 2006 Microchip Technology Inc.
2.3.5 Write
After a device family has been selected and a hex file has been imported, the target
PICmicro MCU can be programmed by clicking on the Write button. The PICmicro
MCU will be erased and programmed with the hex code previously imported. The
status of the Write operation is displayed in the status bar located under the Device
Configuration window.
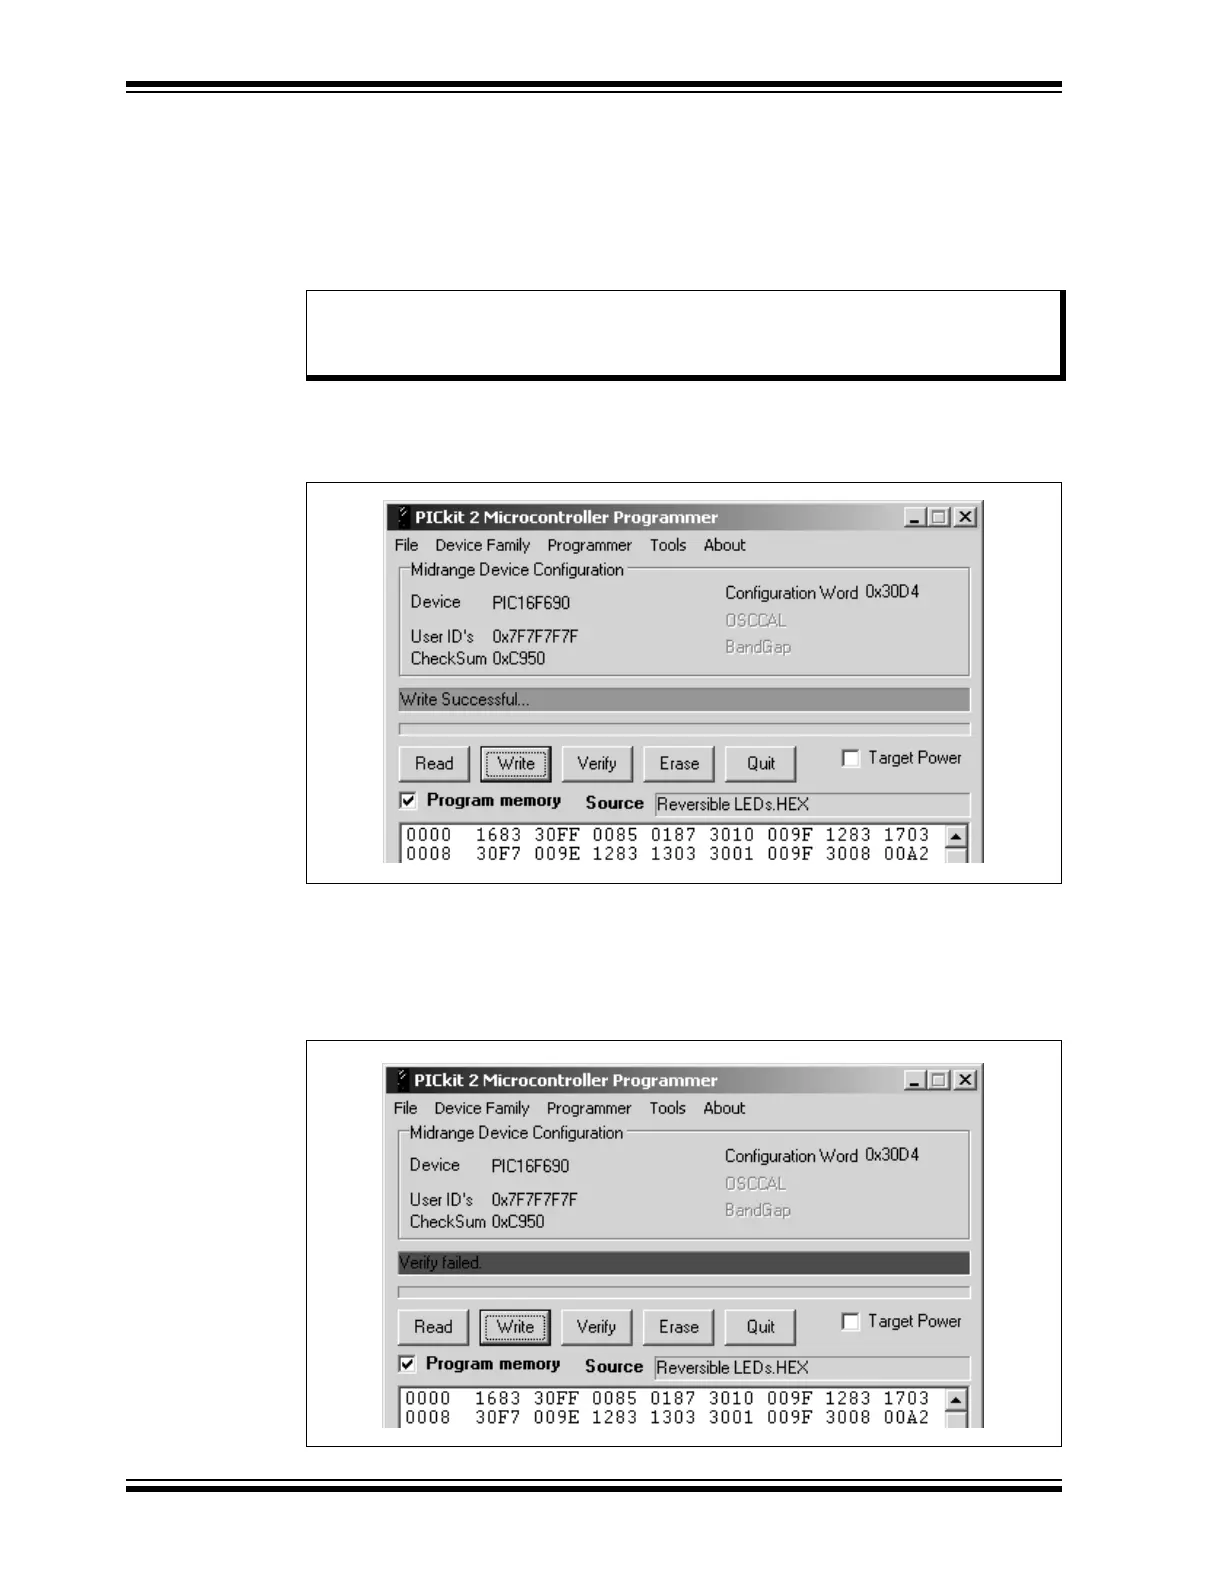
If the write is successful, the status bar turns green and displays “Write Successful”, as
shown in Figure 2-7.
FIGURE 2-7: WRITE SUCCESSFUL STATUS
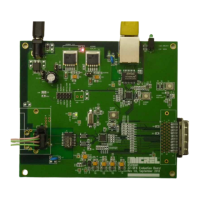
If the write fails, the status bar turns red and displays “Verify failed”, as shown in
Figure 2-8. This error indicates that the data was corrupted during the programming
sequence. If this error is displayed, try writing the program to the device again. If the
error continues, see Chapter 6. “Troubleshooting” for assistance.
FIGURE 2-8: WRITE ERROR STATUS
Note: The device will be erased prior to programming. The PICkit 2 Microcontroller
Programmer uses the bulk erase method that requires V
DD voltage between
4.5 to 5.5V