17Quick Start Guide
Working With The Control Centre
Although many controls on the control centre are similar to their equivalent
analogue-type counterparts, some have been speci cally designed for the PRO
Series, particularly those for navigation and GUI operation. As you will probably
have had experience on analogue consoles, you will already be familiar with
most of the PRO X controls and their operation. Therefore, this chapter only deals
with the GUI controls that may be new to you.
The navigational controls, such as quick access buttons and scroll buttons, are
described in Navigation, and the ones speci cally for automation can be found
in Managing The Scenes.
About Channel Operation
During normal operation the task of controlling the input (12 channels), aux,
return, aux sends and matrix channels is allocated to the two bays on the left.
The two bays on the right control the input (4-channel) and master channels.
This task allocation applies similarly to the GUI screens. However, you can control
any channel from either GUI screen. This is done by navigating the channel to
the GUI channel strip via the GUI menu; control is also then available via the local
channel strip on the control surface.
About GUI Operation
This section explains the basic procedures you can perform at the GUI screens.
In general, you will control and operate the GUI by combining the operations
described here.
Each trackball controls the movement of a pointer on its respective GUI screen.
The left trackball operates the mix bay GUI screen and the right one operates the
GUI screen in the master bay. Each trackball has two buttons, which have similar
functionality to the buttons on a PC/laptop mouse. The left button is used in click
and drag operations, while the right button is generally used for editing and ner
control operations.
Operating The GUI Screen Controls
This section shows you how to operate GUI screen elements, such as buttons,
control knobs, drop-down lists and sliders.
>> To switch a GUI button on/o
Click the button. If it has a status indicator, this will illuminate/extinguish to
show that it is on/o , respectively.
>> To adjust a GUI control knob or fader
Use a drag operation. Move the pointer up/down/left/right for adjustment.
>> To select an option from a drop-down list
Click the drop-down arrow. The drop-down list will unfold to display some or all
of its contents, depending on how many items it contains.
Do one of the following:
Click the option you require
If necessary, scroll the list (see “To scroll a drop-down list” below) to display the
option, and then click it.
>> To scroll a drop-down list
With the drop-down list displayed, do one of the following:
Drag the scroll box
Click the scroll bar. The scroll box will ‘jump’ in the direction of the click to
another position in the scroll bar
Click an up/down scroll arrow. The scroll box will ‘jump’ in the direction of the
scroll arrow to another scroll bar position. Clicking a scroll arrow when the scroll
box is adjacent to it has no e ect.
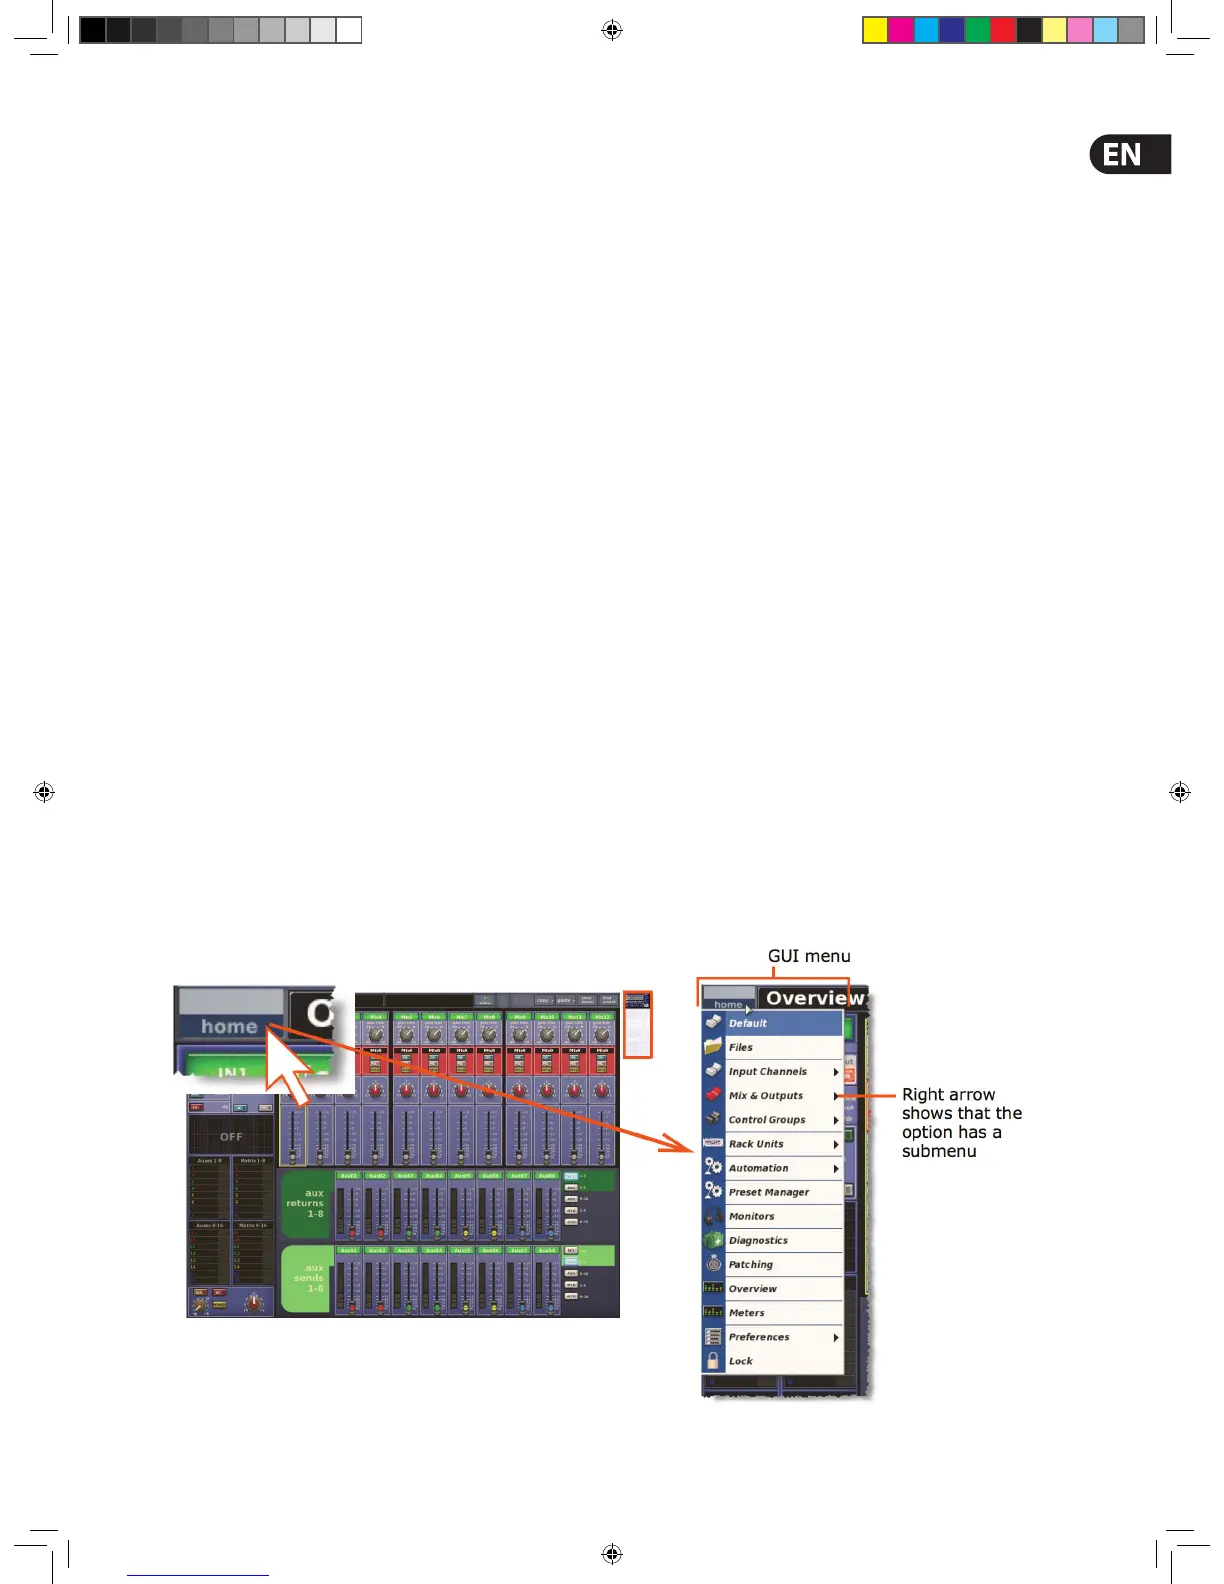
Using The GUI Menu
You can open the GUI menu at either GUI screen, or you can go directly a GUI
menu screen by using a screen access button.
Throughout this guide, menu/submenu option selection sequences are shown in
the following format (for example, for choosing the general preferences screen):
home > Preferences > General
>> To open the GUI menu
Click home.