Preva Installation/Service Manual, 00-02-1577, Revision E01
126
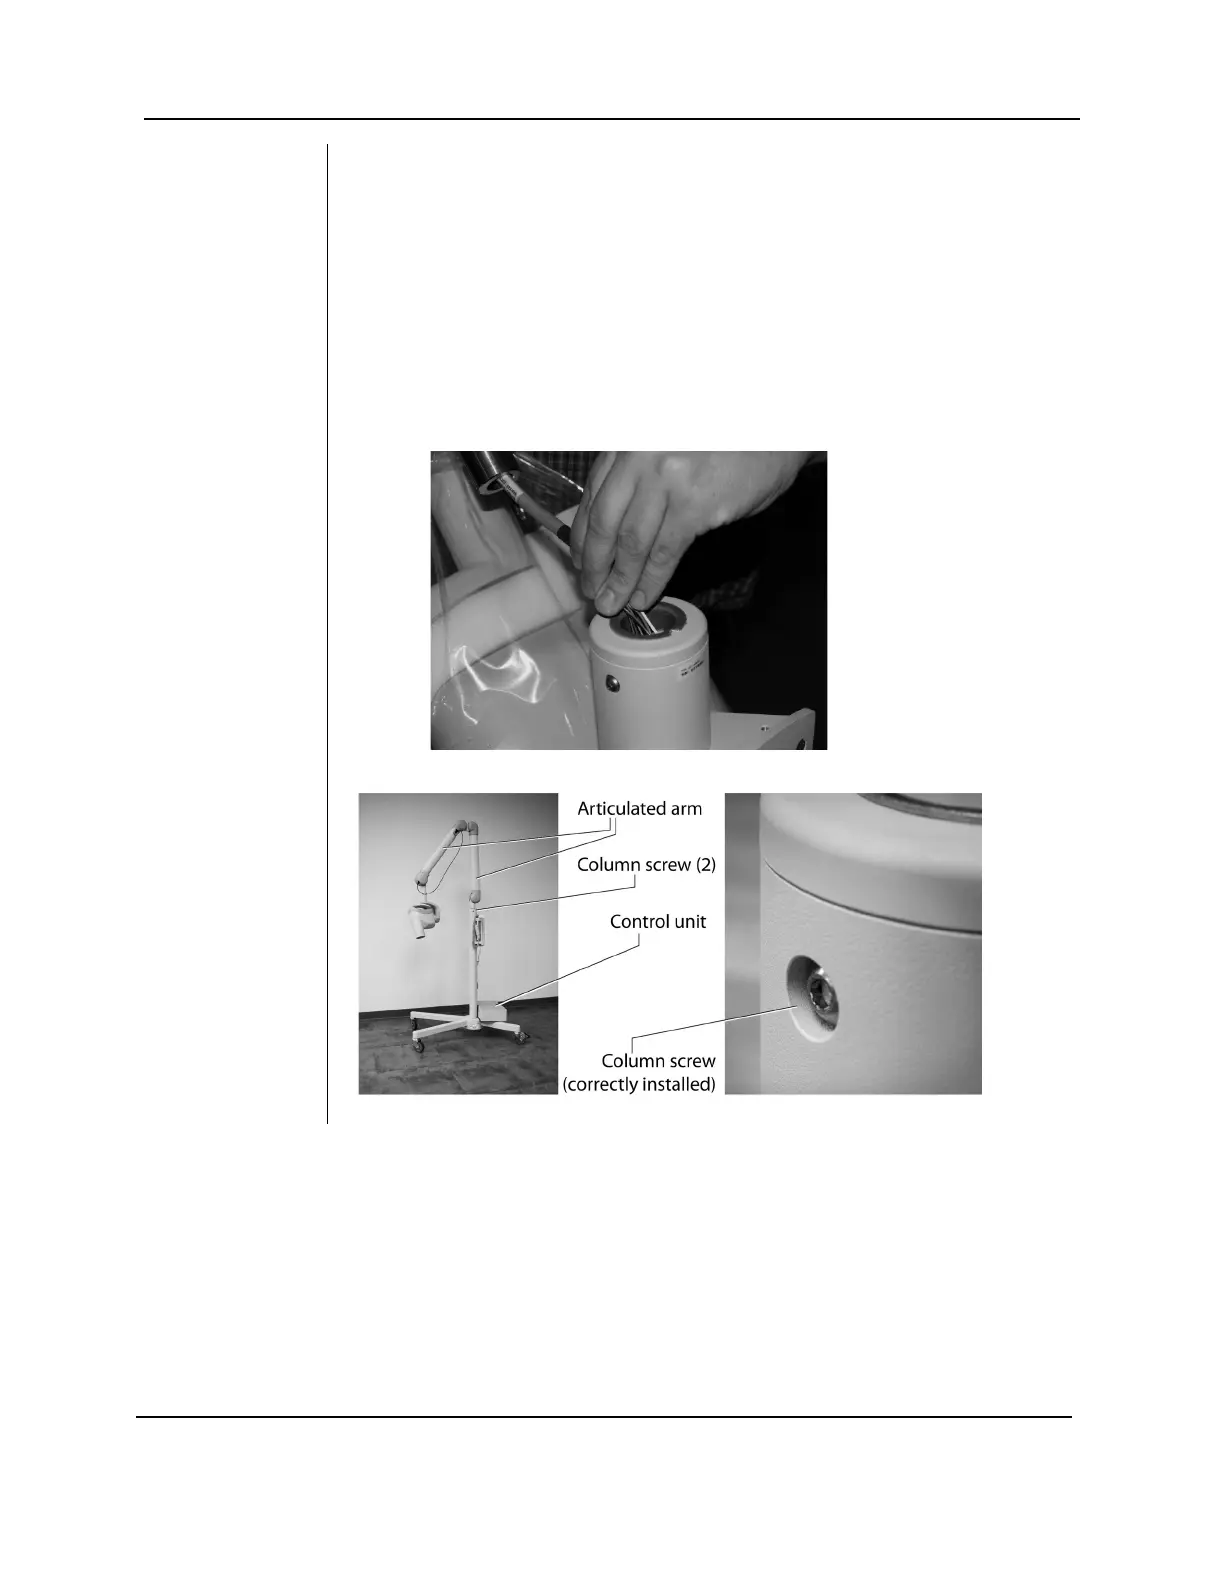
12. Lift the Arm/Tubehead carefully and guide the cables
through the top of the post. Carefully insert the
articulated arm, taking care not to pinch or damage the
connectors.
Note that the articulated arm must be oriented away
from the control unit (see Figure 124). This will allow the
two column screws to be recessed in their holes as
shown in Figure 125. (If the articulated arm is installed in
any other orientation, the column screws will protrude
about 3 mm (1/8 inch) and the arm will not rotate
correctly.)
–
FIGURE 123
FIGURE 124
FIGURE 125