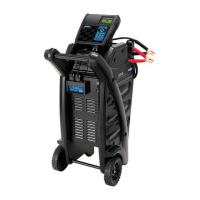
GR8-1200 OEM
Midtronics Inc. 7000 Monroe Street Willowbrook, IL 60527
www.midtronics.com
20
Setting User Preferences
Before starting your test you may want to customize the use
of your GR8 by setting preferences in the Admin Menu. The
menu has settings for the time, the contrast and backlight
time, a utility to customize printouts for the optional IR printer,
among others. The admin utilities are described in Chapter 15
on page 40.
Help Menu
The GR8 provides a Help Menu with a glossary of
test-related de nitions that you may want to re-
view prior to testing.
This menu also provides troubleshooting information and
phone numbers for Midtronics Customer Service, in case you
encounter a problem and/or need technical assistance.
Select the HELP icon from the Main Menu.
Chapter 3: Getting Started
Multitasking
The GR8-1200 Multitasking Battery Diagnostic Station is
capable of doing two jobs at once. Historically a charger or
tester could only perform one function at a time. The GR8-
1200 Multitasking Battery Diagnostic Station has the ability to
charge or test the battery and the electrical system of a vehicle
independently while a second battery is being charged.
Wireless Multitasking
The Multitasker communicates with the control module
using RF radio signals. Once a charge session has begun,
the control module can be disconnected and removed to
test another vehicle in the service bay—thus, acting as two
tools in one. The Multitasker will control the charge session
when the control module is removed. The charge session can
be monitored with the control module even when it is not
connected however, internal AA battery life will be reduced.
Long-term monitoring of a charge session should be done
while connected to the Multitasker.
Procedure Summary
The best way to utilize the multitasking feature is to rst test
a battery using the system test and the associated battery test
cable that comes from the top of the controller (See Chapter
7 for detailed System Test instructions). If the test decision for
the battery is one that requires a charge then the controller
will ask you if you want to charge the battery.
Select CONTINUE, swap out the tester cables for the charging
cables, and the controller will now analyze the battery for
the optimal charging conditions. See Chapter 6 for detailed
Diagnostic Charging instructions. Once the charge process
has started you can go back to the main menu and continue to
run system tests while the charger is charging.
Starting with the battery test is recommended so that a good
battery decision can quickly be reached. While the charger can
also be used and will reach the same decision, it is designed to
determine the optimum charging method for a battery and
therefore will take longer before reaching a decision. The
same holds true for a bad cell or other physical aws that will
cause a replace battery decision.