CONTROL PANEL MODIFICATIONS
i-
26 625
r
ggp
1.
2.
3.
4.
5.
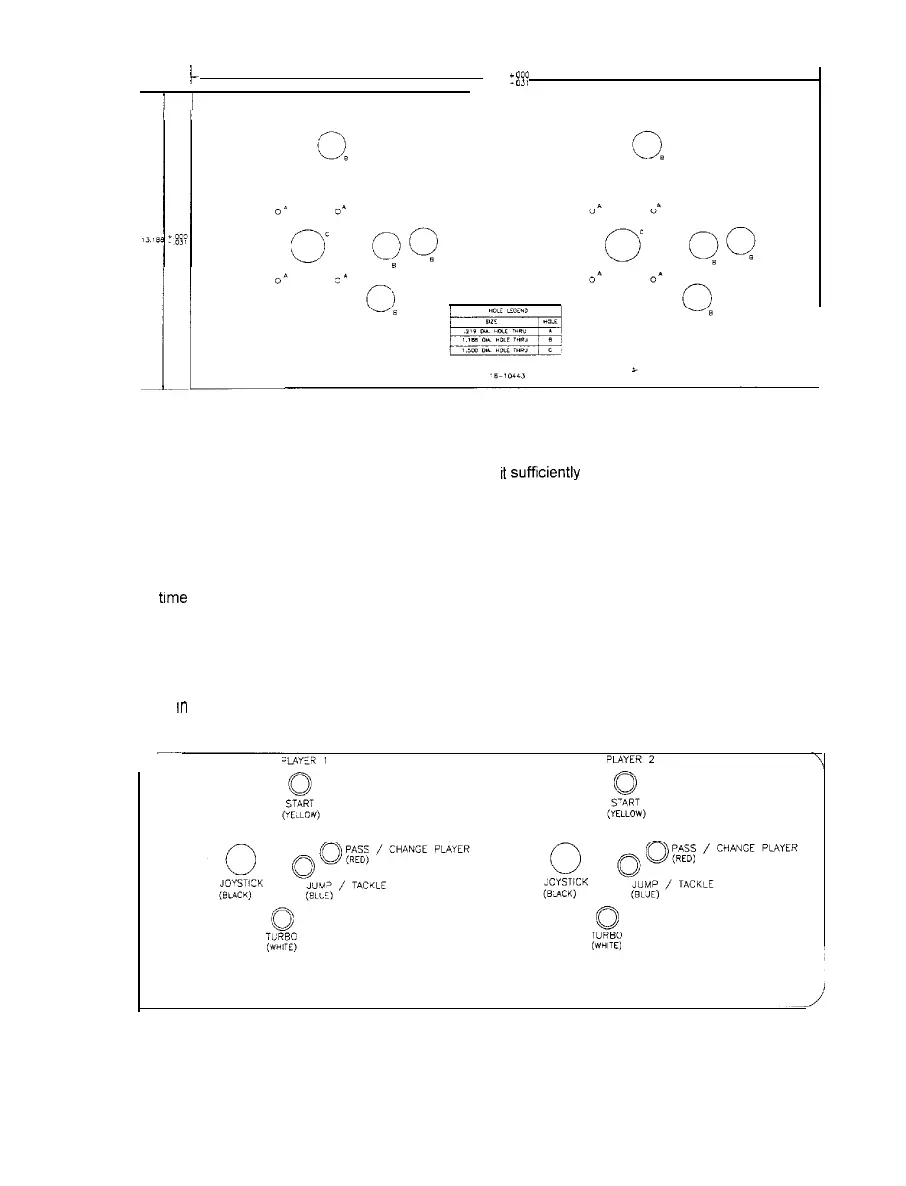
CONTROL PANEL TEMPLATE
Locate the control panel template (16-10443) and unfold it. Stack newspapers, books, magazines,
etc., on the template until needed This will flatten
It
sufftciently
for use. A full size copy of the hole
pattern for one set of player controls is included as the last page in this section of the manual.
Remove the control panel buttons and joysticks from the existing control panel. Remove the panel
covering and any artwork from the previous game. Remove any hinges or mounting brackets.
Fill the existing control panel holes with wood, putty, glue or other suitable material. Allow adequate
trme
for materials to dry, then sand or file the control panel to a flat surface on both sides.
Place the template on top of the repaired panel Orient it to center the controls and tape it in place.
Cut new holes for the joysticks and the control panel buttons. Remove template and deburr all holes.
Remove the backing and apply the decal to the panel. Start at the top and work down. After the decal
is
rn
place, smooth it outwards, taking care to squeeze out air bubbles.
If you can not remove an air
bubble, pop it with a knife or pin and smooth it down. Allow the adhesive in the decal to set.
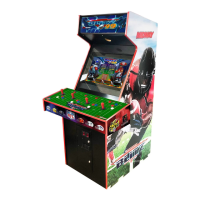
CONTROL LOCATIONS
1-7