OM-261050 Page 22
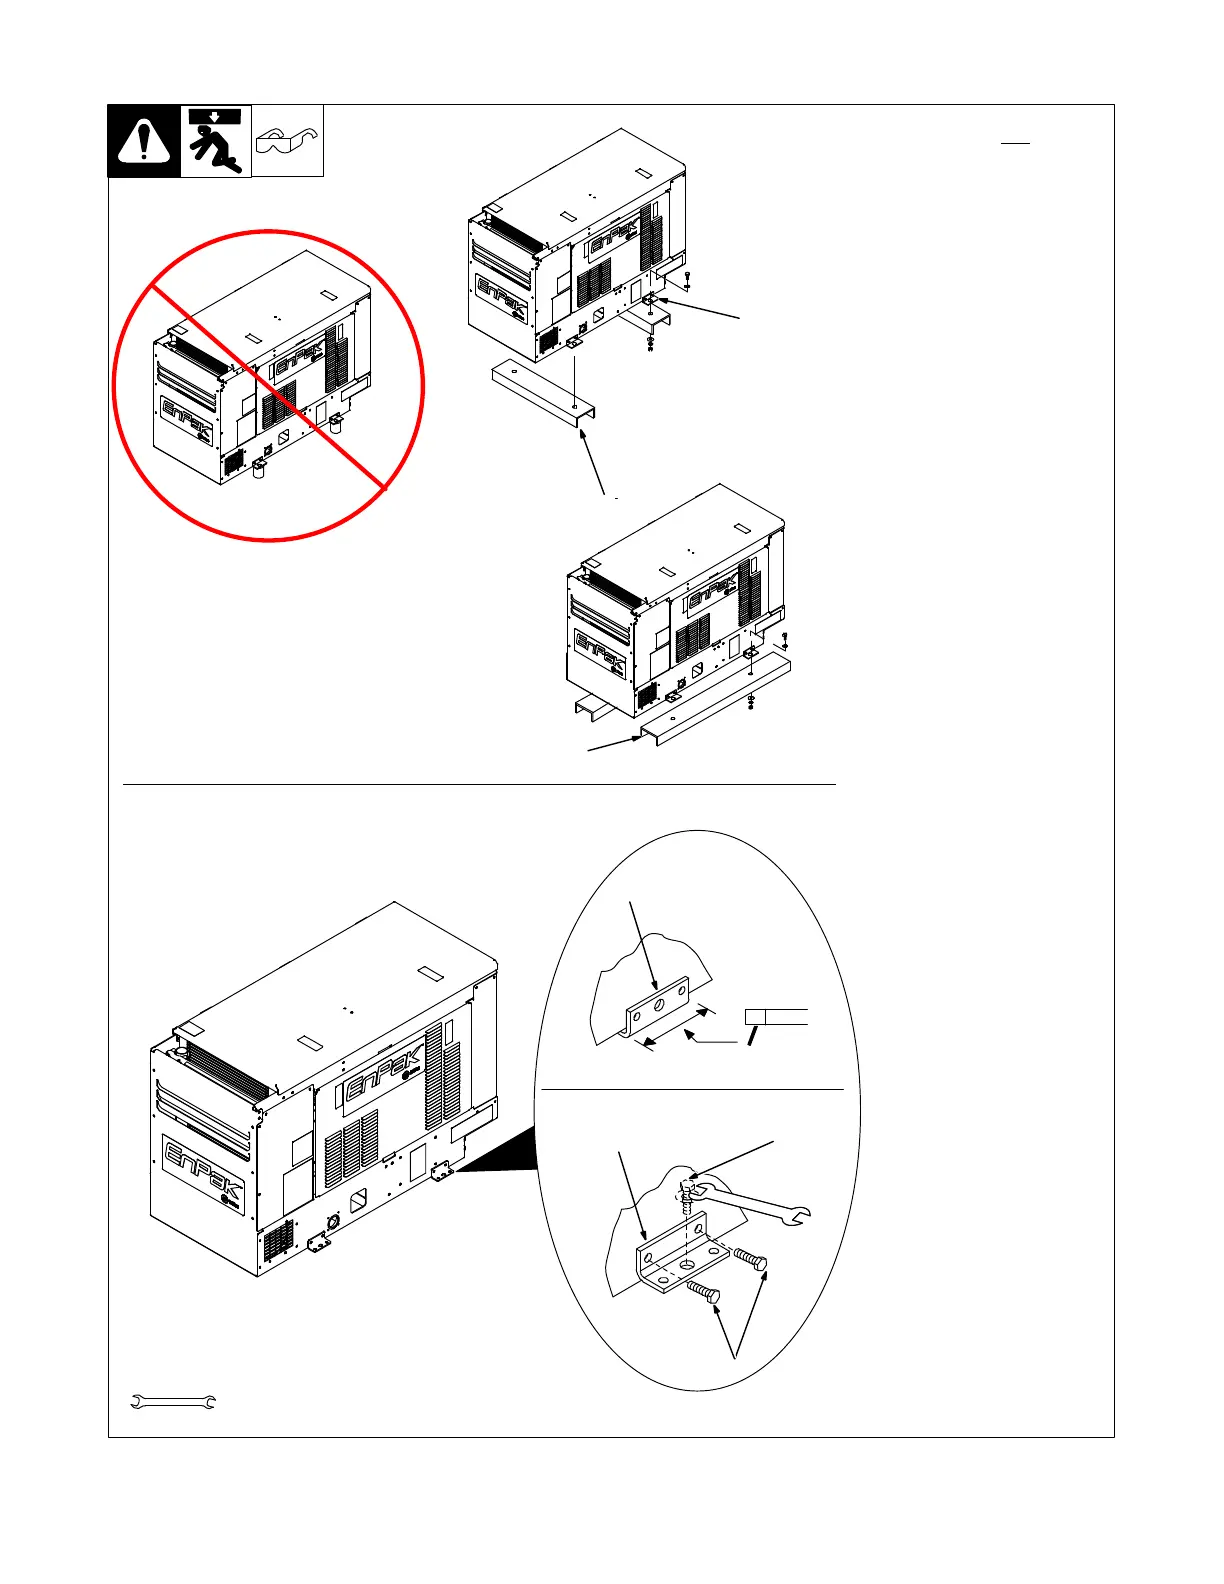
5-2. Mounting Unit
Tools Needed:
9/16 in.
2
2
4
Welding Unit In Place
Bolting Unit In Place
NOTICE − Do not mount unit by
supporting the base only at the four
mounting brackets. Use cross-sup-
ports to adequately support unit
and prevent damage to base.
See Section 4-7 for dimen-
sions.
Mounting Surface:
1 Cross-Supports
2 Mounting Brackets (Supplied)
Mount unit on flat surface or use
cross-supports to support base.
Secure unit with mounting brack-
ets.
3 1/2 in Bolt And Washer
(Minimum − Not Supplied)
4 5/16-18 x 3/4 in. Screws
(Supplied)
To Bolt Unit In Place:
Using brackets attached to the
base, mount unit to vehicle with 1/2
in. (12 mm) or larger hardware (not
supplied). There are also 3/8 in.
weld nuts and mounting holes in the
base. See Section 4-7 for mounting
dimensions.
To Weld Unit In Place:
Remove hardware securing the
four mounting brackets to the base.
Reverse brackets and reattach to
base with original hardware.
Weld unit to vehicle only at the four
mounting brackets.
1
2
Supporting The Unit
Using Mounting Brackets
Ref: install3 2008--01 803 274 / 200 864-A / 265 802-A
1
OR
3






 To Next Page