MOUNTING
This product is susceptible to electrostatic shock.
Follow proper grounding procedures.
Inspect all cartons and packaging for possible damage during shipment, before removing the XPL+ and
associated equipment.
1. Loosen the 6 enclosure lid ( captivated ) screws and swing the lid open.
2. Remove the 4 board B mounting screws ( outer corners ) and remove the circuit board assembly.
3. Drill sufficient holes in the enclosure bottom to meet enclosure cable/conduit entry requirements.
4. Attach the enclosure to the selected mounting surface. ( 4 predrilled screw holes provided. )
5. Attach the conduits/cable hubs to the enclosure. ( Do not apply undue force. )
6. Reinstall the circuit board assembly.
Non metallic enclosure does not provide grounding between conduit connections.
Use grounding type bushings and jumpers.
Transducer Mounting
Objects near the transducer face cannot be reliably detected. Mount the transducer above the highest
material level (away from the nearest monitored object) by the following
Nearest Distance
.
NEAREST DISTANCE TRANSDUCER TYPES
0.5 m ( 1.65 ft ) ST-H, ST-25, XCT-8, XPS-10, XCT-12, XPS-15, ST-50
0.66 m ( 2.17 ft ) XPS-30, XPS-40
0.99 m ( 3.25 ft ) ST-100, LR-21, XLT-30, XLS-30
1.32 m ( 4.33 ft ) LR-13, XLT-60, XLS-60
05/25/98
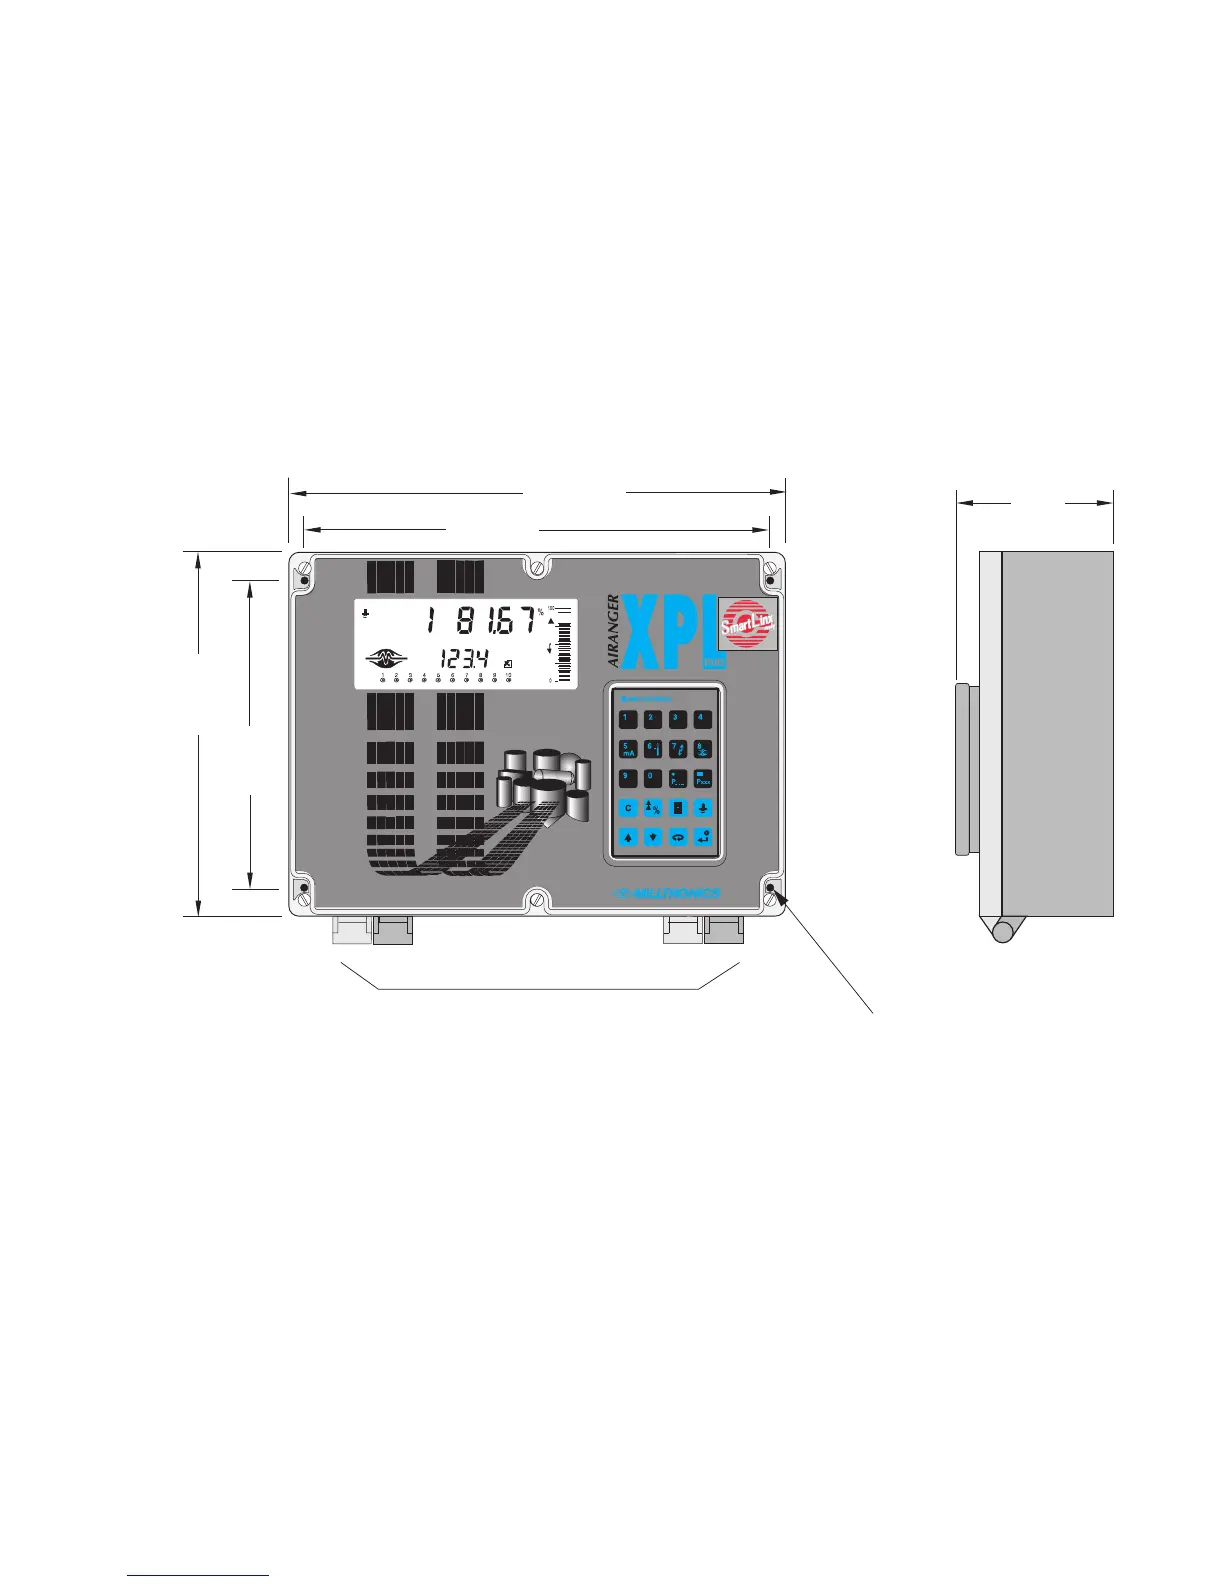
106 mm
(4.2")
267 mm
(10.5")
172 mm
(6.8")
Suitable location for conduit entrances.
Use water tight conduit hubs to maintain the enclosure rating.
mounting hole 4.3 mm (0.17") diameter
access under lid (4 places)
285 mm
(11.2")
209 mm
(8.2")
PL-532 12