Image Optimization 5-65
4. Adjust the image parameters to obtain the optimized image and necessary
information.
5. Adjust the ROI on the frozen image if necessary.
6. Save the image or review the image if necessary.
7. Perform measurement or add comments/body marks to the image if necessary.
8. Estimate the hardness of lesions according to the results.
9. Press <B> to return to B mode.
5.12.2 Enter/Exit
Enter
Press the user-defined Elasto key on the control panel to enter the mode.
After entering the mode, the system displays two windows in real-time on the screen.
The left one is the 2D image, and the right one is the Elasto image.
Exit
Press <B> or the user-defined Elasto key on the control panel to exit and enter the
mode.
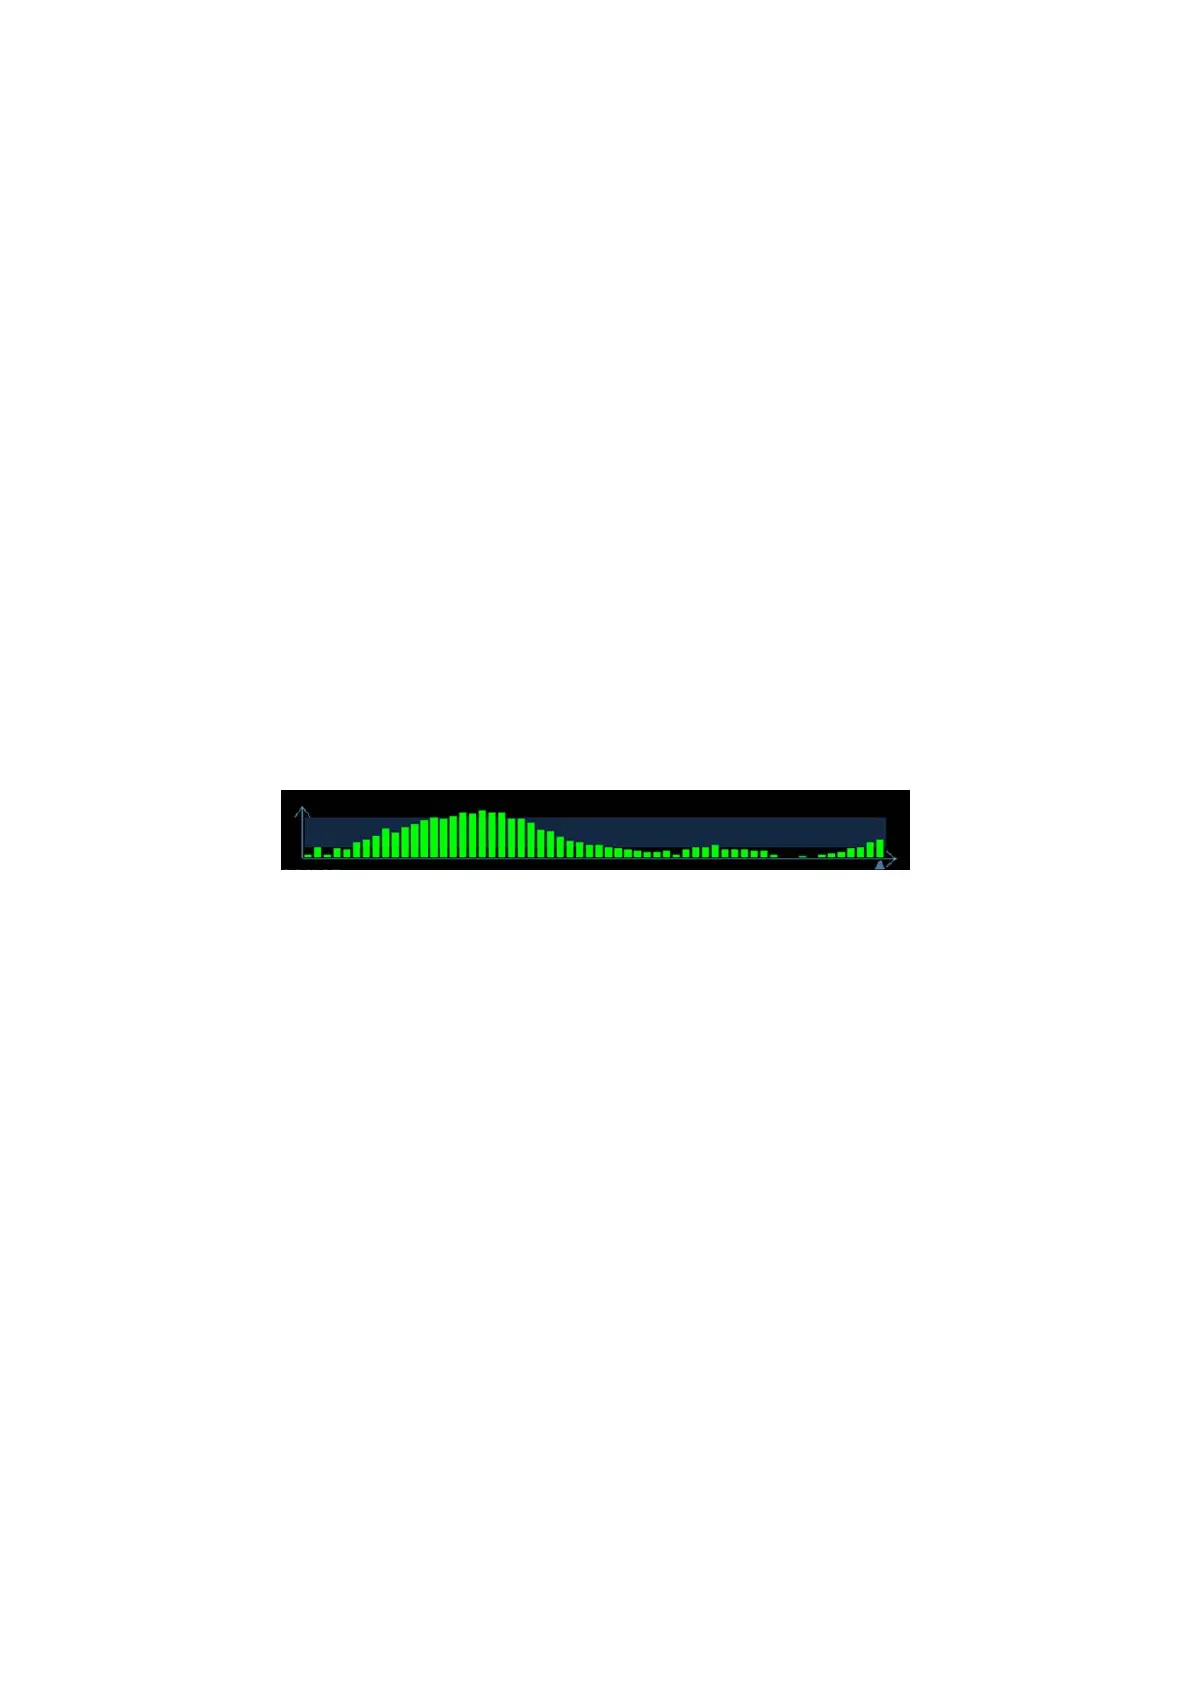
5.12.3 Pressure Hint Curve
The screen displays the pressure curve in real time:
The X-axis represents time and the Y-axis represents pressure.
ROI Adjustment
Description To adjust the width and position of the ROI in Elasto imaging.
Operation When the ROI box is solid line, roll the trackball to change its position.
When the ROI box is a dotted line, roll the trackball to change the size.
Press <Set> to switch between the solid line and the dotted line status.
Smooth
Description To adjust the smooth feature of the Elasto image.
Operation To adjust the image smoothness. Adjust using the [Smooth] item on the
touch screen.
The system provides 0-5 levels of smooth function: the bigger the value
the stronger the effect.
Opacity
Description To adjust the opacity feature of the Elasto image.
Operation Rotate the knob under the [Opacity] item on the touch screen.
The system provides 0-5 levels of opacity function: the bigger the value
the stronger the effect.