EasyManuals Logo

Mindray Resona 7 Operator's Manual

Mindray Resona 7
492 pages
To Next Page IconTo Next Page
To Previous Page IconTo Previous Page
Page #357 background imageLoading...
Page #357 background image
17 Probes and Biopsy
Operator’s Manual 17 - 39
b. Adjust the angle block to the desired level.
c. Tighten the angle pinch nut.
3. Insert the biopsy needle:
a. Adjust the dial scale to the required needle type shift, and then screw the needle fixing nut
to lock the dial scale. (To adjust the dial scale you have to loosen the needle fixing nut
first.)
b. Pull the lock pin and close the V-shaped cover to fix the lock pin in the groove of the
needle type adjusting base, so as to install the needle into the guiding hole.
4. Release the needle from the bracket:
a. Pull the lock pin and open up the V-shaped cover to expose the needle.
b. Separate the bracket and the probe from the needle.
5. Remove the needle-guided bracket:
a. Screw the pinch nut to release the needle-guided bracket.
b. Separate the bracket and the probe.
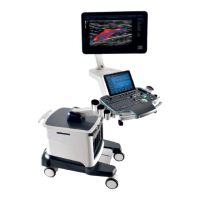
Table of Contents

Other manuals for Mindray Resona 7

Questions and Answers:

Question and Answer IconNeed help?

Do you have a question about the Mindray Resona 7 and is the answer not in the manual?

Mindray Resona 7 Specifications

General IconGeneral
TypeUltrasound System
Power SupplyAC 100-240V, 50/60Hz
Transducer Frequency Range1.0 MHz
Transducer Ports4
Transducer TypesConvex, Linear, Phased Array, Volume
Imaging ModesB-Mode, M-Mode, Color Doppler, Power Doppler, Pulsed Wave Doppler, Continuous Wave Doppler, Tissue Doppler
Advanced Imaging TechnologiesSpeckle Reduction Imaging
ConnectivityDICOM, Ethernet, USB, HDMI
ApplicationsGeneral Imaging, Radiology, Cardiology, Vascular, OB/GYN, Urology, Small Parts, Musculoskeletal
Battery LifeNo battery

Related product manuals