35
Override Button at the
1 O' Clock Position
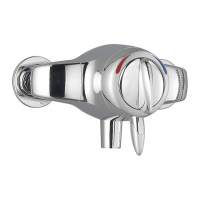
Shroud Fitting and Removal
Combiflow Exposed
Fit the shroud assembly.
1. Make sure that the override button assembly is aligned at the 1 O' clock position.
2. Engage the shroud into the body recess and push the shroud firmly onto the
body.
Note! Make sure that the override button is firmly in position inside the shroud
and the grey button guide is positioned corrrectly on the body. Failure to fit the
shroud correctly may cause the control lever to rub on the shroud..
For removal hold the shroud firmly and pull away from the valve.
Combiflow Built in
The shroud assembly is supplied fitted, if it is removed then follow this procedure.
1. Make sure that the override button assembly is aligned at the 1 O' clock position.
2. Make sure that the five raised locators within the shroud assembly fit into the
five slots of the brass upper body and push the shroud firmly onto the body.
Note! Make sure that the override button is firmly in position inside the shroud
and the white button guide is positioned corrrectly on the body. Failure to fit the
shroud correctly may cause the control lever to rub on the shroud.
For removal hold the shroud firmly and pull away from the valve.
Slots
Body Recess
Button Guide
Override Button at the
1 O' Clock Position
Button Guide
For latest prices and delivery to your door visit MyTub Ltd 0845 303 8383 www.mytub.co.uk
 Loading...