OPERATION
3-64
Mirage 22000/4000/6000User’s Manual
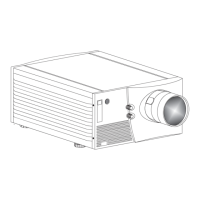
3b) MATCH GREEN LIGHT
OUTPUT:
Compare
green fields and
choose the dimmest. In
the Green Primary
menu for each
remaining projector,
reduce the Green
White Level as
necessary until all
green light output
appears to match. See
right.
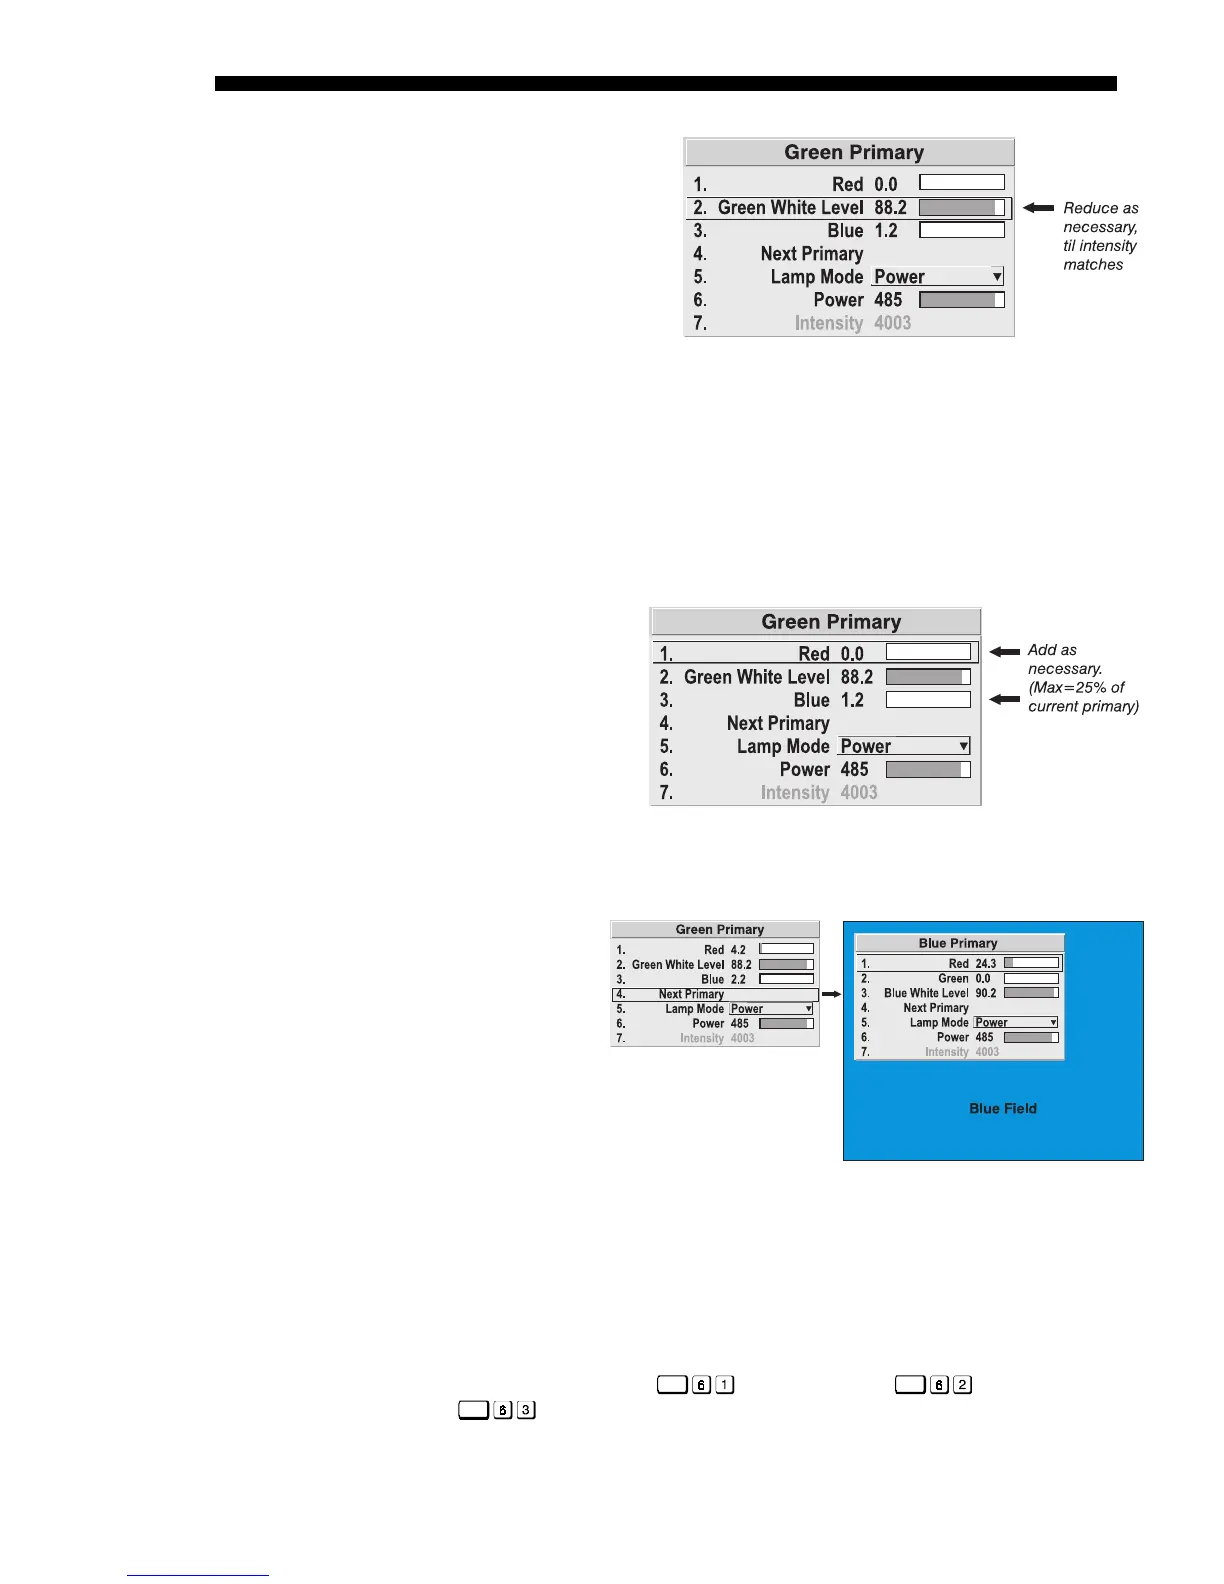
3c) MATCH GREENS: Compare green fields and choose the least saturated green
(i.e. the screen which you feel is furthest from “pure green” and leans slightly
toward yellow or blue). In the Green Primary menu for each remaining
projector—starting with the adjacent projector—add red or blue as necessary
until all green fields match the first, both in color and light output. Sometimes
all projectors need
color added, other
times certain
projectors will
need red and others
will need blue, etc.
See right. NOTE:
Green affects the
light output of any
color the most,
blue the least.
3d) ADJUST NEXT
PRIMARY:
When all
greens match,
select Next
Primary from
the Green
Primary menu.
The Blue
Primary menu
will appear
and your
screens will turn to a full blue field. Repeat steps 3b and 3c for blue, then for
red. For each primary adjustment, add other “secondary” colors as necessary.
3e) RECHECK ALL COLORS: Because one color may be slightly affected by
settings used for another, recheck all 3 colors to make sure your initial
matching is still good. Adjust if necessary.
NOTE: If desired, use
Func
for full red field,
Func
for green, and
Func
for blue.
In Individual Projectors:
Figure 3.41. Reduce Primary White Level if
Necessary
Figure 3.42. Add Secondary Colors As Necessary
In All Projectors: