MAINTENANCE
4-8
Mirage 22000/4000/6000User’s Manual
Close the lamp door
• Swing the door down and secure the 2 screws.
Replace the left side panel
• Align the bottom of the left side panel with two pins at the bottom edge of the
projector and swing up into place. Secure with 3 screws.
NOTE: The lamp module is calibrated for maximum performance and brightness in
this projector. Do not attempt to re-align or adjust an installed lamp module.
Power up the projector and reset the lamp timer
In the Main menu, select the “Lamp” option. In the Lamp submenu, select the
“Change Lamp” option–enter the new serial number in the S/N text box (see Section
3, Operation if you need help entering the number). When the new number is
recorded, the lamp timer will automatically reset to “0” hours and begin to log time.
IMPORTANT
If you neglect to enter a serial number, the lamp timer
will not reset to “0” and will therefore be inaccurate. The
lamp life limit may then expire prematurely.
NOTES: 1) Once entered, the new lamp serial number is also automatically added to the
“Lamp History” submenu (read-only). 2) Lamp life data is required for warranty claims.
3) Light output and uniformity can vary significantly during the first 100 hours of
lamp use. If you are using the Brightness Uniformity control, it is recommended that
you either set up Brightness Uniformity after this period, or do an initial setup and
re-check at 100 hours. See 3.11, Using Multiple Projectors.
It is a good idea to replace the air filter whenever the lamp module is replaced (or
more frequently if operating the projector in a dusty environment). The filter is
located behind the right side panel.
Turn off the projector, cool, and unplug.
Before removing or installing a filter, turn off the projector and allow to cool for five
minutes before unplugging. Make sure that the lens cap is on.
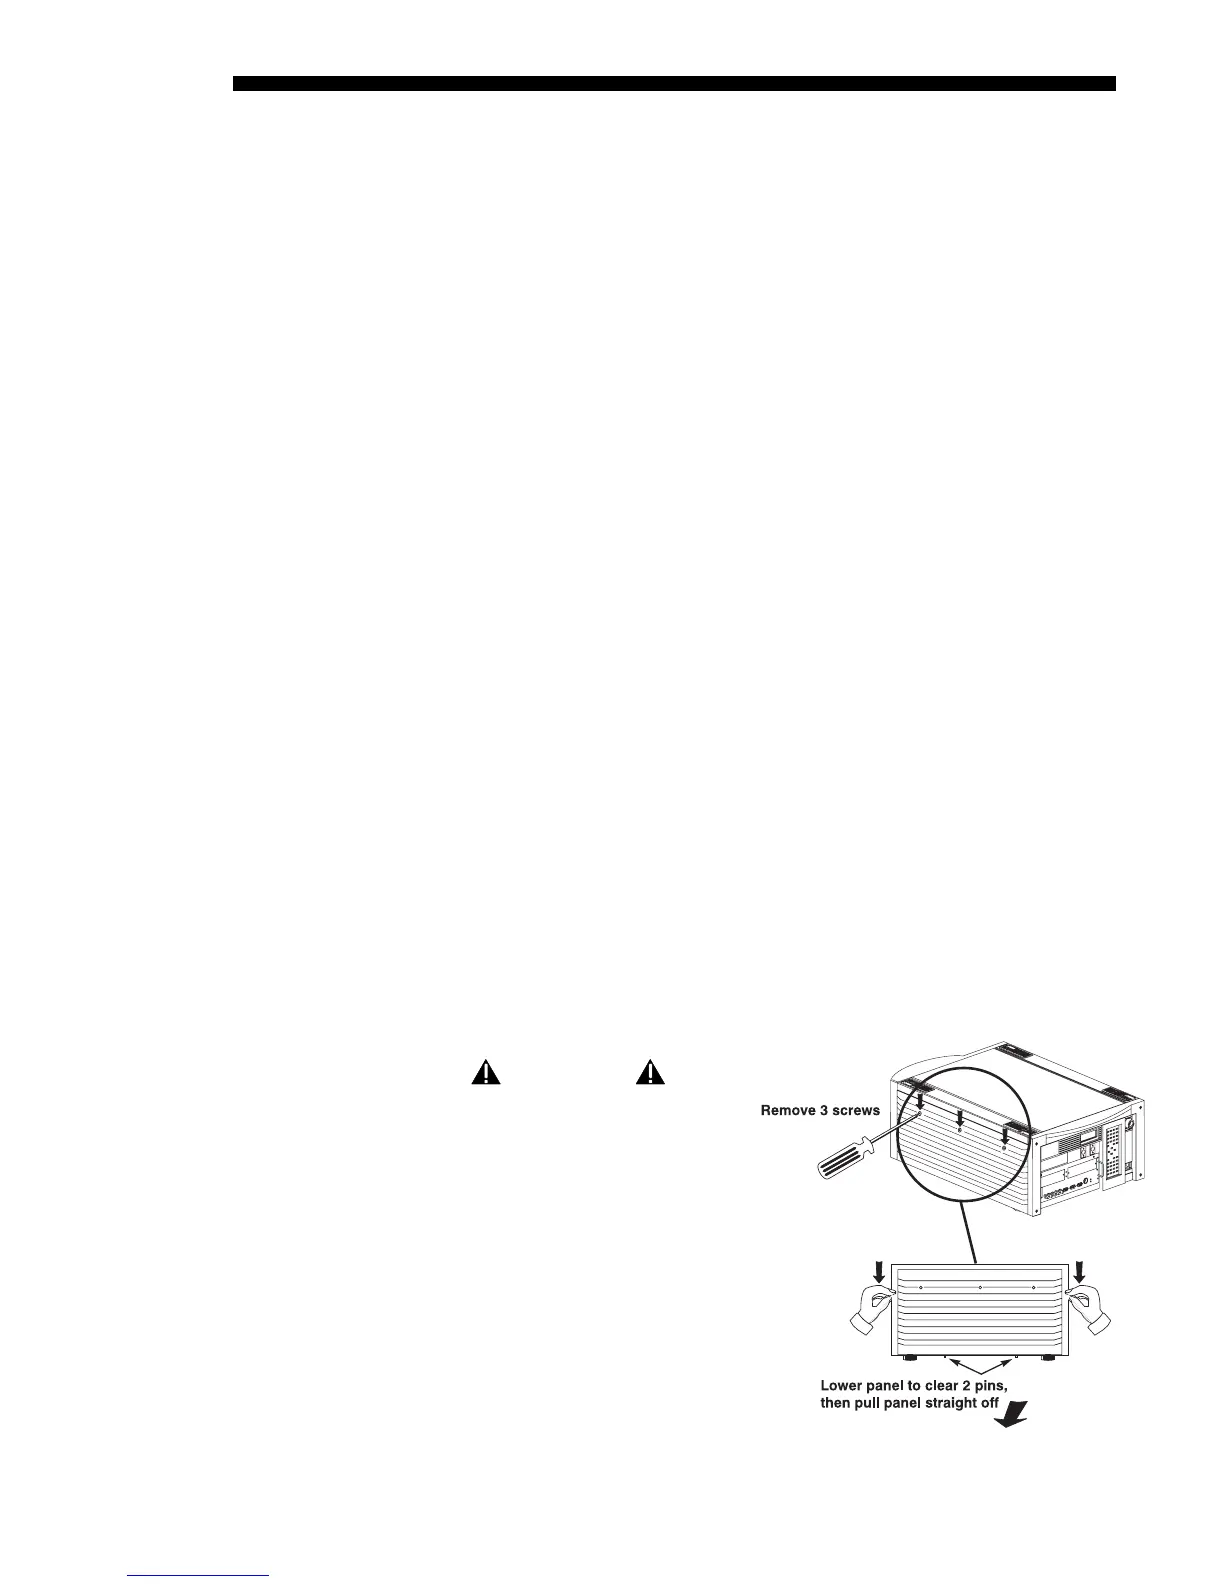
Remove the right side panel
WARNING
Unplug the projector.
• See Figure 4.9. Remove the 3
screws securing the projector’s
right side panel.
• Lower the panel slightly to
clear two pins at the bottom
edge of the projector.
• Pull the panel off to expose the
filter near the front corner.
STEP 9
'
STEP 10
'
STEP 11
'
Filter Replacement
'
Procedure
STEP 1
'
Figure 4.9. Remove the right side panel
STEP 2
'