MAINTENANCE
Mirage 2000/4000/6000 User’s Manual
4-7
Attach new lamp to the terminal block and insert
• Secure the new lamp module to the terminal block with the single screw, then
insert into the lamp compartment as described below:
•
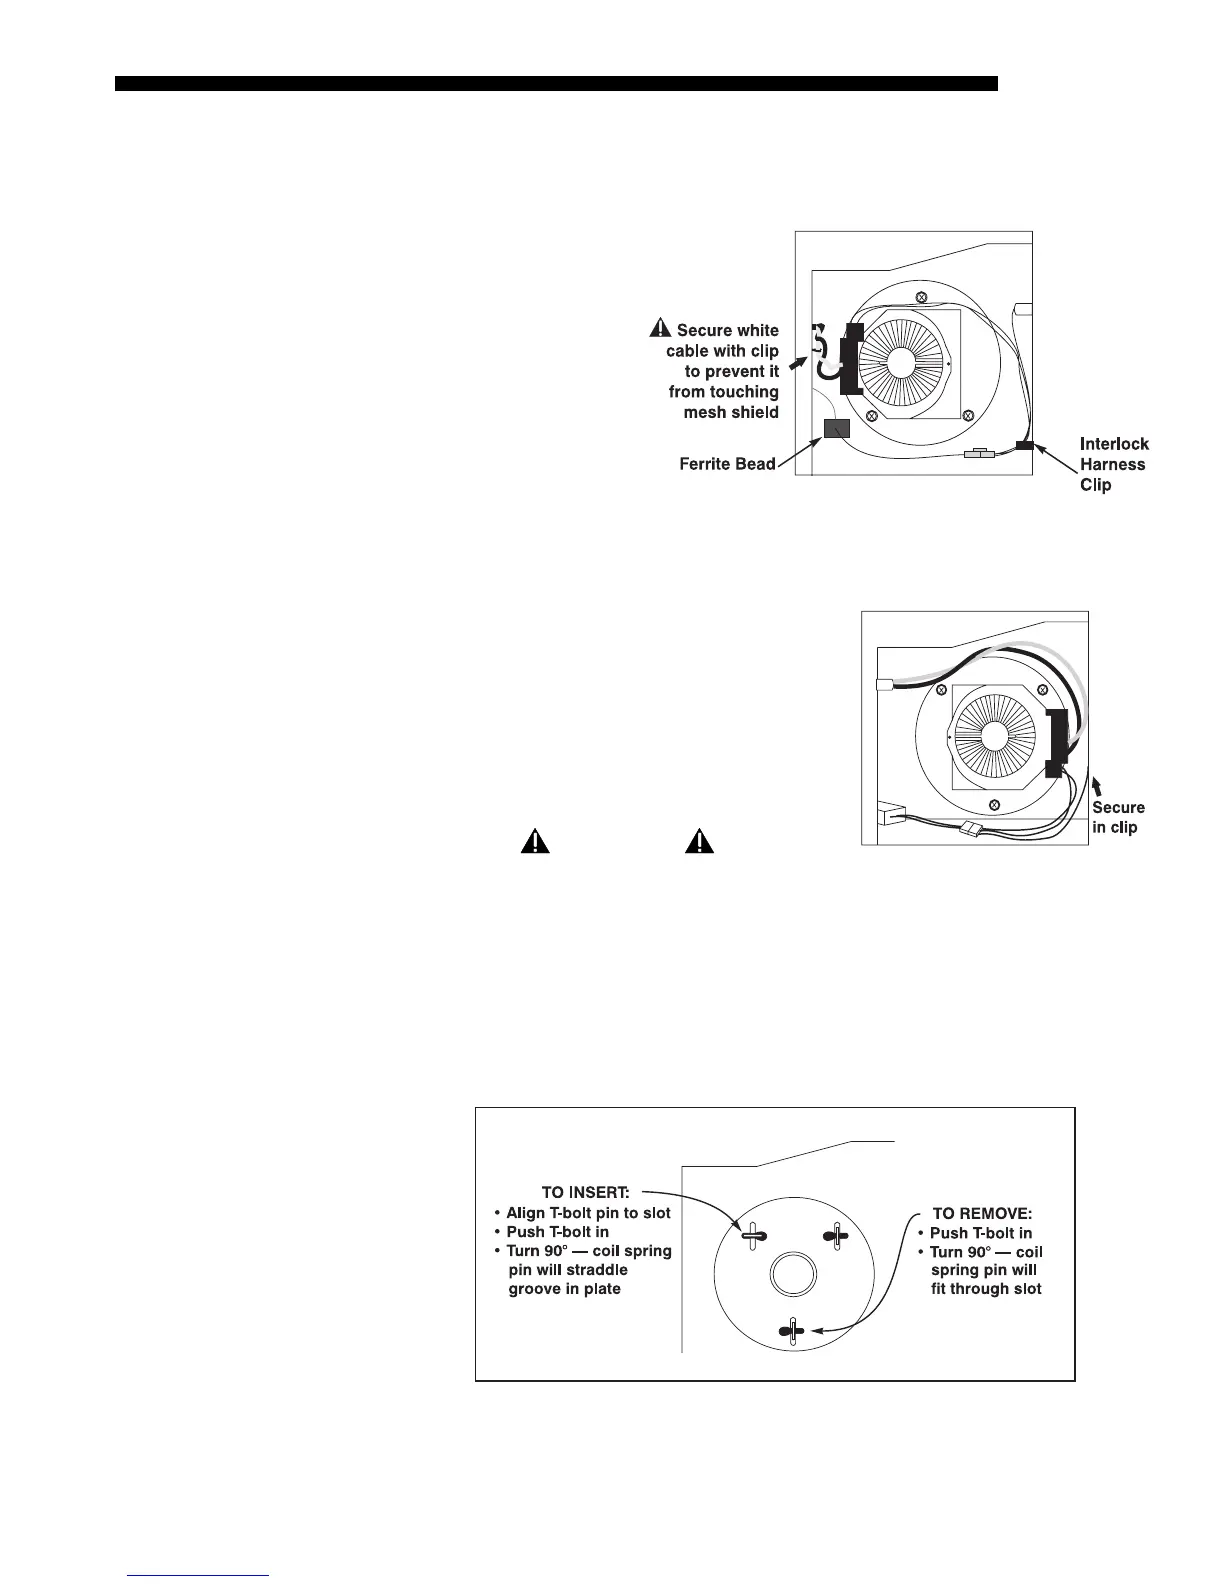
IF 2000:
Looking
into the lamp
compartment, the
terminal block
should be located
at approximately
“9 o’clock”, i.e.,
roughly centered
and on the side of
the lamp facing the
projector rear.
Make sure heavy
lamp cables are
twisted together, and secure all cabling as shown in Figure 4.6.
•
IF 4000/6000: Looking into the lamp
compartment, the terminal block should be
located at approximately “3 o’clock”, i.e.,
roughly centered and on the side of the
lamp facing the projector front. Make sure
the cables travel over the lamp, i.e. NOT
along the lamp compartment floor. See
Figure 4.7.
WARNING
Check lead dressing in lamp compartment!
Secure the new lamp to the adjustment plate
• Roughly align the 3 T-bolts on the lamp to the 3 slots in the adjustment plate
at the rear of the lamp compartment.
• Push the lamp all the way back and make sure the pin on each T-bolt aligns
with its slot on the alignment plate–slowly turn each until the clearance slot is
located. Then push and turn each T-bolt 90° to lock. See Figure 4.8.
Figure 4.8. Using the T-bolts
(SHOWN: 4000/6000 ORIENTATION. MIRAGE 2000 WILL BE UPSIDE DOWN)
STEP 7
'
Figure 4.6. Mirage 2000 Lamp Installation
Figure 4.7. Mirage 4000/6000
Lamp Installation
STEP 8
'