MAINTENANCE
4-6
Mirage 22000/4000/6000User’s Manual
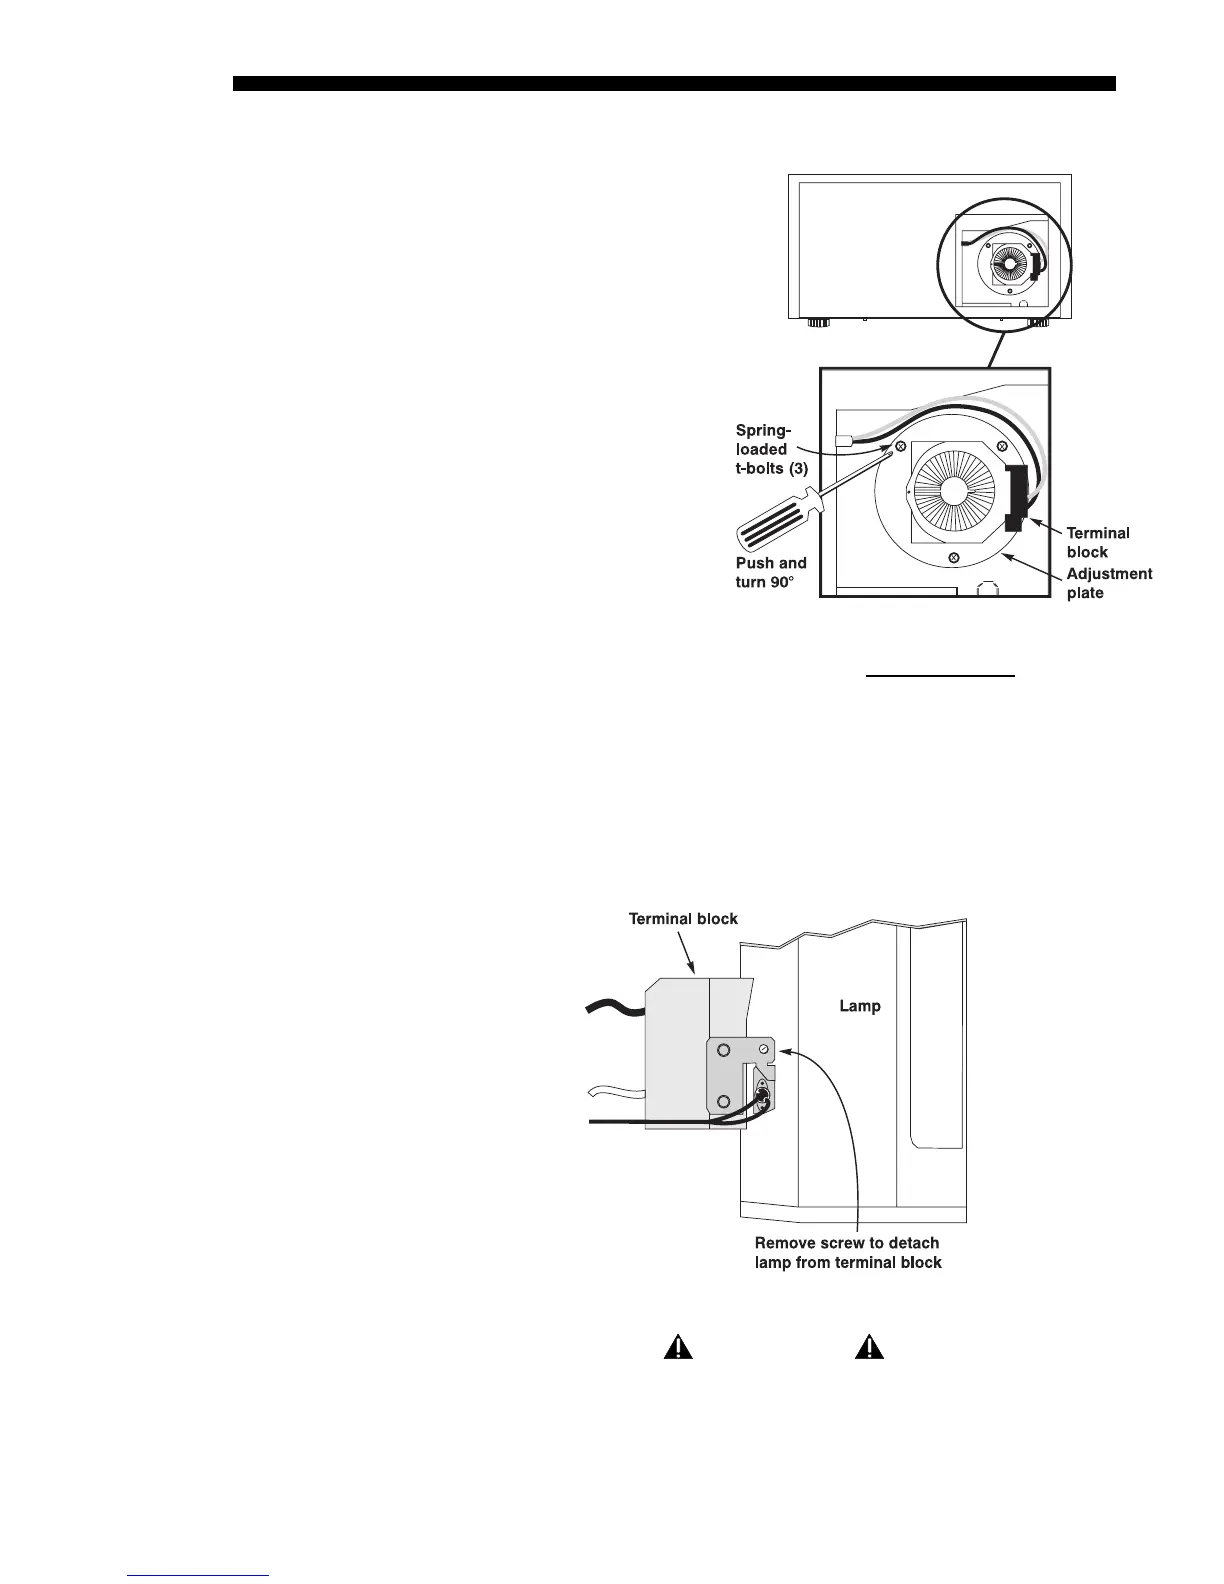
Loosen the spring-loaded T-bolts
• The lamp module is secured
to its adjustment plate with 3
large spring-loaded T-bolts
that lock in-and-out with a
90° turn (they are the largest
heads visible on the
adjustment plate). To remove
each T-bolt, use a Phillips
screwdriver to push and
turn each bolt 90°. The pin
behind each bolt will align
with its slot and pop the bolt
free. See right. NOTE: If you
can’t access the bottom
screw in the 4000/6000,
decrease vertical offset.
Remove lamp and detach from terminal block
• Pull the lamp module out slightly. Note that it is still attached to a “terminal
block” which connects to the lamp power supply via anode and cathode
cables–the lamp module cannot be fully removed yet.
• Remove the single screw securing the lamp module to the terminal block. See
Figure 4.5. The lamp should now be fully free–refer to the recycling/disposal
instructions provided with the new lamp kit.
Figure 4.5. Detach lamp from terminal block
(TOP VIEW)
IMPORTANT
Detach the lamp from the terminal block only.
Do not disconnect cables.
STEP 5
'
Figure 4.4. Loosen spring-loaded T-bolts
(SHOWN: 4000/6000 ORIENTATION.
REVERSE FOR 2000)
STEP 6
'