MAINTENANCE
Mirage 2000/4000/6000 User’s Manual
4-11
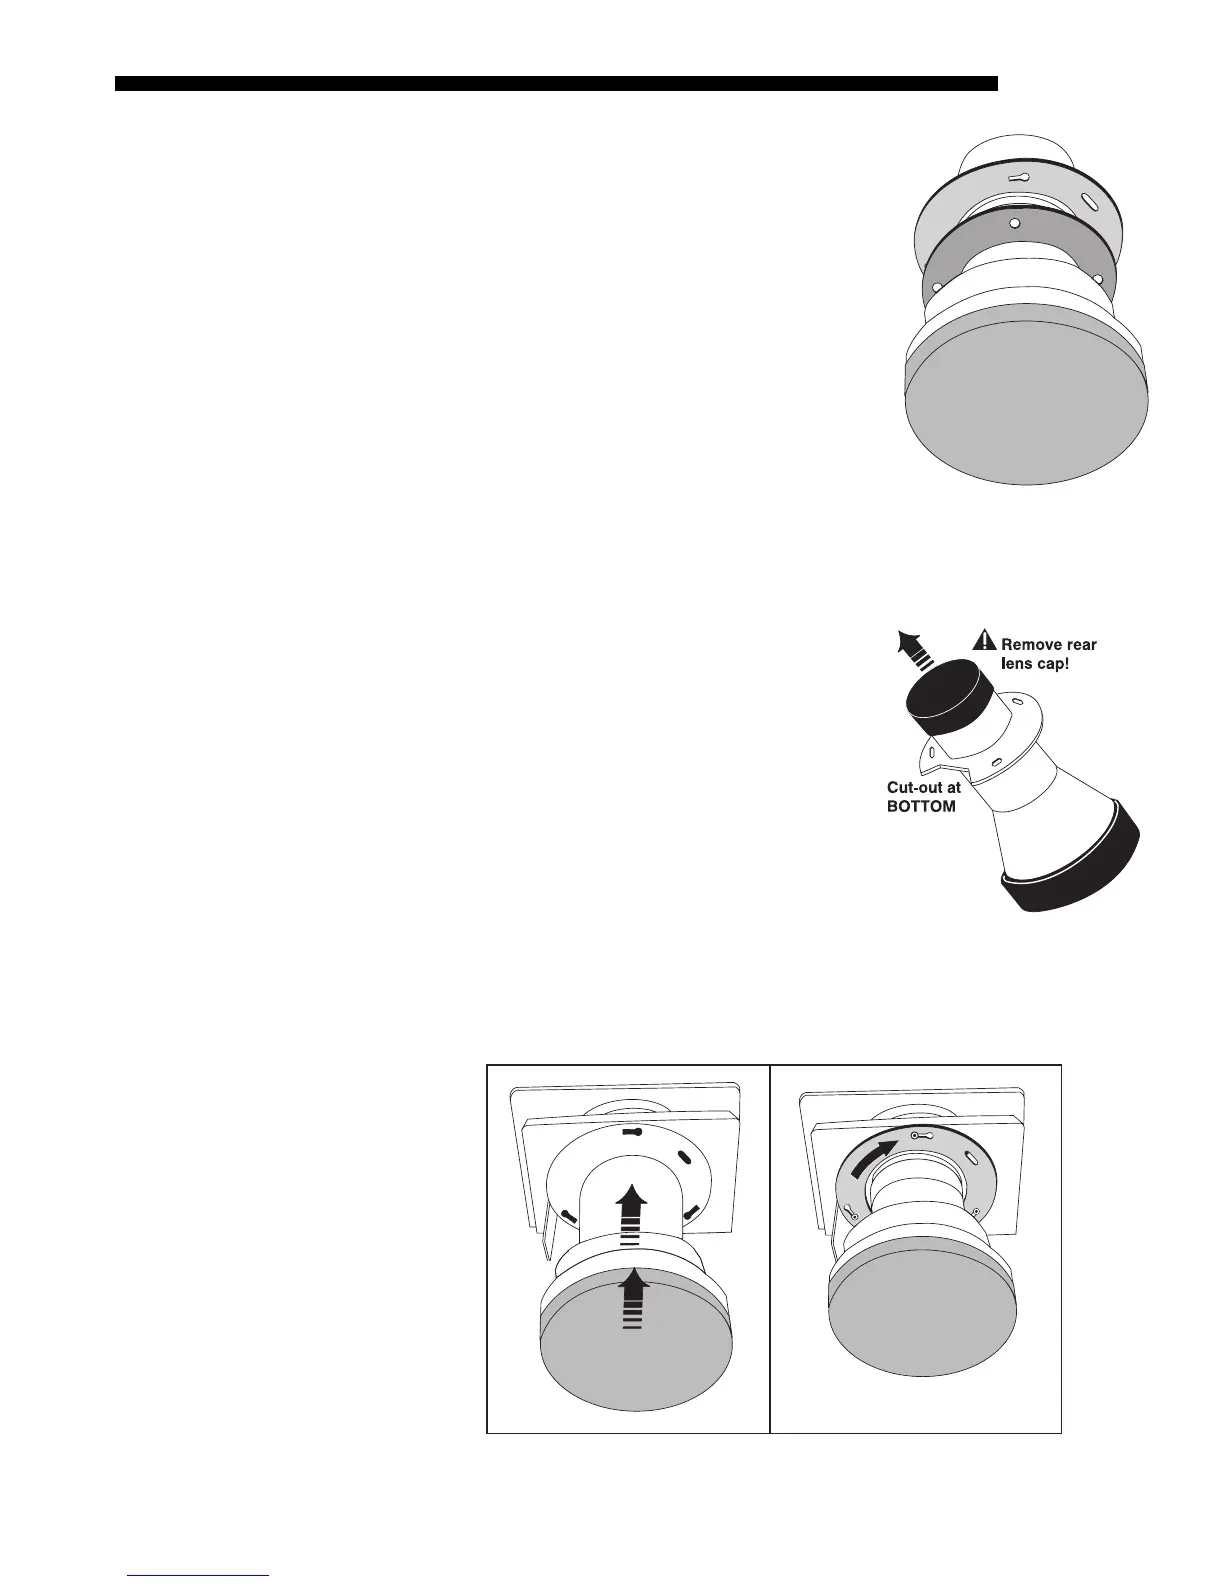
Rotate zoom gear clockwise fully
Face the front of the new motorized zoom lens (still
out of the projector), with cut-out at bottom. Manually
rotate the zoom gear fully clockwise. See Figure 4.13.
The access holes will be aligned with the flange slots.
IMPORTANT: Before continuing, make sure focus
tabs cannot move, indicating that the focus gear is
properly engaged with its motor. If the tabs do move
freely, the focus motor (visible just inside the lens
opening, at the bottom) has likely popped forward
during rough transit and is no longer engaged with the
gear. The motor must be as far into the projector as
possible—move focus tabs slightly while pushing the
motor back fully (maximum movement is
approximately ¼”).
Insert New Lens
NOTE: Remove small rear lens cap and any lens
opening material from the projector. Keep front cap
ON.
•
CUT-OUT AT BOTTOM:
Orient the lens flange
cut-out to the bottom of the lens opening.
•
INSERT LENS:
The 3 slots on the lens flange
align with the 3 lens mount screws—insert the
lens so that screw heads slip through the large
ends of the flange holes. See Figure 4.14.
•
ROTATE LENS: Rotate the lens barrel
clockwise until the screw heads lock into the
small ends of the lens assembly slots. See Figure 4.14.
NOTE: For a motorized zoom lens, the rotation will skew the access holes
away from the lens mount screws. Screws will still be accessible, however.
Figure 4.14. Insert Lens and Rotate
(FIXED LENS SHOWN)
STEP 4
'
(MOTORIZED ZOOM ONLY)
Figure 4.13.
Gear rotated fully
clockwise
STEP 5
'