INSTALLATION AND SETUP
2-14
Mirage 22000/4000/6000User’s Manual
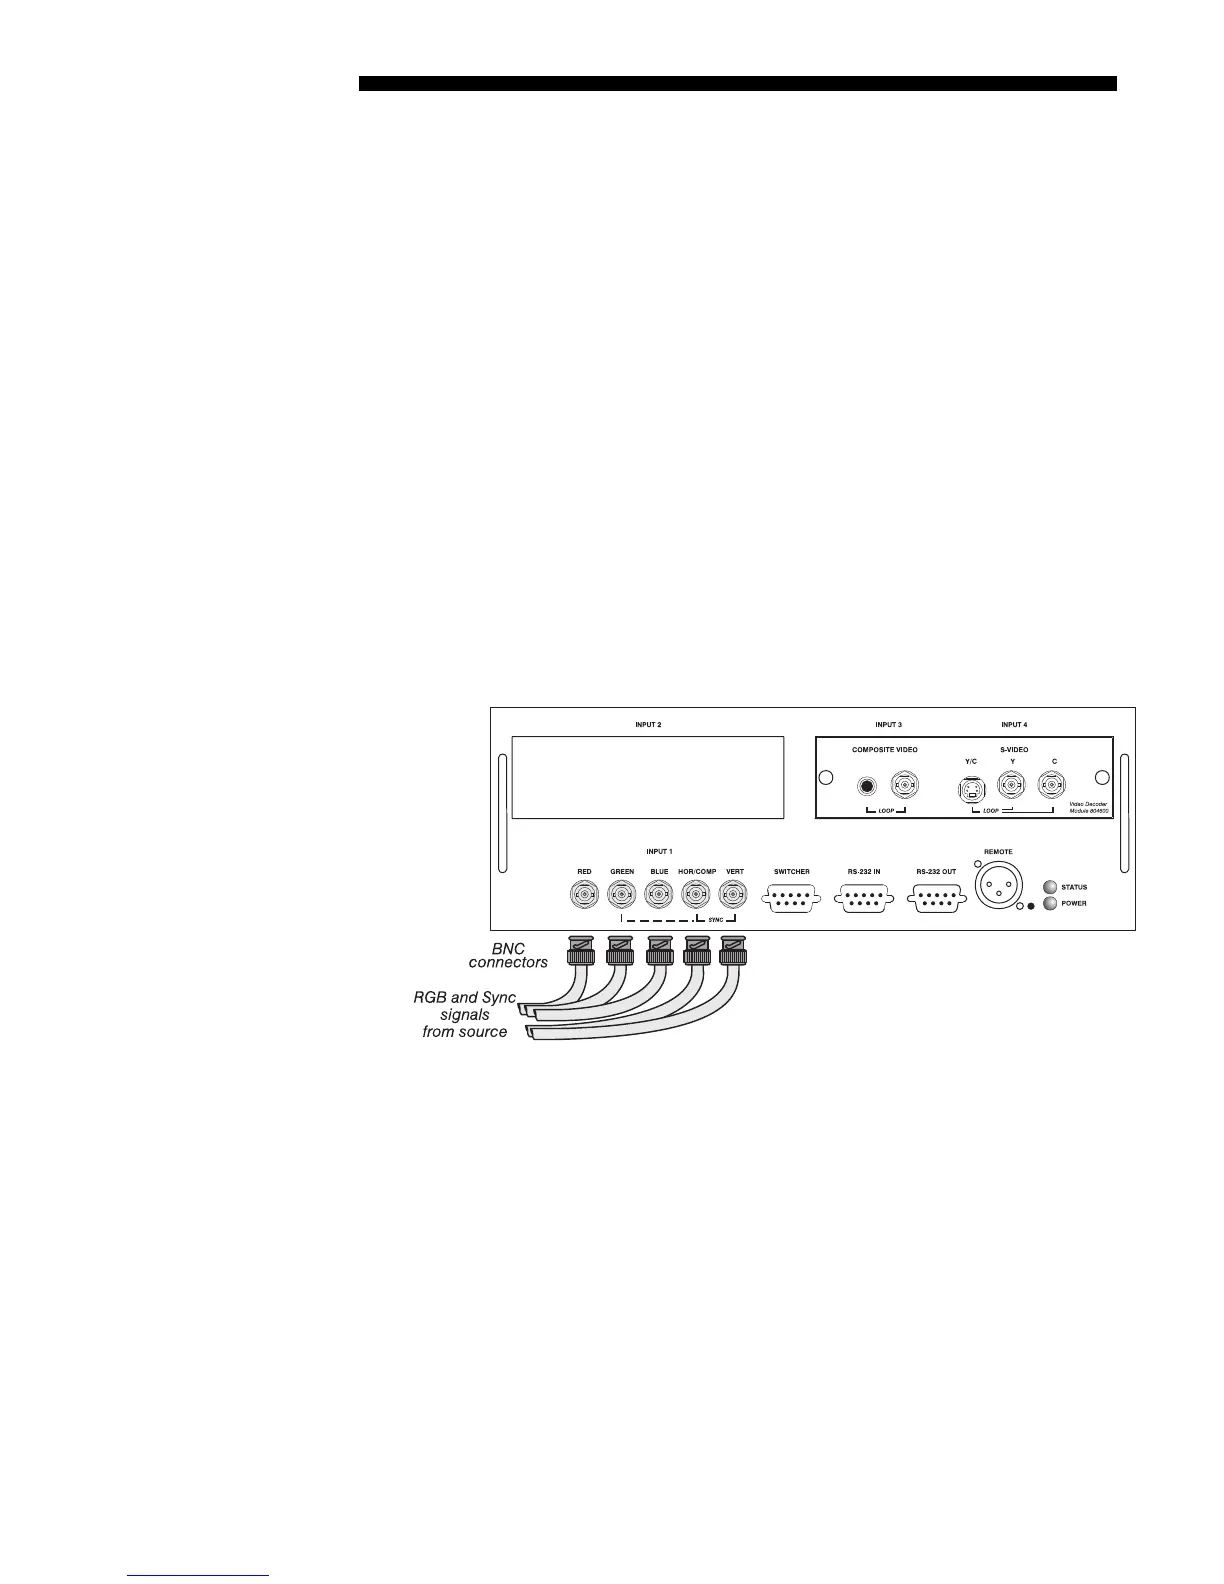
INPUT 1
provides 5 BNCs (connectors) for linking to a variety of sources, typically to
an RGB source such as VGA, SVGA, XGA, Mac, PowerMac, DEC, Sun, SGI and
others. This projector supports multiple sync types with RGB signals: sync-on-green,
composite sync, and separate H & V syncs.
NOTE: Depending on the source, you may need a custom adapter cable with BNC
connectors at the projector end and a different type of connector at the other (such as
a 15-pin "D" connector for computer sources). Contact your dealer.
Connect the
SYNC
BNC input(s) first. Then connect the red, green and blue source
outputs to the
RED, GREEN, and BLUE BNCs on the INPUT 1 panel. If the source uses
sync-on-green, only the red, green, and blue connections are required. If the source
provides a composite sync output, connect it to the
SYNC
input labeled
HOR/COMP
. If
the source provides separate horizontal and vertical sync outputs, connect horizontal
sync to the
SYNC
input labeled
HOR/COMP
and connect vertical sync to
SYNC
input
labeled
VERT. See Figure 2.13.
NOTES: 1) If for some reason the projector fails to recognize as an RGB signal,
specify this Color Space option within the Image Settings menu. See 3.6, Adjusting
the Image. 2) To connect YPbPr signals–such as from DVD or analog HDTV sources–to
INPUT 1, use the red, green and blue BNCs as described in YPbPr Signals later in this
section.
Figure 2.13. Connecting RGB Input
RGB Si
nals
'