OPERATION
Mirage 2000/4000/6000 User’s Manual
3-21
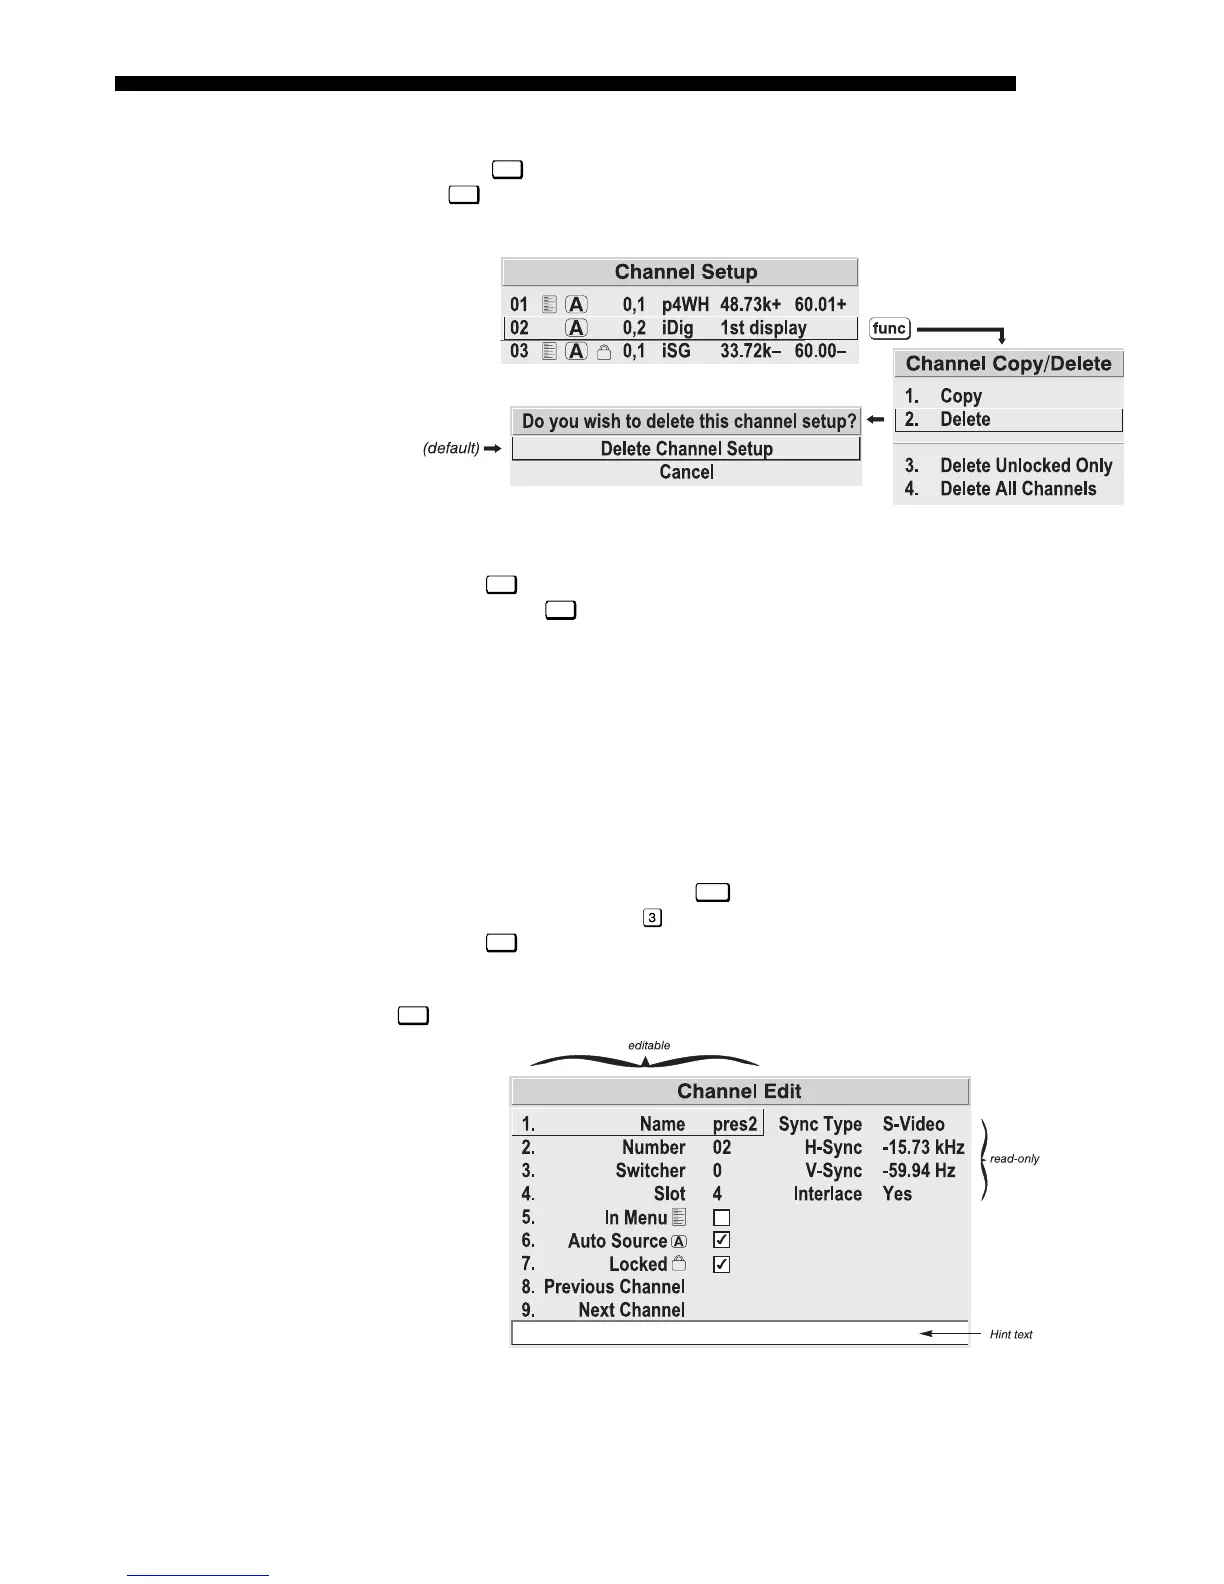
TO DELETE A CHANNEL, highlight the desired channel in the Channel Setup menu,
then press
Func
to activate the Channel Copy/Delete submenu. Select “Delete” and
press
Enter
—a confirmation window will appear to make sure that you really want to
delete this channel.
Figure 3.13. Deleting a Channel
TO DELETE MULTIPLE CHANNELS
, highlight any channel in the Channel Setup menu
and press
Func
to go to the Channel Copy/Delete submenu. Select “Delete Unlocked
Only” and press
Enter
to delete all unlocked channels. Or select “Delete All Channels”
to delete all channels, even those that are locked. In either case, the current channel
will remain but will be redefined from projector defaults.
NOTE: For any deletion, a confirmation box appears to make sure that you really
want to delete. Select “Cancel” (default) if you don’t want to delete after all.
The basic setups that describe how and where a channel can be accessed are listed in
the Channel Setup menu. These channel setups can be edited at any time in the
Channel Edit submenu.
From the presentation level press
Menu
to display the main menu. To display the
Channel Setup menu, press
, or move the highlight to the Channel Setup option
and press
Enter
. The Channel Setup menu will appear.
To edit parameters shown in the Channel Setup menu, select the relevant channel and press
Enter
. The Channel Edit menu will appear similar to the sample shown in Figure 3.14.
Figure 3.14. Channel Edit Menu (
SAMPLE
)
If desired, edit the following channel setups in the Channel Edit menu:
Editin
a Channel Setu
'
CHANNEL EDIT — STEP 1
CHANNEL EDIT — STEP 2
CHANNEL EDIT — STEP 3