PHOTOS
79
DISASSEMBLY PROCEDURE
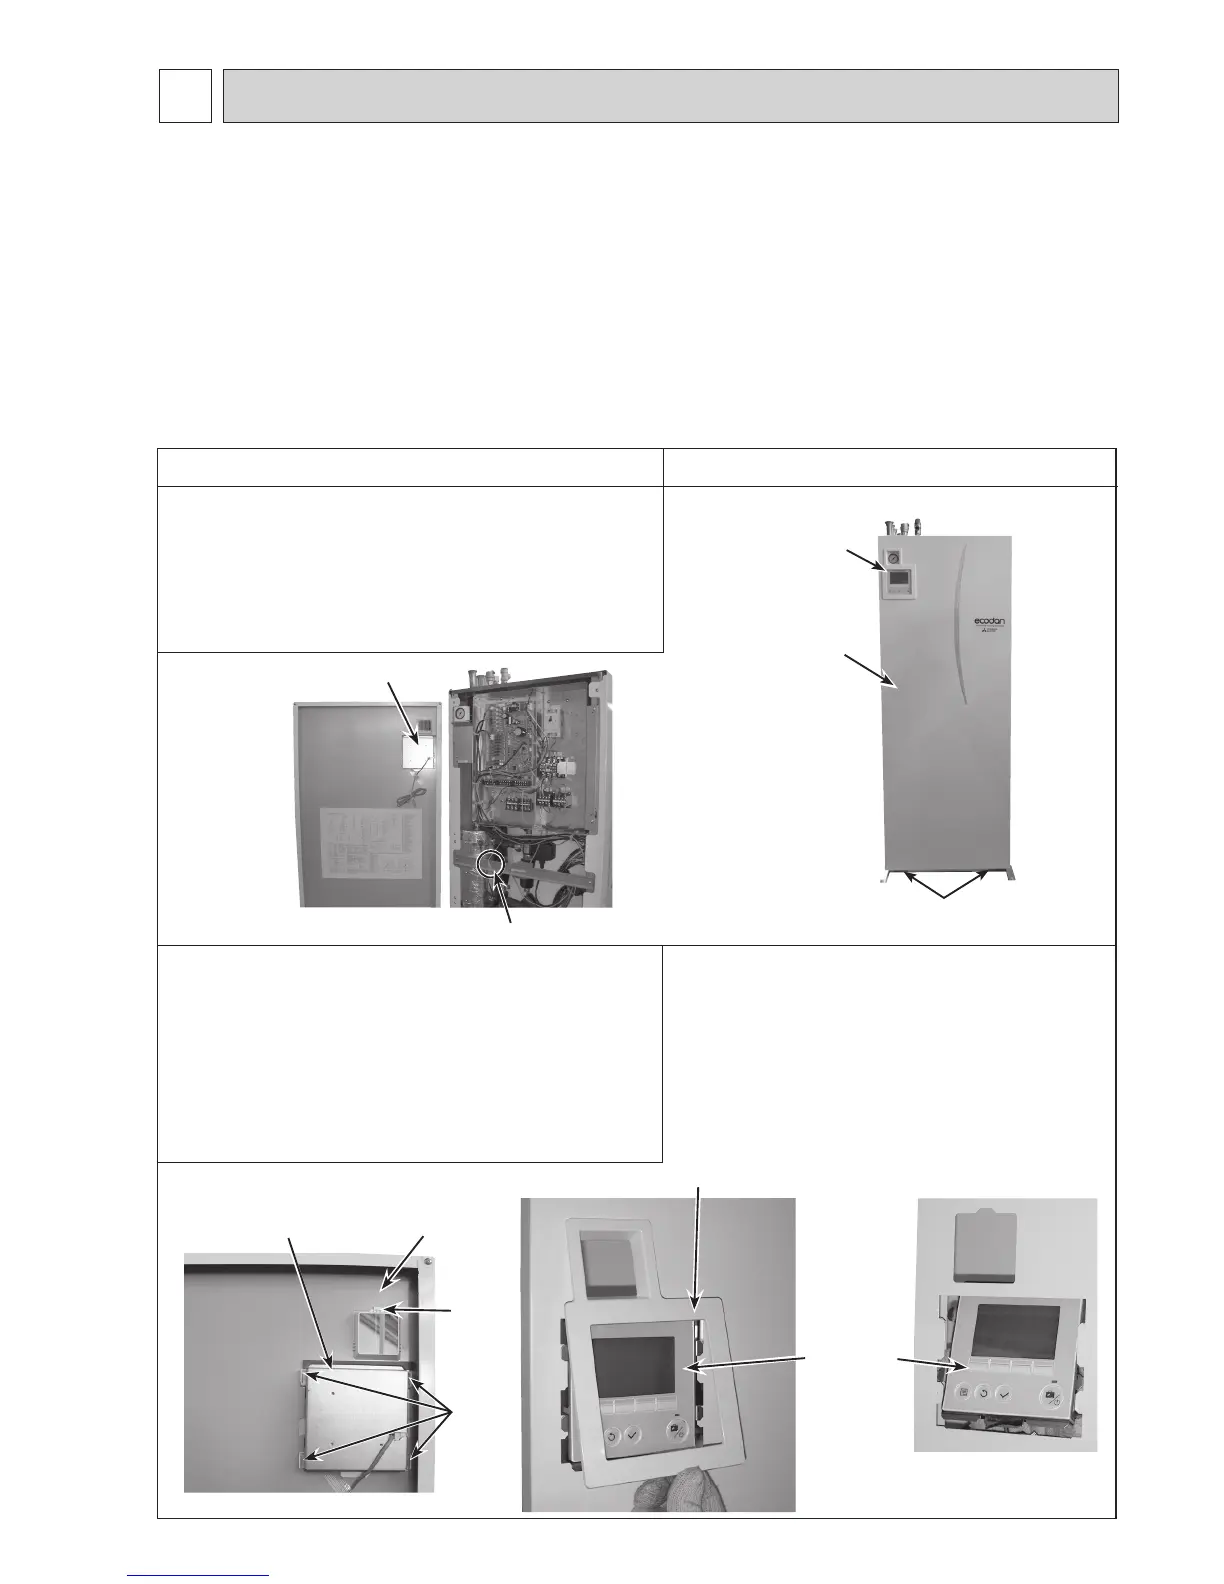
1. How to remove the front panel
(1)Removethe2screwsatthebottomofthecylinderunit.
(Photo 1-1)
(2)Slightlyliftandpulloutthefrontpanelfromthecylinder
unit. (Photo 1-1)
(3)Disconnecttherelayconnectorconnectingfromthemain
remote controller. (Photo 1-2)
Photo 1-1
Photo 1-2
2. How to remove the main remote controller
(1) Remove the front panel (Refer to Procedure 1).
(2) Turn the front panel over and remove the main remote
controllerholderbyremovingthe5claws.(Photos2-1
and 2-2)
(3)Slidethemainremotecontrollersupportupward,then
removeittogetherwiththemainremotecontroller.
(Photo 2-2)
(4) Separate the main remote controller from the main
remote controller support. (Photos 2-1 and 2-3)
Photo 2-1
Frontpanelfixingscrews
Front panel
Main remote controller
Front panel
Connector
Main remote
controller support
Photo 2-2 Photo 2-3
11
DISASSEMBLY PROCEDURE
Checkindividualillustrationsandpositionsofthepartsbyreferringtothepartscatalog.
Someleadwiresandpipesarebundledwithbands.Cutthebandstoundothefastenedpipesandleadwiresifnecessary.Whenbundlingthe
leadwiresandpipesagain,usenewcommerciallyavailablebands.
Whenremovingthepartsassociatedwithwaterpipework,drainthecylinderunitasnecessary.Referto"Drainingthecylinderunit"onpage41.
Whendrainingthecylinderunit,keepwaterfromsplashingontheinternalparts(mainlyelectricpartsandinsulations).
<Preparation for the repair service>
●Preparethepropertools.
●Preparetheproperprotectors.
●Provideadequateventilation.
●Afterstoppingtheoperationofthecylinderandoutdoorunit,turnoffallthepower-supplybreaker.
●Dischargethecondenserbeforetheworkinvolvingtheelectricparts.
●Allowpartstocool.
●Donotexposetheelectricpartstowater.
●Whenreplacingorservicingwatercircuitparts,drainsystemfirst.
Main remote controller
Main remote
controller
Claws
Claw
Main remote
controller holder

 Loading...
