PHOTOS
83
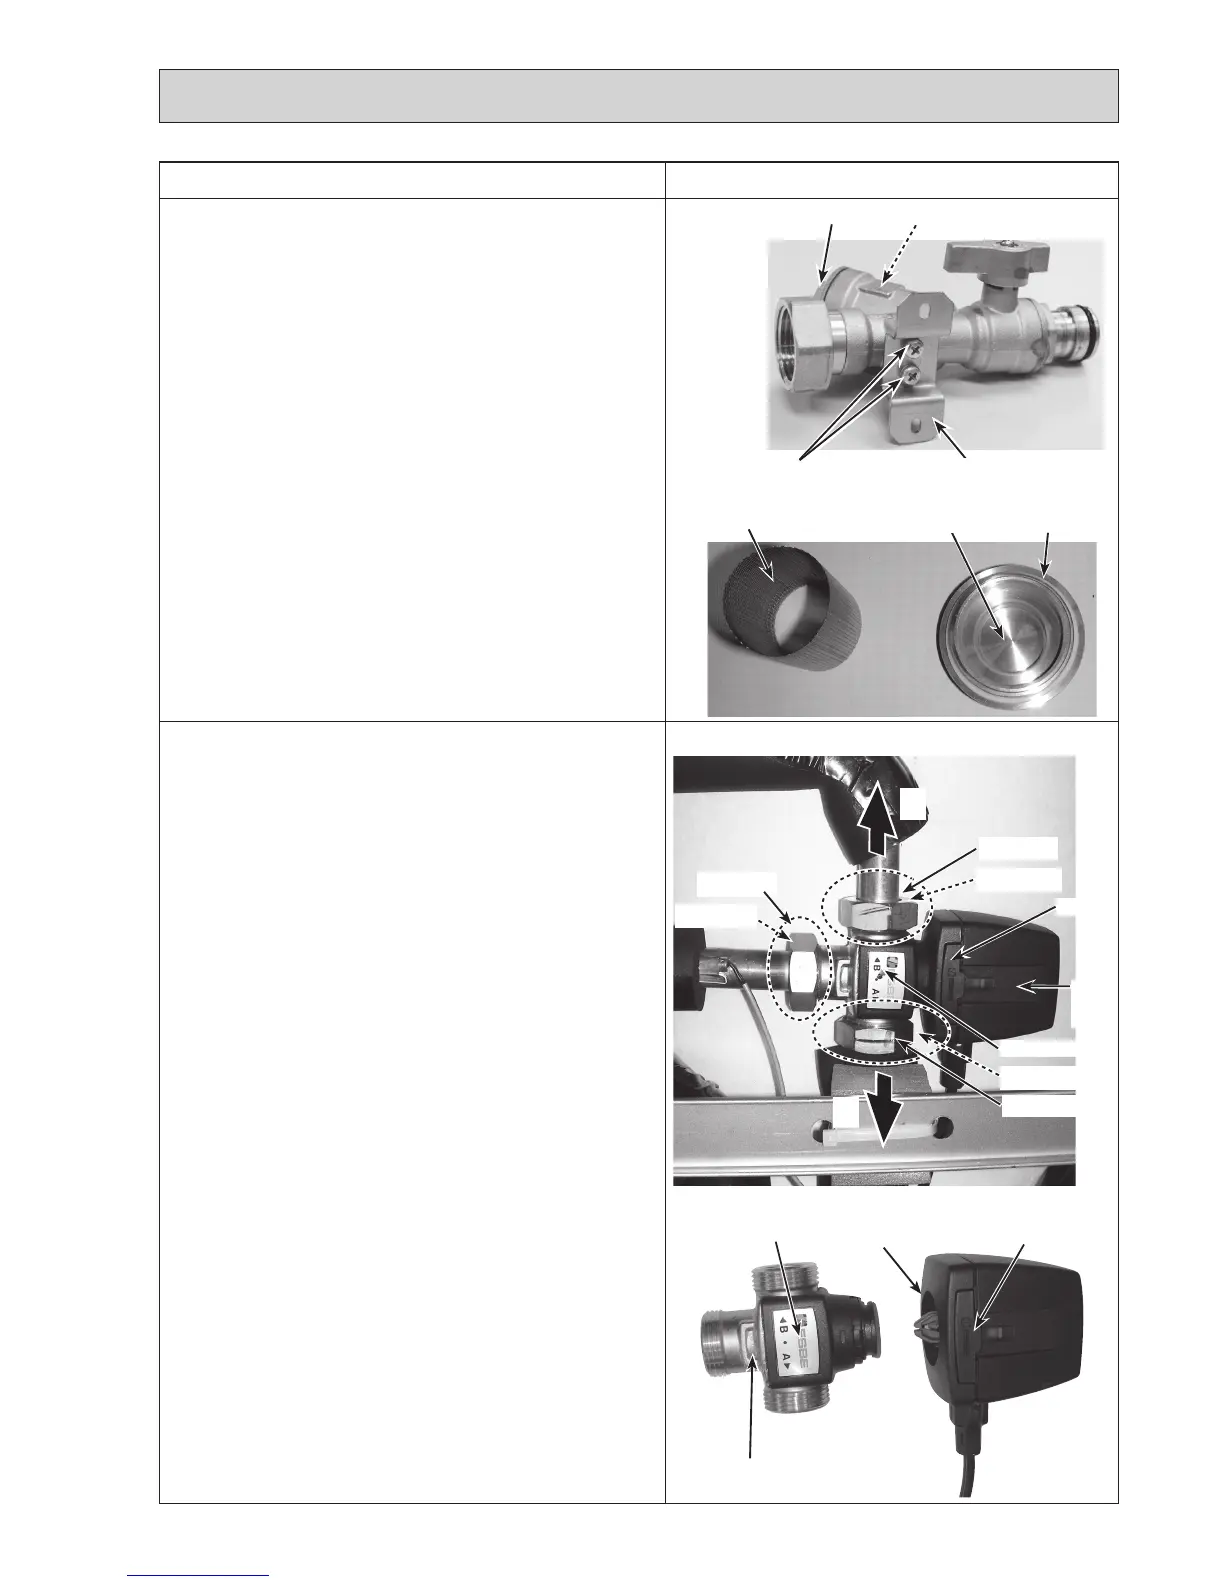
Photo 6-1
6. How to remove the 3-WAY VALVE/3-WAY VALVE MOTOR
(1) Remove the front panel (Refer to Procedure 1).
(2) Disconnect the CNV1 connector on the controller board.
(Photo 4-2)
(3)Releasethe3-wayvalvemotorleadwirefromthe2
cable clamps, the fastener and the cable strap in the
controlbox,andthecablestrap,thecoatedclampand
thebandbelowthecontrolbox.(Photos4-1and10-1)
(4)Removethe3-wayvalvemotorfromthe3-wayvalveby
pressingthebuttononthe3-wayvalvemotor(viewed
from the front of the cylinder unit). (Photos 6-1 and 6-2)
•Pressthebuttonalsowhenreinstallingthe3-wayvalve
motor.
(5)Removethe3-wayvalvebyremovingthe3G1"nutsin
theorderofthebottom,middleandtopusing2
spanners:onetoholdthe3-wayvalveandtheotherto
turn each nut. (Photos 6-1 and 6-2)
•WhenreinstallingtheG1"nuts,usenewG1"gaskets.A
andBshownrepresentthebottomandthetop
directionsofthe3-wayvalve,respectively.
Note:
Beforereplacingthemotor,besuretopoweroffthe
cylinder unit.
Failure to do so may cause electric shock or cause the
3-wayvalvetomalfunction.
Photo 6-2
DISASSEMBLY PROCEDURE
3-way
valve
motor
3-wayvalvemotor Button
A
B
Nut(G1")
Nut(G1")
Gasket(G1")
Gasket(G1")
Placetoholdthe3-wayvalve
withaspanner
3-wayvalve
3-wayvalve
Gasket(G1")
Nut(G1")
<Strainer valve>
(6)
Removethe2screwsonthestrainervalvestay.(Photo5-1)
(7)Removethestrainervalvebydetachingthequickcon-
nection.
•Whenreinstallingthequickconnection,useanew
O-ring.
•RefertoProcedure23forhowtoattachanddetachthe
quick connection.
(8)Removethestrainervalvestaybyremovingthe2
screws.(Photo5-5)
•Reusetheremovedstrainervalvestayandthestrainer
valvestayfixingscrews.
Note:Skipsteps(2)and(3)whenreplacingthestrainer
valve only.
<Strainer cover (debris recovery)>
(5)Removethecoverusing2spanners:onetoholdthe
strainer valve and the other to turn the cover. (Photo 5-5)
•
Besuretoreattachthemeshafterwashingit. (Photo 5-6)
•Whenreinstallingthecover,useanewpacking.(Photo
5-6)
Note:SkipSteps(2)and(3)abovewhenwashingthestrain-
er mesh only.
Photo 5-6
Fromthepreviouspage.
Strainer mesh
PackingCover
Button
Photo 5-5
Strainer valve stay
Screws
Cover Strainer mesh (inside)

 Loading...
